• Skip to primary navigation
  • Skip to content
  • Skip to primary sidebar
  • Skip to footer

The Day's Journal

Finding beauty in the everyday pieces of life

  • Weddings
  • Lifestyle
  • The Day’s Design
  • Nav Social Menu

    • Facebook
    • Instagram
    • Pinterest

DIY

Our Faux Finish Wall

1 · Feb 29, 2020 ·

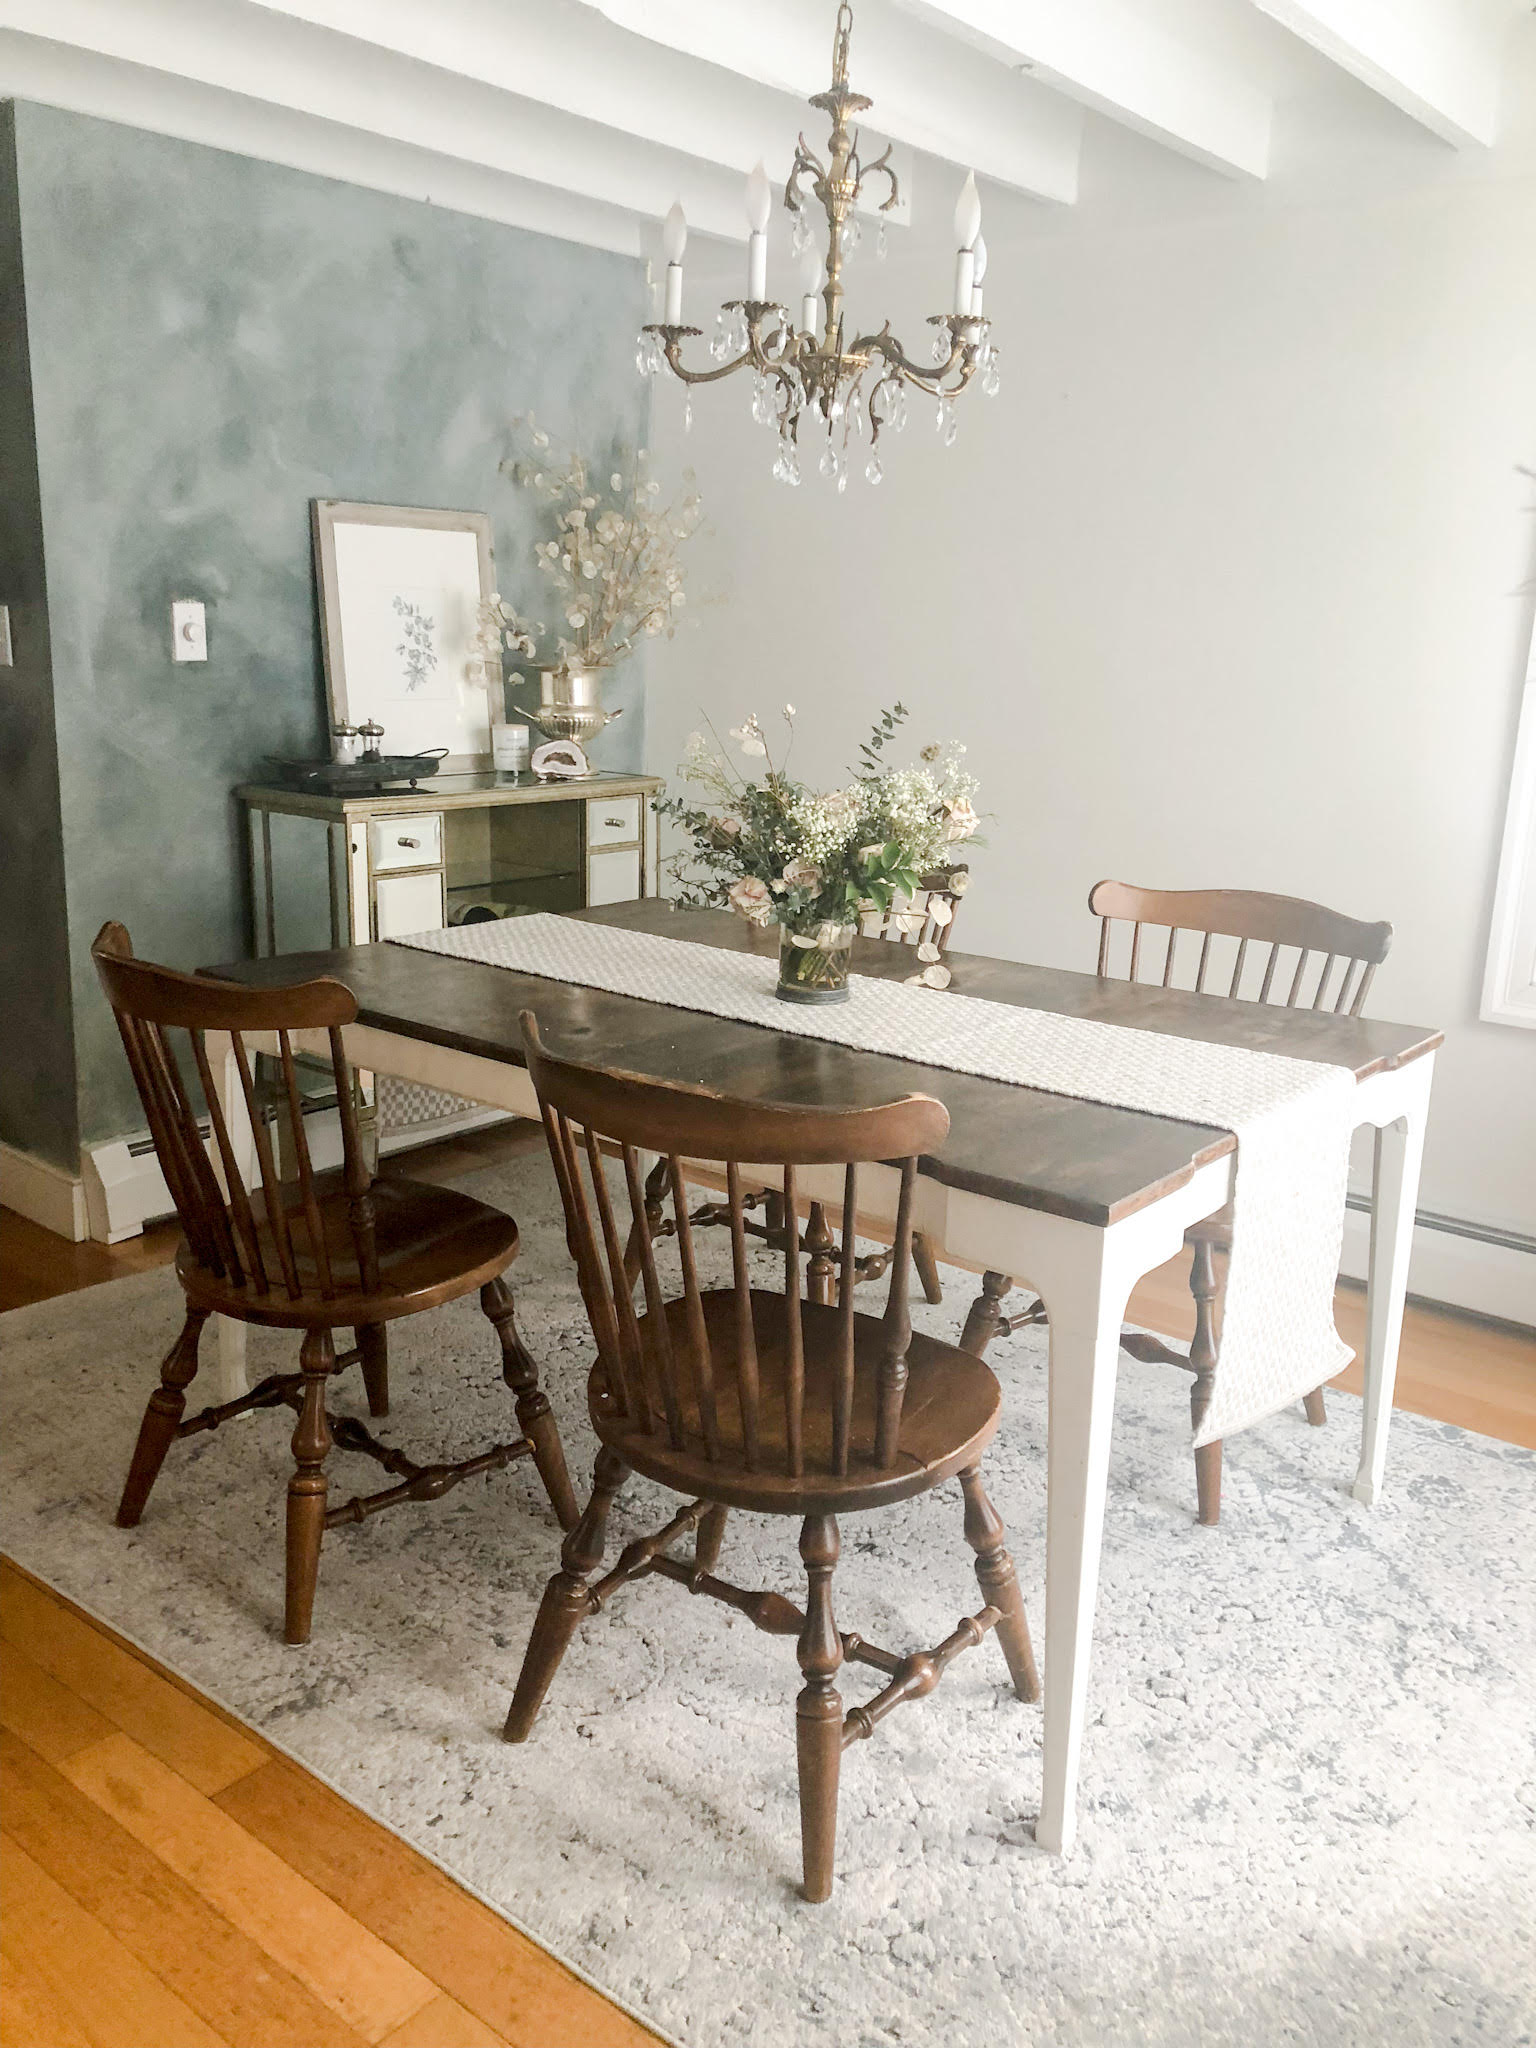
I had a vision for a wall in our dining room.  I wanted it to be bold and yet subtle.  A statement wall that didn’t speak too loudly.  I wanted a burst of color but am natrually drawn to neutrals.  It’s a wall of contridictions.

On top of that, I wasn’t sure exactly what the finish was that I imagined.  You might say it looks a little concrete-ish or even like plaster.  I saw something that mixed with an old world feel and sort of looked like a chalkboard that you’ve just kind of erased – with streaks of white still stretch across it.

I’d been dreaming about this wall for a couple months and then in true Shelby style, 2 days before Thanksgiving I decided that I couldn’t wait any longer and wanted to do a little dining room update before the big feast.  As luck would have it, it was an incredibly quick project.  And easy, Gretta even hopped on board helping out.  I did it, documented it and moved on… then never posted the results.  Until now.

So in full disclosure, this project was done nearly a year and a half ago.  I’m jogging my memory with old recorded Instagram stories and photos that I had never bothered to download off my SD card.  I’m still sure I can talk you through it if you’d like to replicate something like this youself.  It would also make a really great finish for a styling board for photography backdrops and flatlays, even if you aren’t interested in committing to adding it into your home.

To Begin:

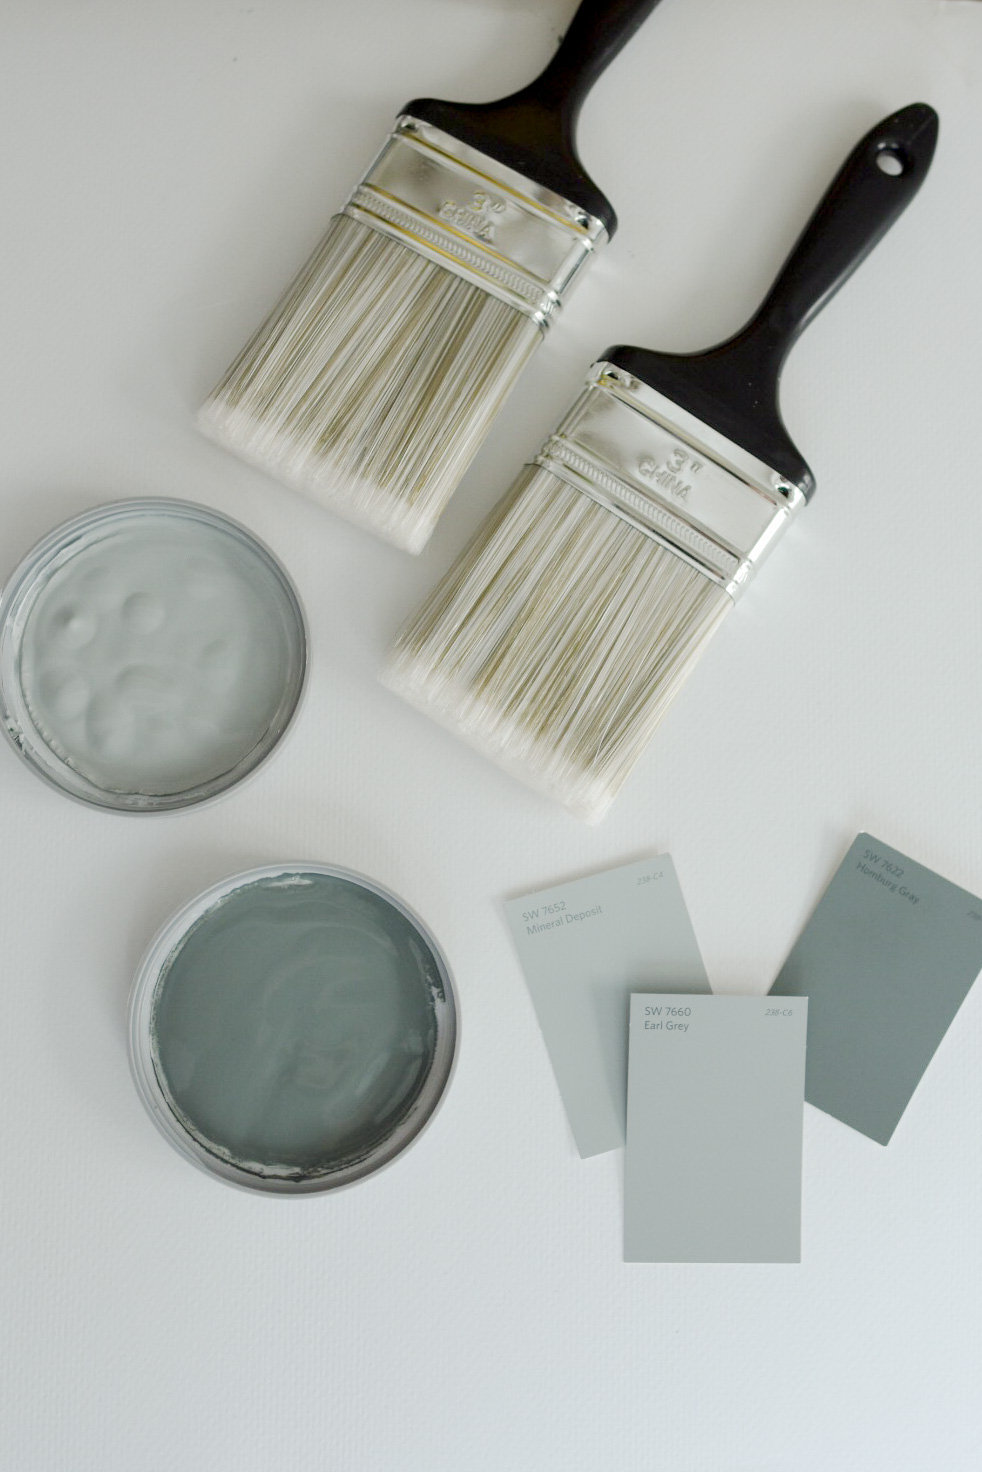
Figure out what color you want your wall to be.  The overall color that was speaking to me was Sherwin Williams Earl Grey.  However, I did not purchase that paint.  Instead, I found a tone that was 1 shade lighter than it and 1 shade darker and bought a quart of each of those.  Combined, they will give me the desired level of darkness.

Other Materials Needed:

  • 2 colors of paint (I used SW Mineral Deposit & Hamburg Grey)
  • a large sponge
  • 2, 3inch paint brushes
  • 1 smaller paint brush for dry brushing
  • painters tape if you’re slopping (I myself am daring enough to go without)

My walls were orginally a soft buttery yellow.  I figured it was a light enough hue that my paint selection would cover it.  If your walls are darker than your selected medium tone, then I would recommed adding a coat of primer to them before you begin your project.

Faux Finish accent wall diyEarl grey faux finish accent wall diy

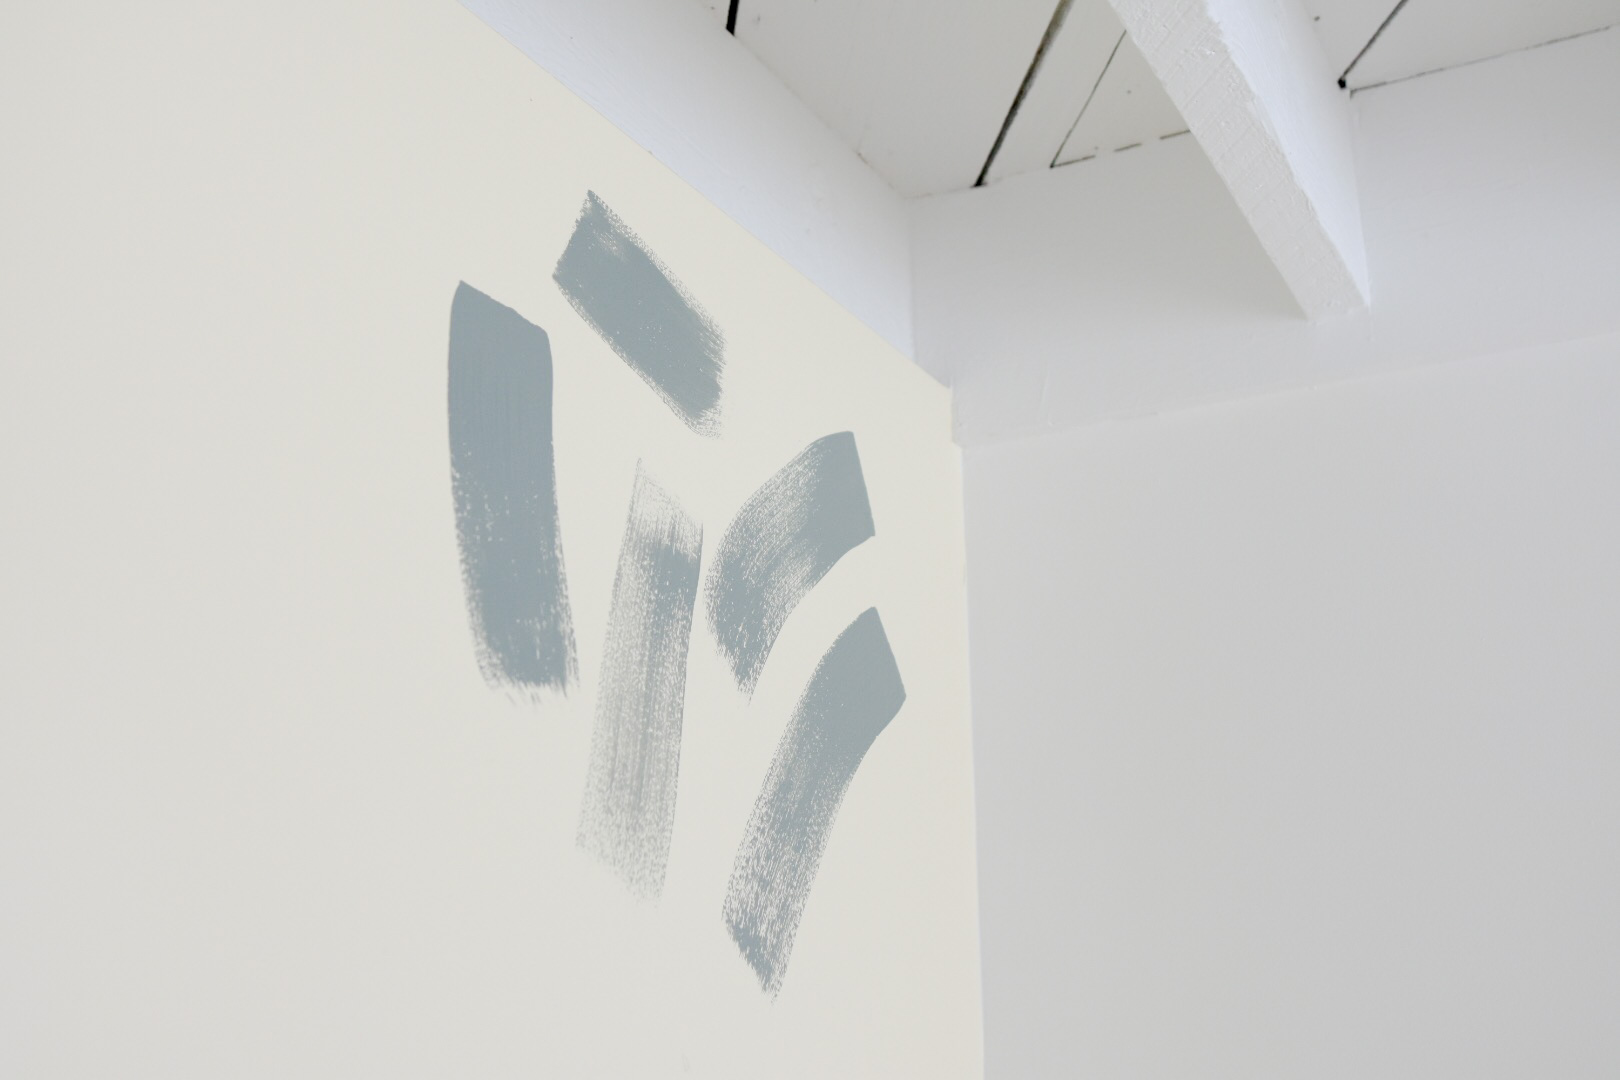
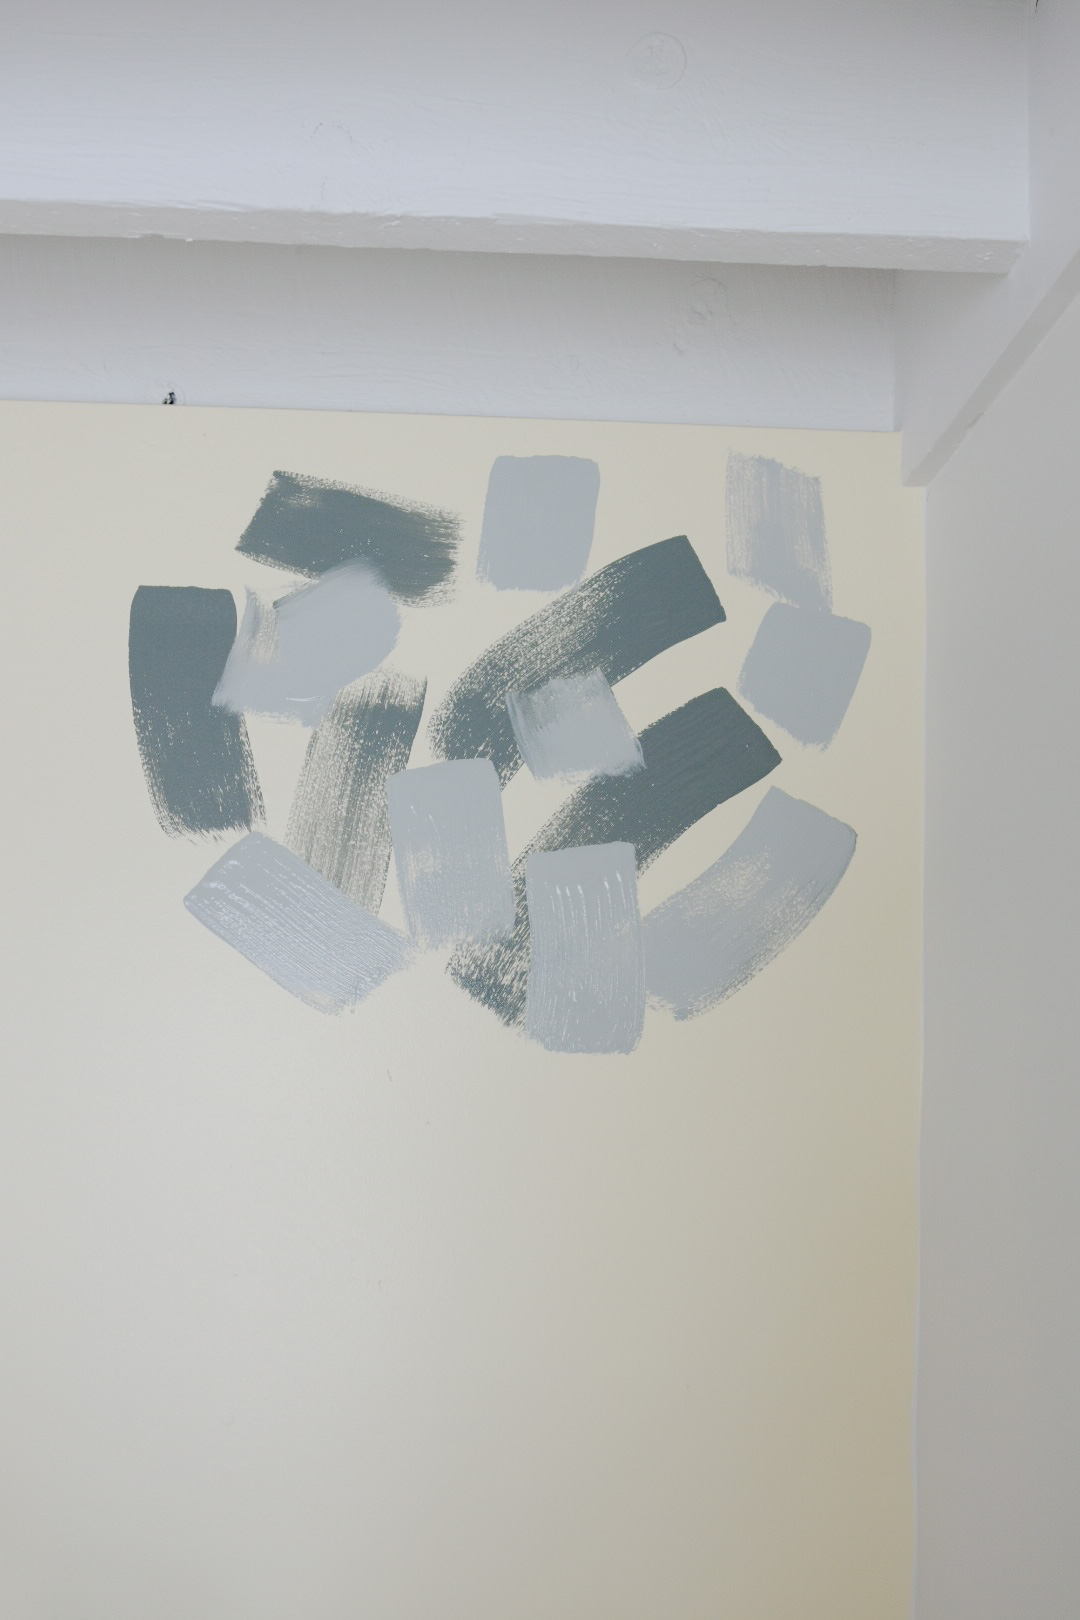
Using your large, 3 inch paintbrush begin adding large swishes of paint to the wall.  Add a few dark and then a few light, tackling section of the wall at a time.  I mentally dividided my wall into 3×3 foot sections.

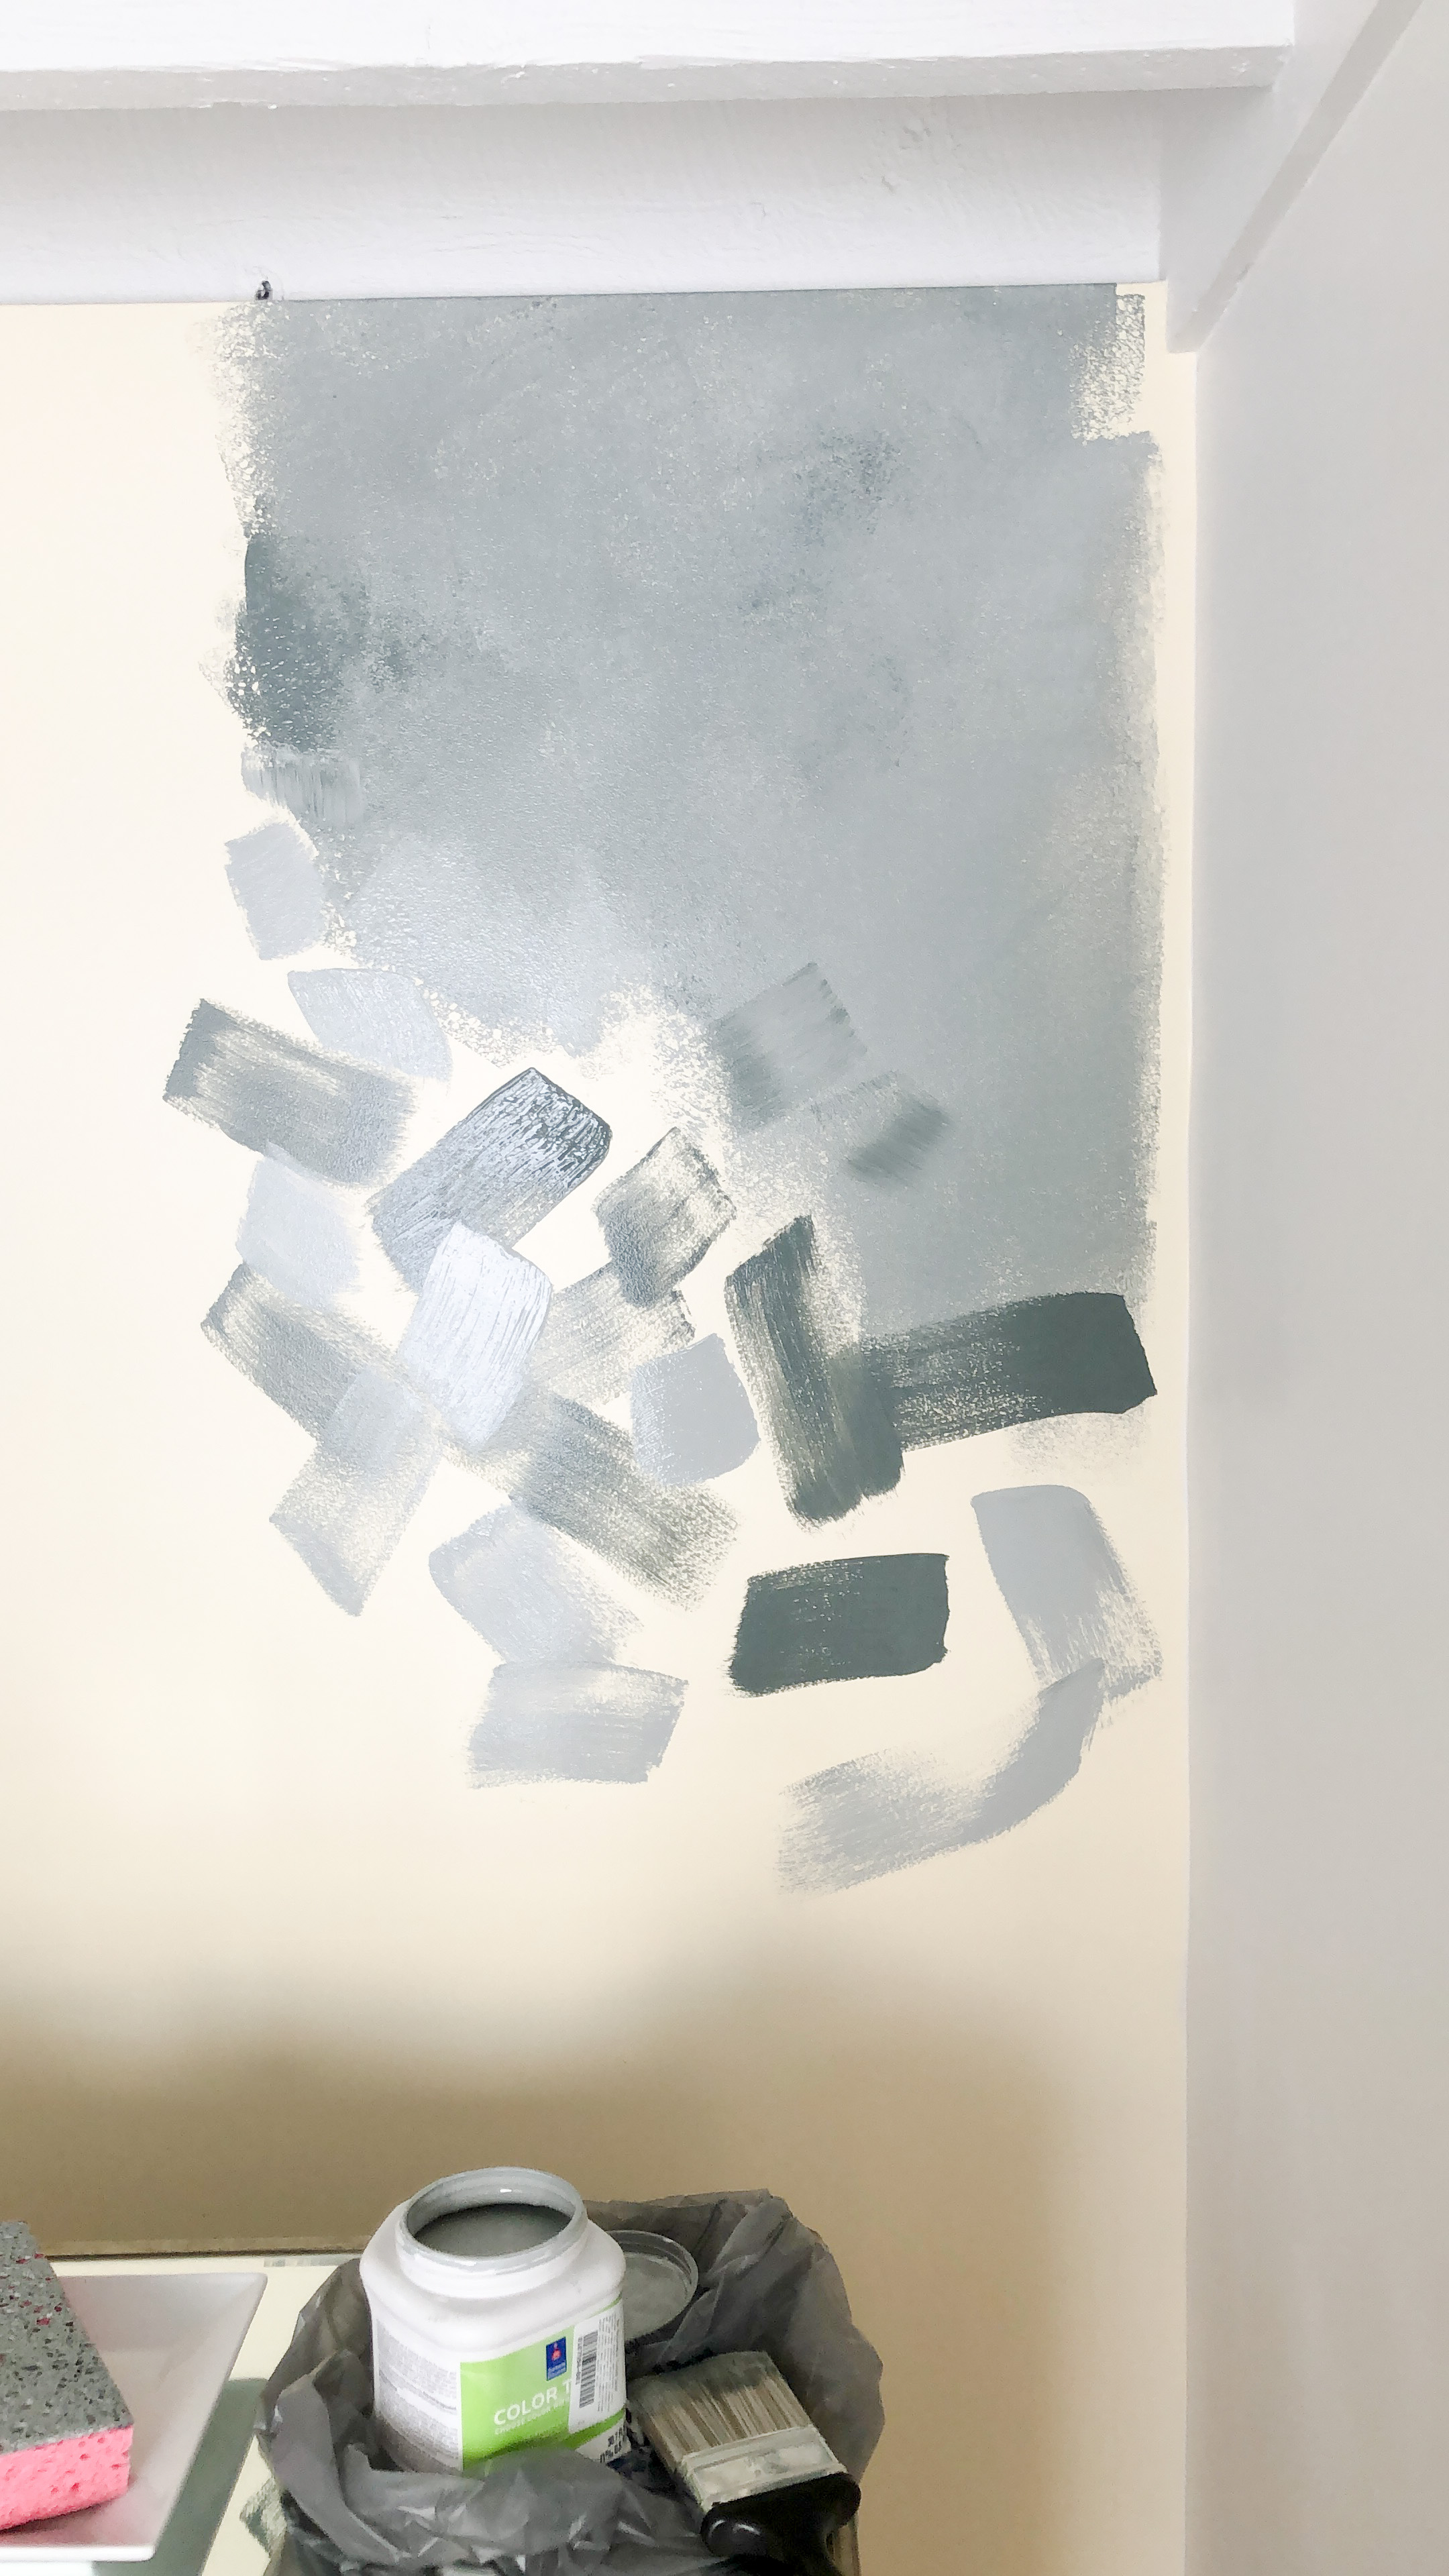
Next, prime the sponge with just a quick layer of paint, brushing it one with large brush.  You’re actually painting the sponge, not the wall in this step.  Don’t completely cover the sponge, but it helps to have a little extra paint on it when you begin blending the paint on the wall.  Gently, begin blotting the paint on the wall, using small dabbing motions that will begin to blend the 2 tones of paint together.

Warning, it looks like 90’s sponge painting at this point and is not pretty.  Keep going.  If you’re seeing too many round sponge holes, being dabbing a little harder in places with will vary the texture.

the modern way to sponge paint

Now take your dry brush and smear the paint.  Use brush strokes in various directions.  Keep playing with the texture until you start liking it.  Then move onto the next section and repeat.

Modern faux finish accent wallfaux finish earl diy wallfaux finish wall tutorial

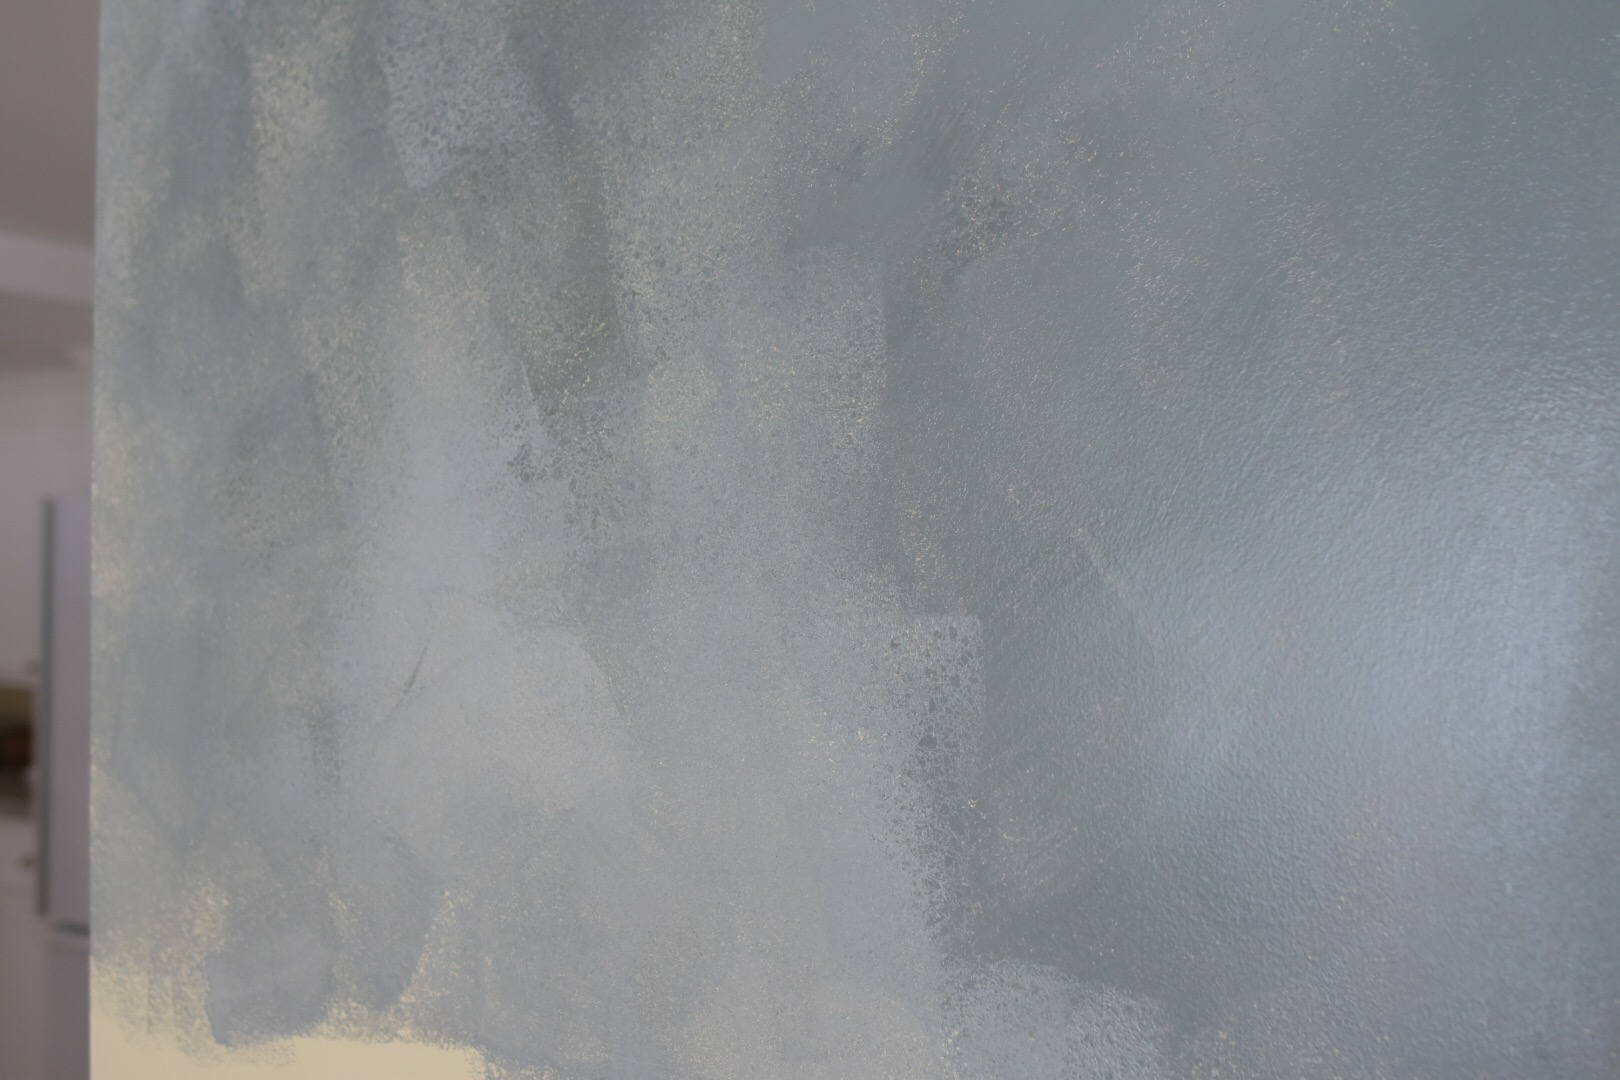
Once you’ve covered the entire wall, begin dry brushing with longer strokes, blending the sections together.  If it seems a little dark in spots, add some of the lighter paint.  And visa versa.

If too much paint begins building up on your “dry brush”, wipe it with a paper towel before continuing on.

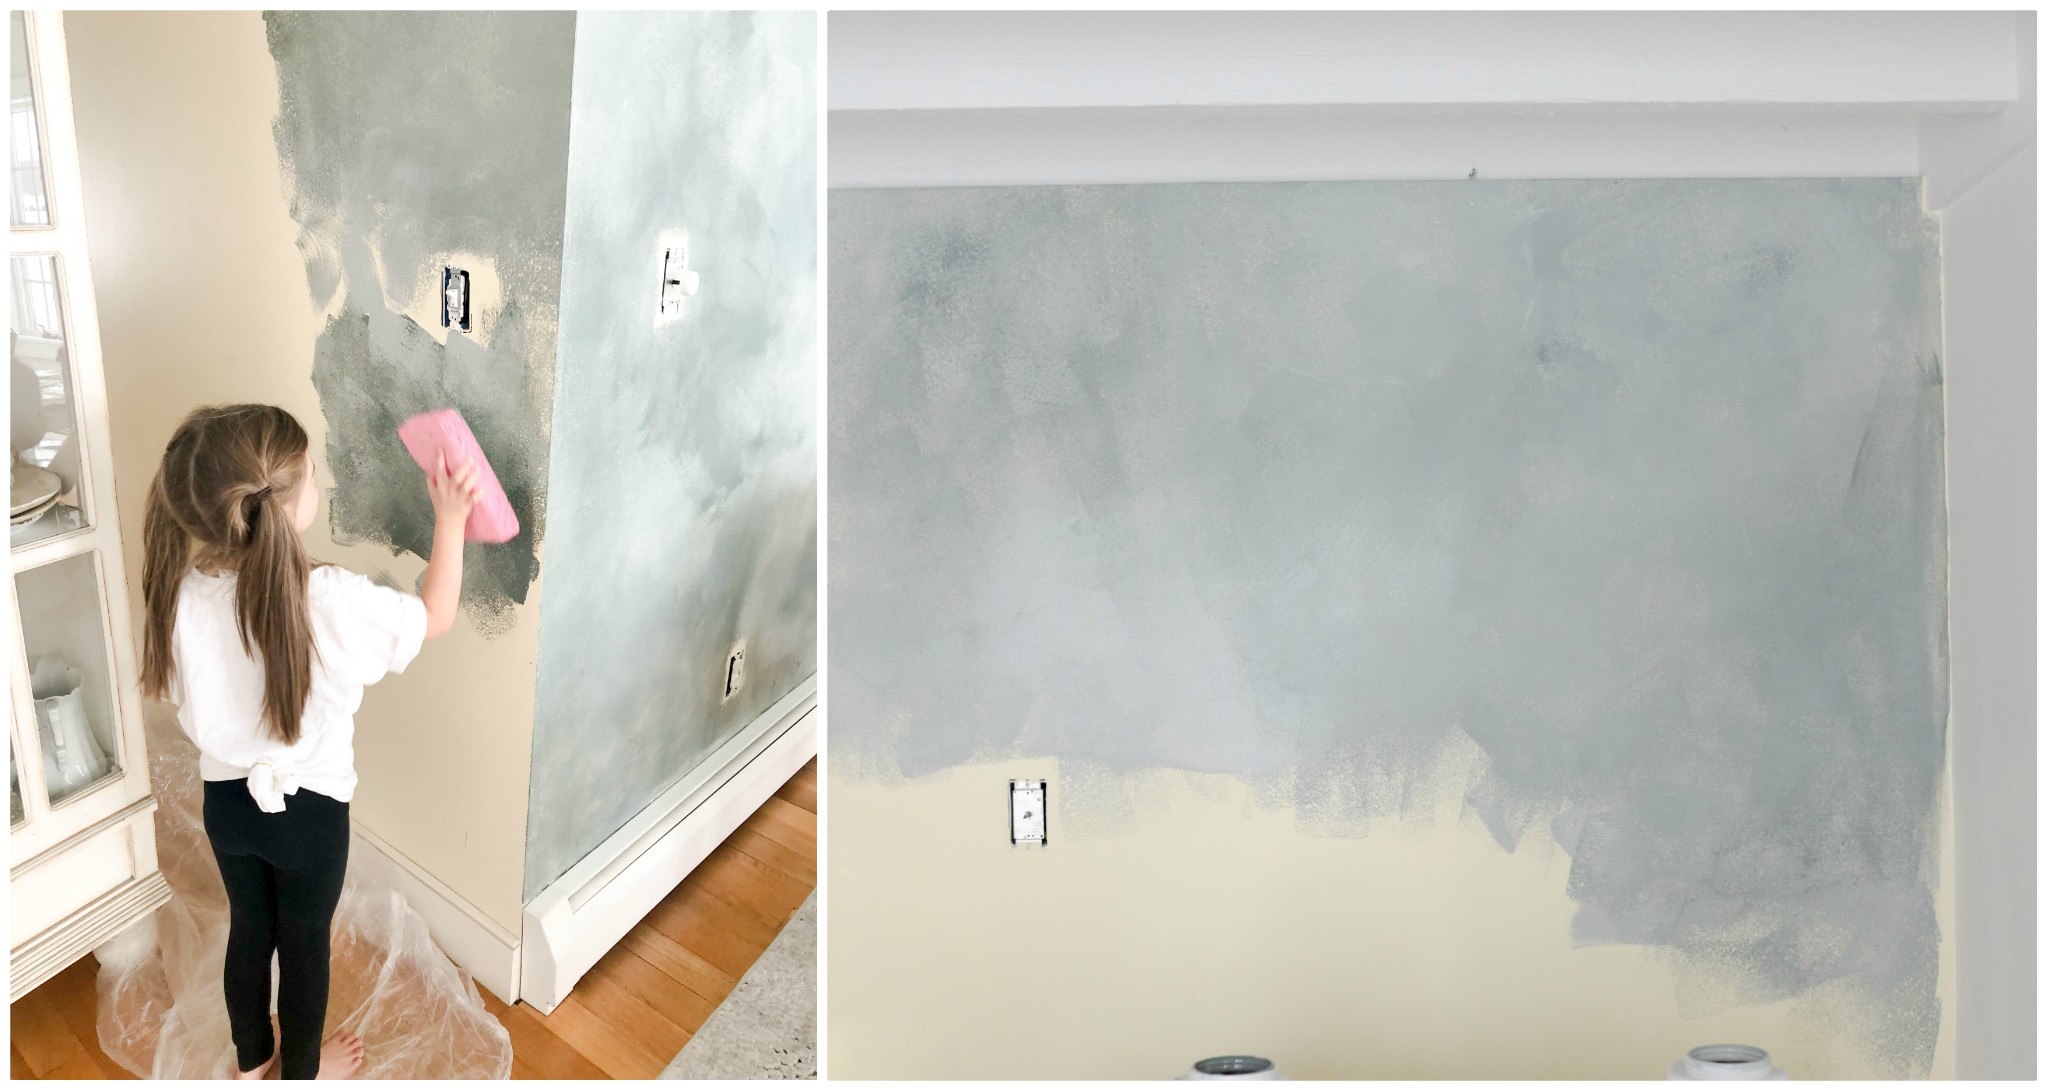
Once I “finished” in other words I loved the way the overall texture looked, I found there was still just a little more yellow poking through in some areas.  Since the wall was still pretty wet and I really didn’t want to add any more paint, I added about a teaspoon of water to my sponge a very lightly dabbed those yellow spot.  This essentially made a thinned out paint layer that easily covered those “holes”.

Are you in need of more detailed directions?  The entire process is saved on in my Instagram highlights, where I’m talking through the process and showing what I’m doing, as I’m doing it.  Click here to instantly link to my Instagram page and watch “Dining Wall”.

Farmhouse Dining Room accent wall

I don’t think there’s really a right or wrong way to accomplish this and you sort of just have to play with it a little until you’re happy with the result.  I still have a little yellow that shows through here and there, but I like the extra dimension that it gives.  I also underestimated the size of my light switch cover and a 1 1/2 years later still need to go back and touch up that area… but we’ll just put that on our someday list!

Home Decor, Projects & Tutorials accent wall, dining room, DIY, faux finish tutorial

Valentine’s Breakfast

0 · Feb 14, 2017 ·

I have a confession, I’m not really a fan of Valentine’s Day.  In grade school, I was always passed over and didn’t get as many Valentines.  In high school, I was never sent flowers or found myself the object of anyone’s affections.  And I’ve never been in a relationship with someone who showered me in grand romantic gestures.  I could really skip the “holiday” all together.

But I work in the wedding industry and the floral industry, which means that this day is the day where romance and florals collide in the most vigurously passionate way.  I have to seek to find acceptance in the traditions of this day, even if that means I’m in it merely for the love of flowers.

However, after almost 7 years of marriage and 2 kids later, one comes to realize the true meaning of love.  It’s isn’t always about the lustful notions that February 14th so often advertises.  It’s a deeper, more content understanding of what home, family and devotion is really about.

As a work from home mom, it would be really easy to skip over the day all together.  My girls would be none the wiser and the tempation is great.  But sometimes I do try to be cute and in my own way show them some extra love on this day.  In the same way, it needs to be shown our significant others, so I decided to start the day with a little Pinterest inspired treat.  It’s not a huge gesture, but I’m a believer in the little things that can make the biggest impact.  It’s all in the details and the little ways to show that we care.

Homemade Pop Tarts | The Day's Design

So yesterday, I started making this little treat, homemade pop tarts.  I thought it would be fun and I’d make them in cute heart shapes.  It was only after I started making them that I realized that my heart shaped cookie cutter is only the size of a silver dollar, so I had to skip to plan B.  And for the record, square ones taste just as good.

My husband has a big day of errands and traveling ahead of him, so it was the perfect hand-held breakfast for a man on the run and the girls love anything with sprinkles.

I used this recipe from Sally’s Baking Addiction for the filling and used her step by step tutorial.  However, I didn’t have any shortening in the house, so I substituted this pie crust from Allrecipes (I had to double the recipe) and it turned out amazing.  I made a total of 13 tarts, filling half of them with the cinnamon and brown sugar mixture and the rest with my huband’s homemade raspberry jam.  For the ones with jam, I simply ommited the cinnamon from the glaze for the top.  This breakfast was a winner and I think I get a gold star, at least for the morning.

Valentine's Breakfast | The Day's Design


This just added a little sweetest to my Tuesday morning.  Even if you’re not celebrating today, I hope you find someone to share a some love with this week.  I think the world could use a little.

“Dear friends, let us love one another, for love comes from God.  Everyone who loves has been born of God and knows God.”

– 1 John 4:17

From the Heart of a Planner, Projects & Tutorials Breakfast, DIY, Pop tarts, recipes, Valentine's Day

Home Improvements

0 · Feb 10, 2015 ·

Remodeling | The Day's Design | Hetler Photography

Sit down, grab a cup of coffee (I’m going to get a refill) and I’ll fill you in on life happenings over here at the Ferguson household…. picture by Hetler Photography.

Back in October I began blogging about all the off-season shenanigans that were about to take place around my home.  I had this blissful dream of all the things that I could get accomplished during this slower time of year, organization projects, remodeling to-dos and office updates.  And I even thought it would be fun to take you along on my journey via blogging.

Oh the best laid plans…

Our initial house project was fixing the ice damage from last winter which affected both our dining room and living room.  This was an insurance claim, so rather than DIYing it (like every other remodeling project that we’ve tackled so far), we hired a pro.  I thought this would make things easier.  I thought things would get done correctly and in a timelier manor.  I thought wrong.  Start dates continued to get pushed back and suddenly I was fearful that it wouldn’t be finished in time to put up a Christmas tree.  I put up a tree anyway.  The crew was let go and the project is yet to be finished.  Let’s just say that I have more control and faith in my husband – who is handy, but certainly not a master craftsman – than I do these so called “professionals”.  If you’ve been waiting to see the “big reveal”, you’re going to have to keep on waiting.  Here are the original plans, in case you’d like to see those.

Project number two has begun.  For 5 years we have been living with the most disgusting, outdated and grossest bathroom you’ve ever seen.  It’s been embarrassing whenever guests need to use the restroom.  It’s dingy, with peeling wallpaper and shredded berber carpet… who carpets a bathroom anyway?  My guess is it was updated sometime during the late 80’s, but I’m not too certain.  We scheduled this project before realizing that our previous ice project would not be complete, but we have to move forward anyway.  We’re having a baby and I refuse to still be remodeling when she arrives.  We’ll see how those plans unfold – right now we’re about 40% complete, with 3 more work weekends to go (we’ve had 2 already).

As far as the rest, well, let’s just say that life is different than it was this time last year.  Things were much quieter then.  This year, it’s been a hustle and bustle of bridal inquiries, meetings and prep for the upcoming season.  I’m so thankful, but it has put a few of those blissful organization dreams aside.  Now I’m updating office space, making room for baby and tripping over extra tiles, tools and other random objects that seem to be floating throughout my home and things are just plain challenging.  But I’m really exciting for what wedding season 2015 will bring – and for the warmer weather ahead.  We’re half way through February, spring is right around the corner.

about_signature

And I almost forgot one really exciting piece of “new business” – there’s a new website in the works!  I’ve been hard at work on this baby and love the way it’s making my flowers and designs shine… it will be up and running soon!

From the Heart of a Planner, Life Adventures a leaky update, bathroom remodel, construction, DIY, fix up the fergusons, ice damage, office updates, pregnancy, remodeling, the day's design, wedding season 2015

DIY Gilded Floral Crown

0 · Apr 1, 2014 ·

Yesterday was the warmest day we’ve seen so far this year and it was as if the whole world simply came bursting back to life.  Neighbors were in the streets, yards were being raked and the snow mounds bordering my lawn shrunk to the point that I can now see the tops of cars passing by my house.  And guess what I found buried underneath some of that snow?  Life!  There, braving the ice and cold, are the little tips of my spring bulbs waiting for their time to bloom.

I’m eagerly awaiting that moment too.  But until then, I thought I’d share a little bit of flowery goodness with you today and how you can create it yourself.  I’m simply loving the floral crown trend right now and this one is especially glam with gilded gold leaves.

So here’s what you need:

Grapevine wire  |  Floral wire  |  Wire cutters  |  Floral tape  |  Flowers*  |  Greens*

*I used one stem of pink lisianthus (which had two flowers) and a cream garden rose.  For greens I used mini coin as my base and filled in with silver dollar eucalyptus – but the options are limitless, use what inspires you!

Floral Crown Supplies | The Day's Design | Ashley Slater Photography

Step 1:  Spray paint your greens.  You can completely coat them or let a little green show.  I like to leave a little nature shining through.

Gold Gilded Floral Crown | The Day's Design | Ashley Slater Photography

Step 2:   Form a circular base with the grapevine wire.  The form should be slightly larger than your head as once the greens are attached the fit will be more snug.

Floral Crown DIY | The Day's Design | Ashley Slater Photography

Step 3:  Once the paint has dried, clip the long stems so only an inch or so remain, along with the leafy, pretty part of the plant.

DIY Gilded Floral Crown | The Day's Design | Ashley Slater Photography

Step 4: Using floral tape, wrap the stem of the greens and attach it to the grapevine wire. Continue to attach stems to the grapevine wire, leaving the other end of the greens free until you have created a full circle of greens.

Gilded Floral Crown tutorial | The Day's Design | Ashley Slater Photography

DIY Gilded Floral Crown | The Day's Design | Ashley Slater Photography

Step 5: Begin filling in the larger leaves, taping them to the grapevine wire.  The larger leaves (eucalyptus) are optional, but I like the extra texture they add.

Gilded Floral Crown Tutorial | The Day's Design | Ashley Slater Photography

Step 6: With the small pieces of floral wire, attach the loose ends of the leaves to the crown so it creates a full and lovely circle.  How tightly you attach the greens is up to you, a looser greens with create a more wild and relaxed look.

At this point you might choose to add an additional layer of gold paint which would help to camouflage any floral tape and wire.

Gilded Floral Crown tutorial | The Day's Design | Ashley Slater Photography

Step 7:  Trim the stems and add flowers.  I chose to place them off to the side, but the options are limitless.  To add them – pierce the base of the bloom with the floral wire and then twist and attach to the crown.

Gilded Floral Crown DIY | The Day's Design | Ashley Slater Photography

Floral Crown DIY | The Day's Deisgn | Ashley Slater Photography

Step 8: Wear your gold crown pretty lady!

Garden Rose Floral Crown | The Day's Design | Ashley Slater Photography

DIY Floral Crown | The Day's Design | Ashley Slater PhotographyDIY Gold Floral Crown | The Day's Design | Ashley Slater Photography

All photos by the fabulous Ashley Slater Photography, thanks love!

about_signature

Projects & Tutorials Ashley Slater Photography, DIY, floral crown, floral crown tutorial, flowers, Garden rose, gilded flower crown, gold crown, gold leaves, pink lisianthus, pretty projects, spray paint, the day's design

DIY Striped Placemats

0 · Jan 24, 2014 ·

It occurred to me this morning that I have not left my house all week.  The last time I stepped out my front door was on Sunday, heading to church.  This cold winter weather has me all cooped up and I start going a little stir crazy.  If you’re like me, it’s this time of year that you start looking for pretty projects to work on and ways to add some easy glam to your home.

Back in November I created quite a few DIY items for Gretta’s first birthday party (you can see the whole thing here), these fun striped place mats were just one little piece of the celebration.

DIY Striped Placemats

The gorgeous photos above are from Hetler Photography… the DIY portion of this post will be snaps shots capture by yours truly and they’re not pretty, but they get the point across!  So here we go:

You will need:

  • 12 x 18 inch foam sheets
  • Painter’s tape
  • Spray paint

DIY placemats

Step 1:

Add lines of painter’s tape in a vertical direction over the foam.  Remember, any area covered with painter’s tape will remain white.  For thicker stripes, add use thicker tape or multiple pieces until desired thickness is achieved.

DIY Striped Placemat

Continue adding tape until you have created your desired number of stripes.  Here’s a little tip to make sure spacing stays consistent and lines of tape are straight: find a piece of furniture or object with straight lines and use it as your guide.  I like to take advantage of my hardwood floors and use the lines as a guide keeping the stripes the same width as the slats on my floor and also making sure the tape stays alined with the floors on either side of the foam.

Step 2:

Spray paint.  Any color works, make it match your house or party decor!  No rules there 🙂

DIY Striped Placemats

Step 3:

Remove painter’s tape once paint is dry.  The paint dries pretty quickly on the foam, it took about a 1/2 hour for me, but could vary depending on the day and drying conditions.  The lines might not be perfectly crisp, but that gives them a little character.

And ta-da, instant glam to your table!

Oh My Stars 1st Birthday Party | The Day's Design | Hetler Photography

A couple of other notes about this project:

  • I used 3 mm thick foam, the thinner pieces seemed to flimsy to be place mats in my opinion.  I purchased mine at Hobby Lobby but JoAnn Fabrics carries it as well.  They were $1.00 each.
  • The spray paint color is used is Krylon’s Raspberry
  • And I also wish my pictures were are pretty as Kellie’s!  Let’s pretend, shall we?

Stay warm friends!

about_signature


Projects & Tutorials DIY, DIY placemats, Gretta's birthday, hetler photography, home decor, place mats, placemats, pretty projects, raspberry, spray paint, stripes

DIY Brides

0 · May 2, 2013 ·

A couple months ago I got in touch with a bride who had discussed using my services, but never really committed.  Just as a friendly follow-up, I dropped her a little note to say hello and see if she needed any help.

Her response was no, she’s more of a DIY bride.

Peach and Orange Centerpiece

Photo by Shannon Scott Photography {Smug Shots}

If you’re a reader of the Every Last Detail blog, then you probably saw Lauren’s post about DIY weddings today.  This is actually something that’s been on my mind for quite some time now, and I did not really know how to go about explaining the complications of the DIY bride without trying to sell my services.

In reading Lauren’s post, you’ll realize DIY can have lots of interpretations.   And even the DIY bride needs help sometimes.  It is completely okay to admit that you’ve bit off more than you can chew, and seek assistance.  There are even people (such as myself!) who will sit down and help you craft those DIY projects!!

Hiring vendors does not mean that your wedding becomes less personal and handmade details need to be lost.  Hiring vendors simply means that you understand your limits and the limits of loved ones around you, and you’re willing to admit that you simply cannot do it all.

Let’s stay stress free and enjoy this beautiful West Michigan weather we have had this week!!

about_signature

Wedding Planning & Advice DIY, diy wedding, do it yourself wedding, handmade weddings, steps to the altar, vendors

Primary Sidebar

Featured Posts

Yellow poppy centerepice for spring wedding flowers

Mauve & Yellow Flowers for the Month of March

5 Flowers for the Month of March

5 Flowers for the Month of February

The Day’s Design’s Valentine’s Flowers

round table with blush and blue decor

Blush & Blue Winter Tabletop

More

As Seen On

EveryLastDetail

BurnettsBoard

Footer

Instagram

Instagram has returned invalid data.

Follow along with our adventures

  • Projects & Tutorials

Copyright © 2026 · Cravings Pro