• Skip to primary navigation
  • Skip to content
  • Skip to primary sidebar
  • Skip to footer

The Day's Journal

Finding beauty in the everyday pieces of life

  • Weddings
  • Lifestyle
  • The Day’s Design
  • Nav Social Menu

    • Facebook
    • Instagram
    • Pinterest

spray paint

DIY Gilded Floral Crown

0 · Apr 1, 2014 ·

Yesterday was the warmest day we’ve seen so far this year and it was as if the whole world simply came bursting back to life.  Neighbors were in the streets, yards were being raked and the snow mounds bordering my lawn shrunk to the point that I can now see the tops of cars passing by my house.  And guess what I found buried underneath some of that snow?  Life!  There, braving the ice and cold, are the little tips of my spring bulbs waiting for their time to bloom.

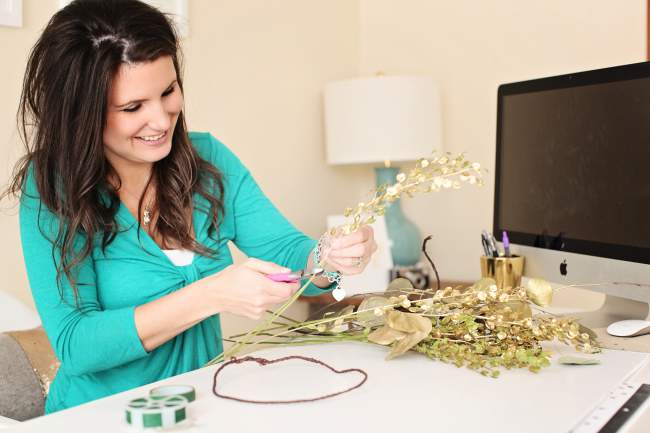
I’m eagerly awaiting that moment too.  But until then, I thought I’d share a little bit of flowery goodness with you today and how you can create it yourself.  I’m simply loving the floral crown trend right now and this one is especially glam with gilded gold leaves.

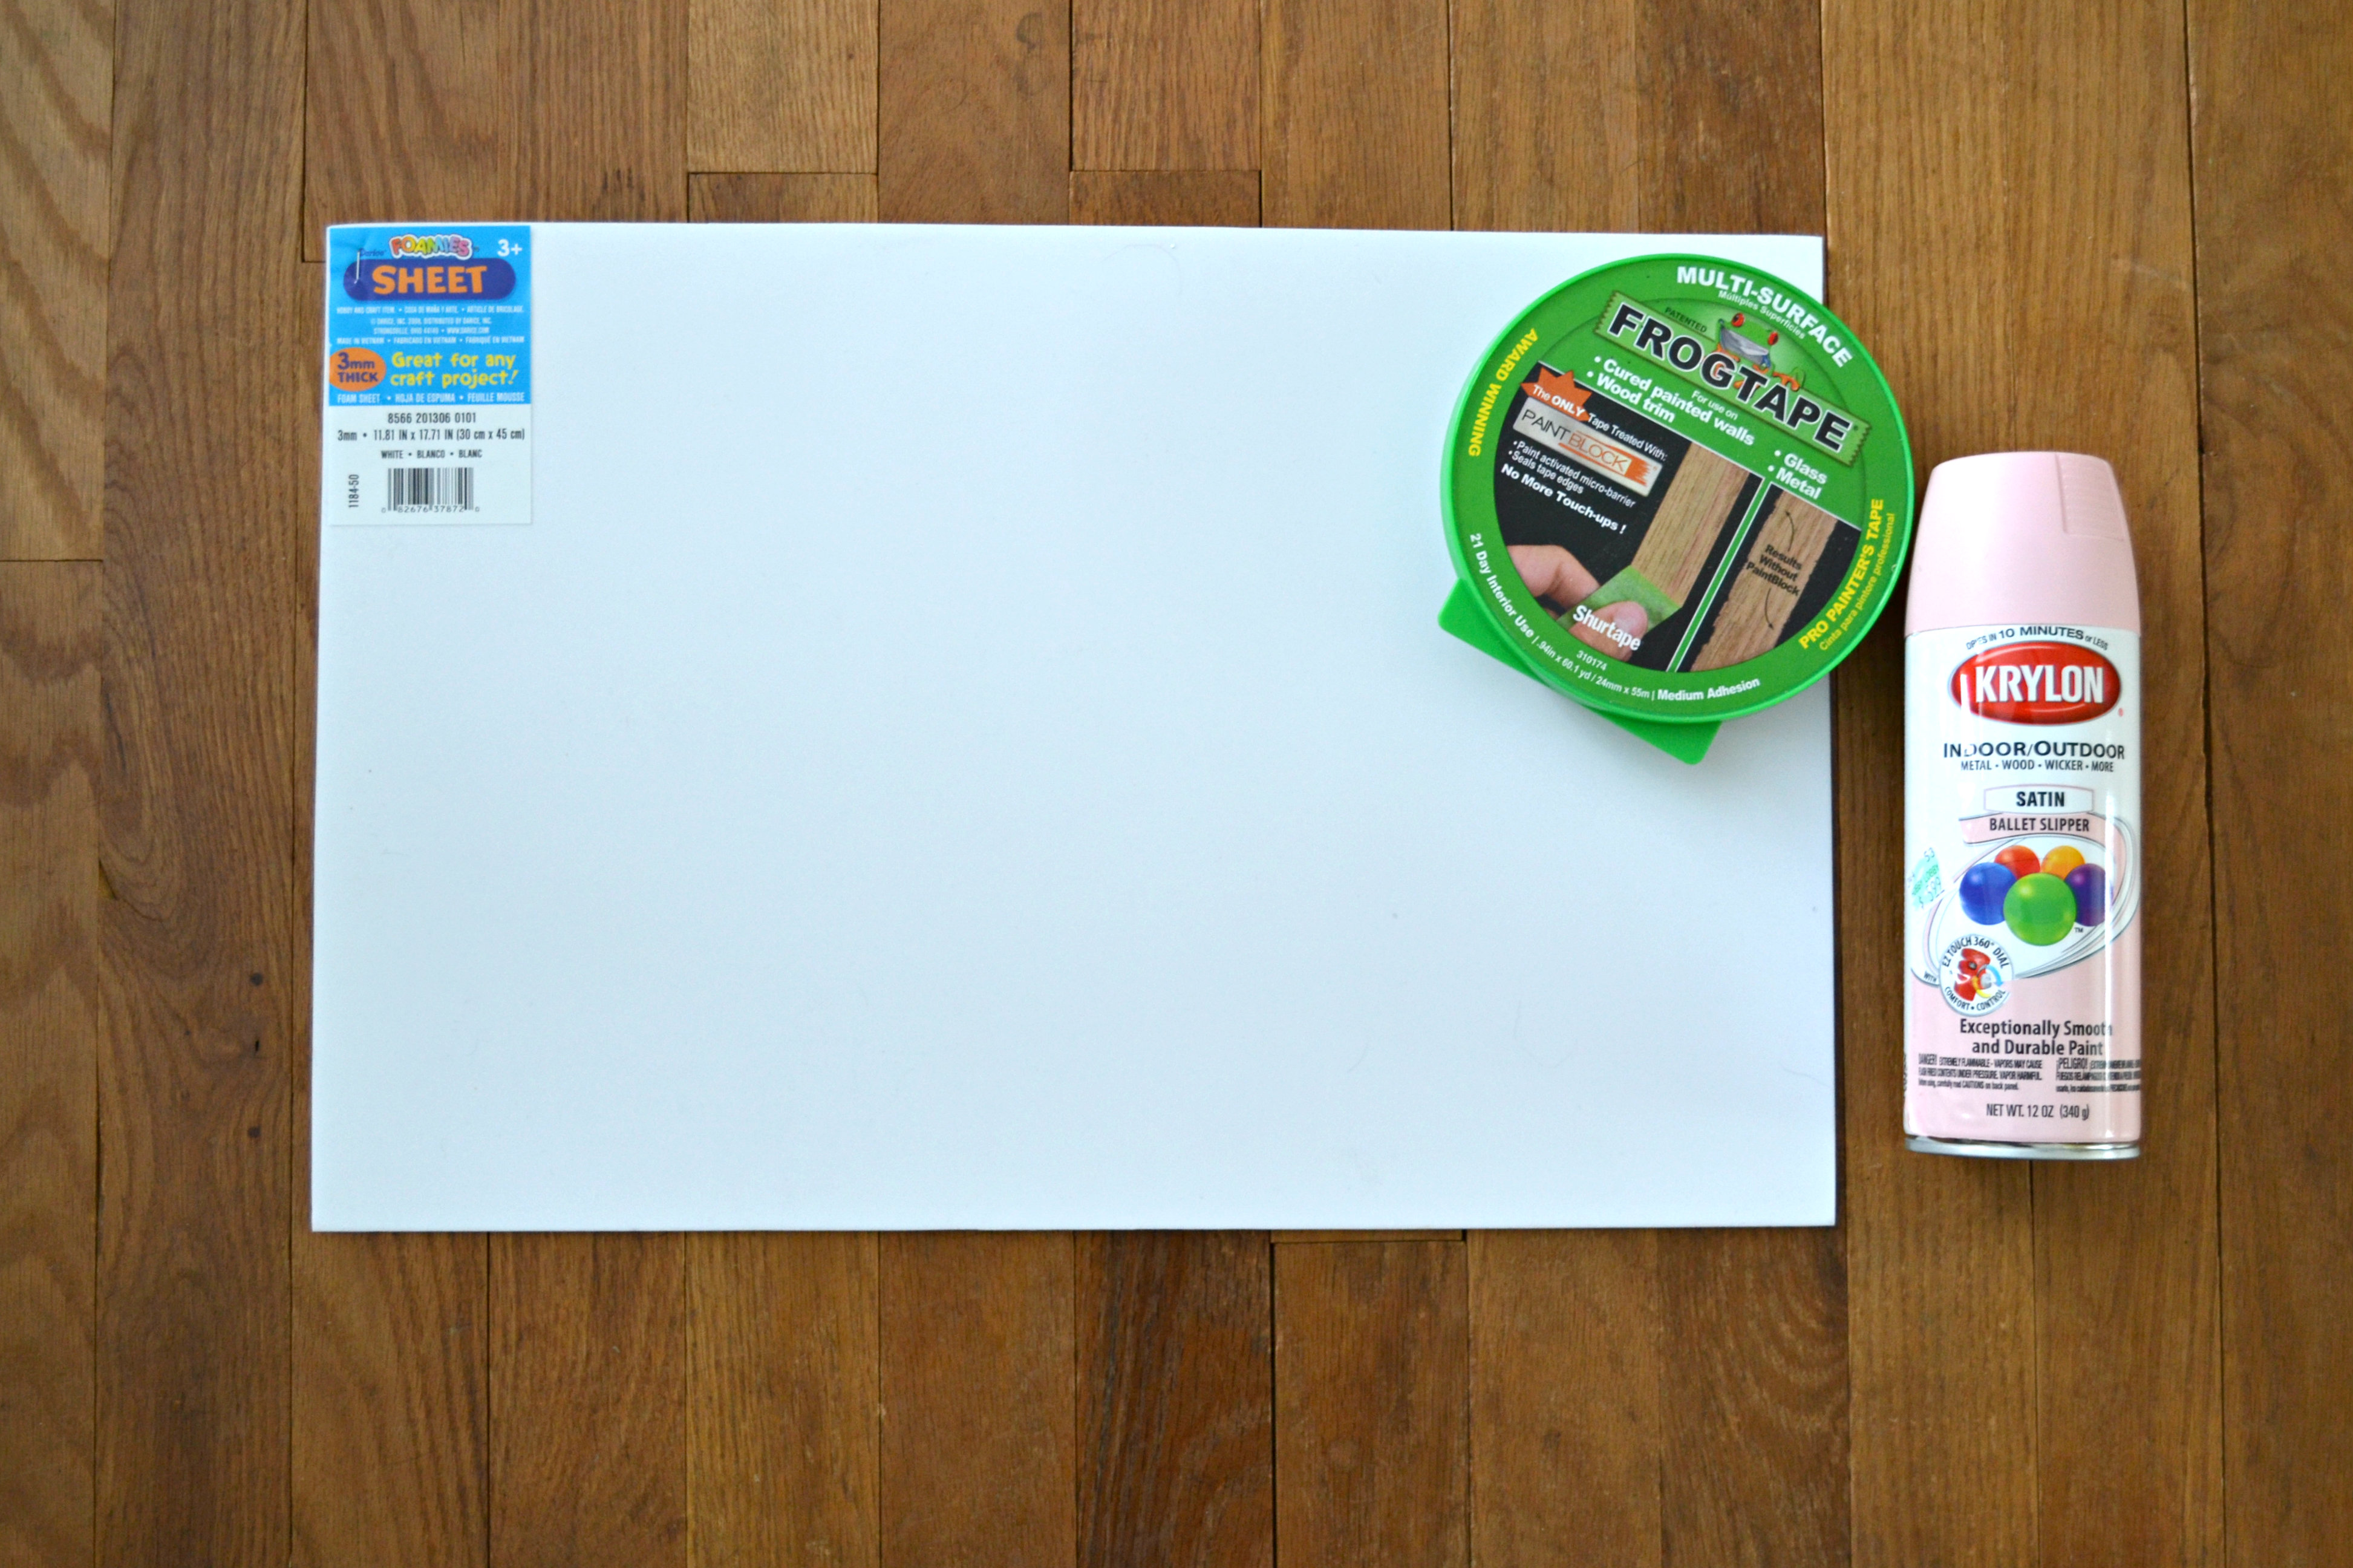
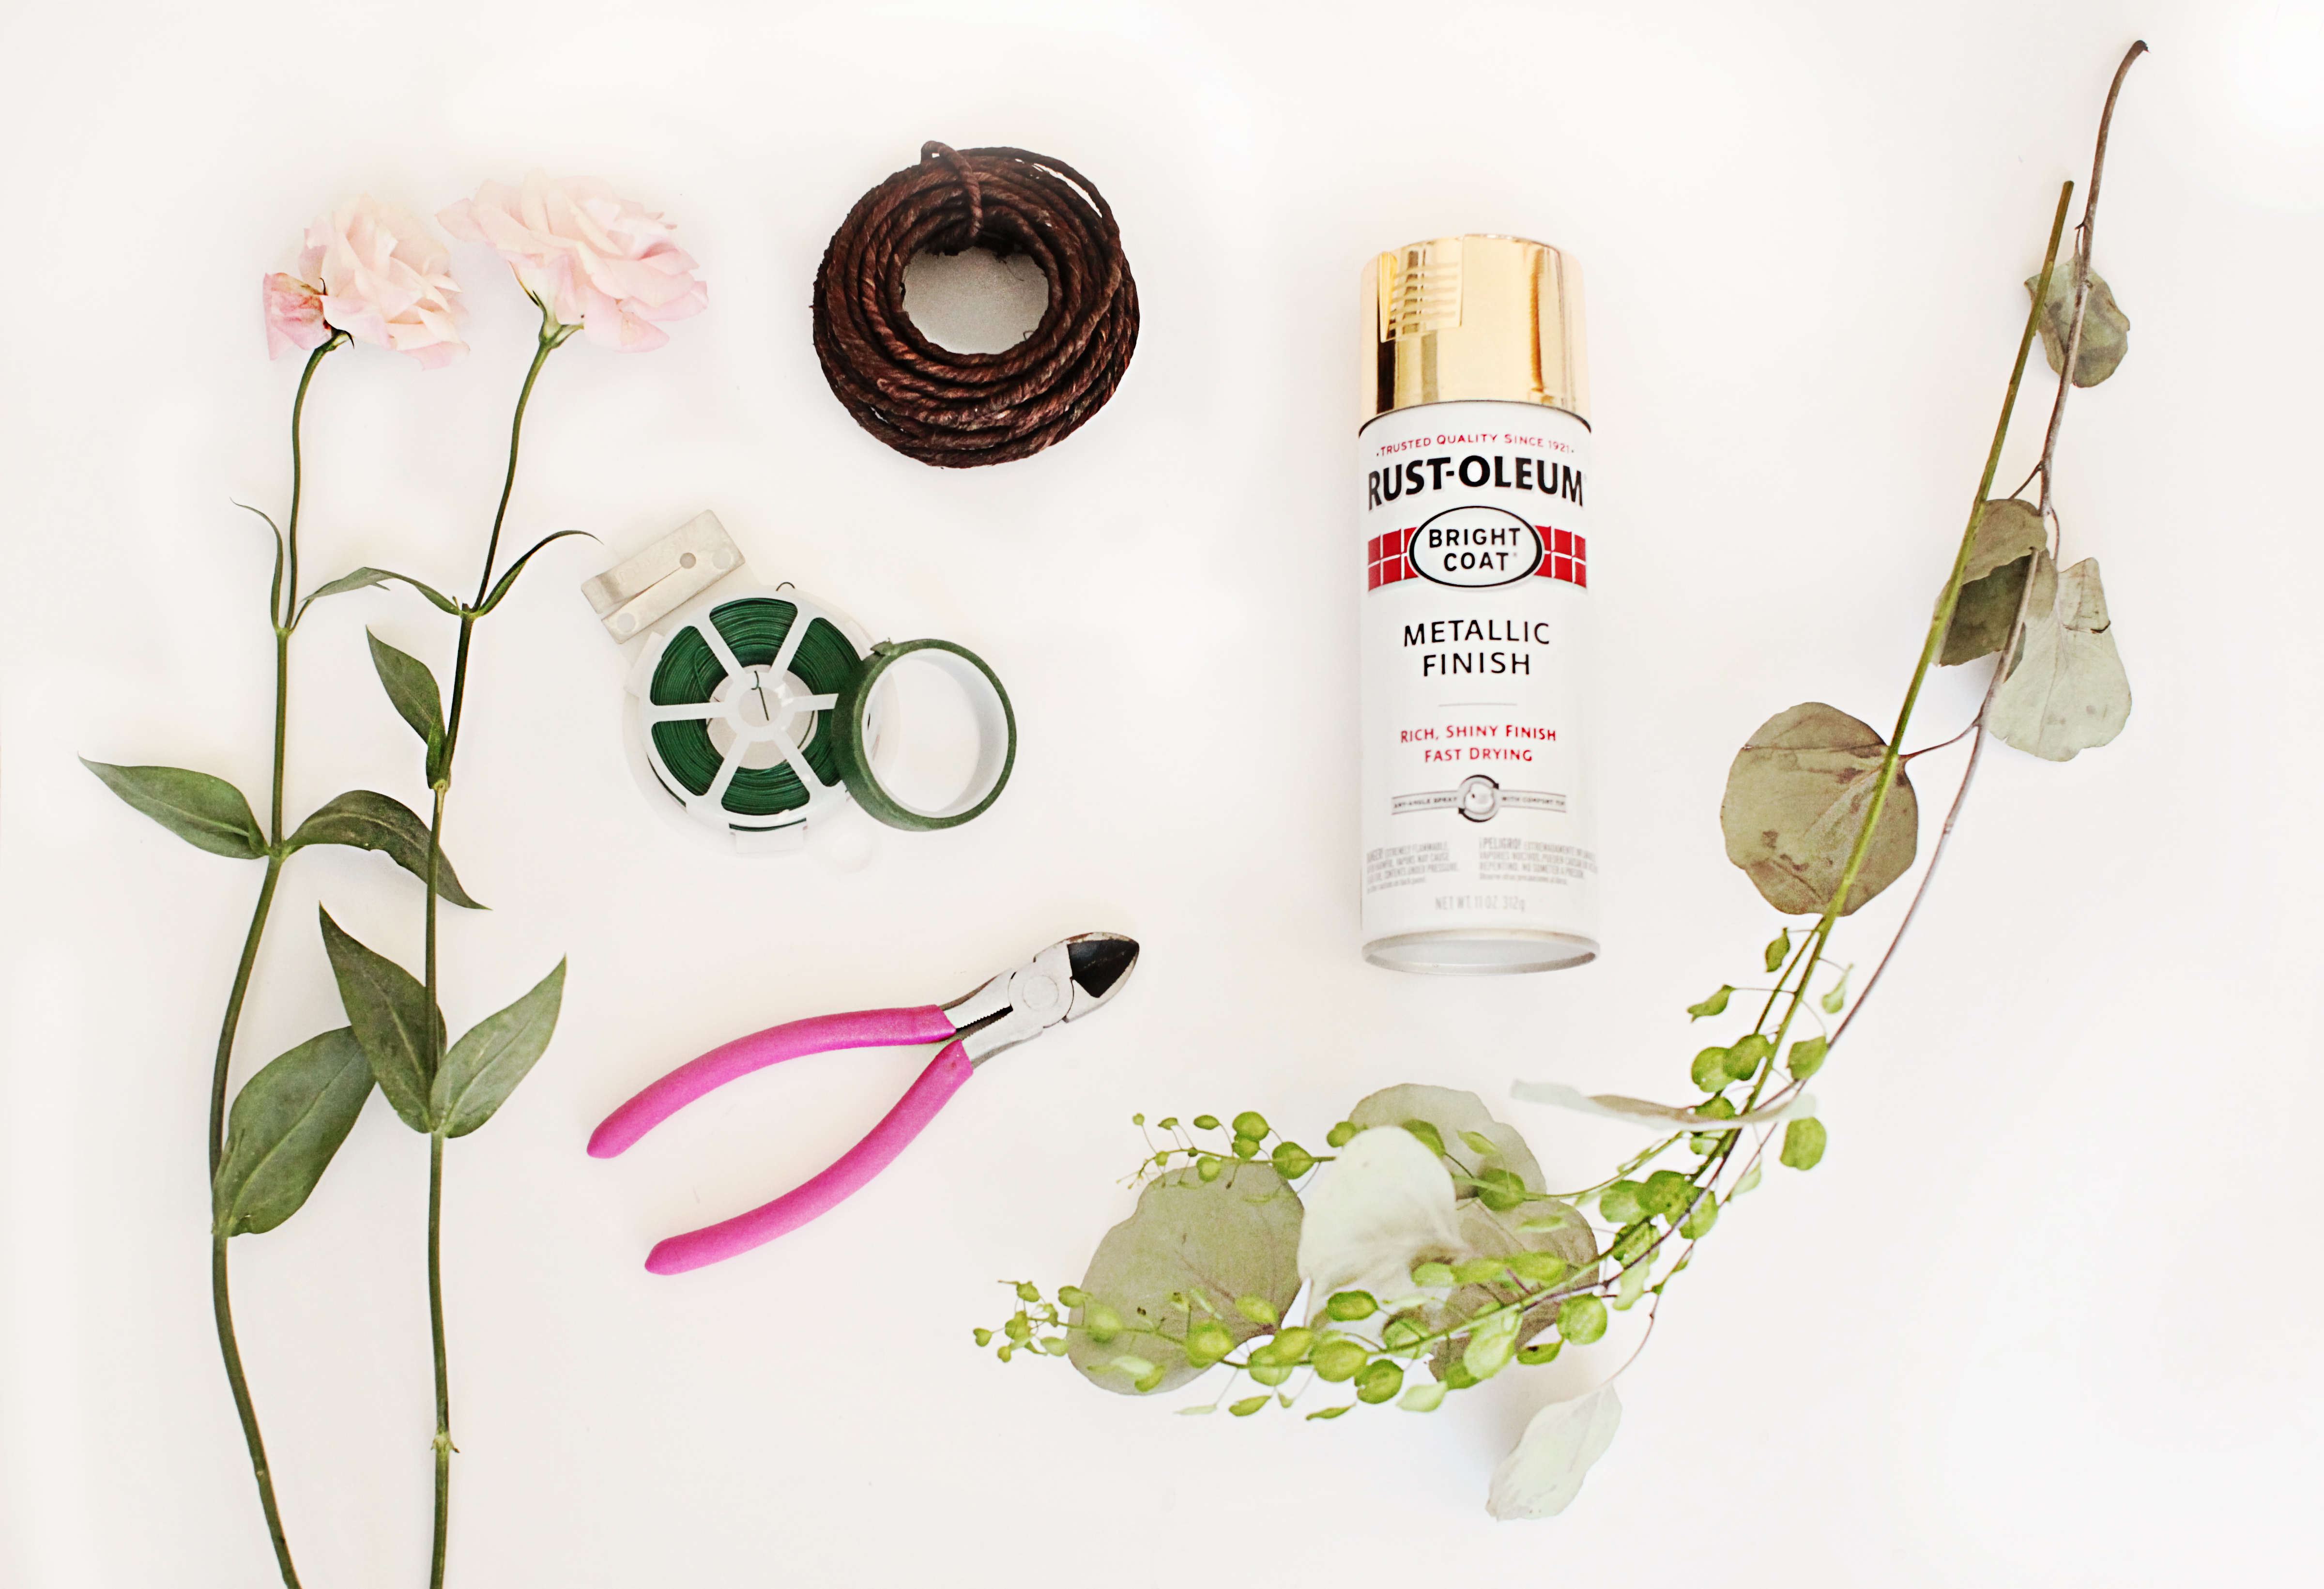
So here’s what you need:

Grapevine wire  |  Floral wire  |  Wire cutters  |  Floral tape  |  Flowers*  |  Greens*

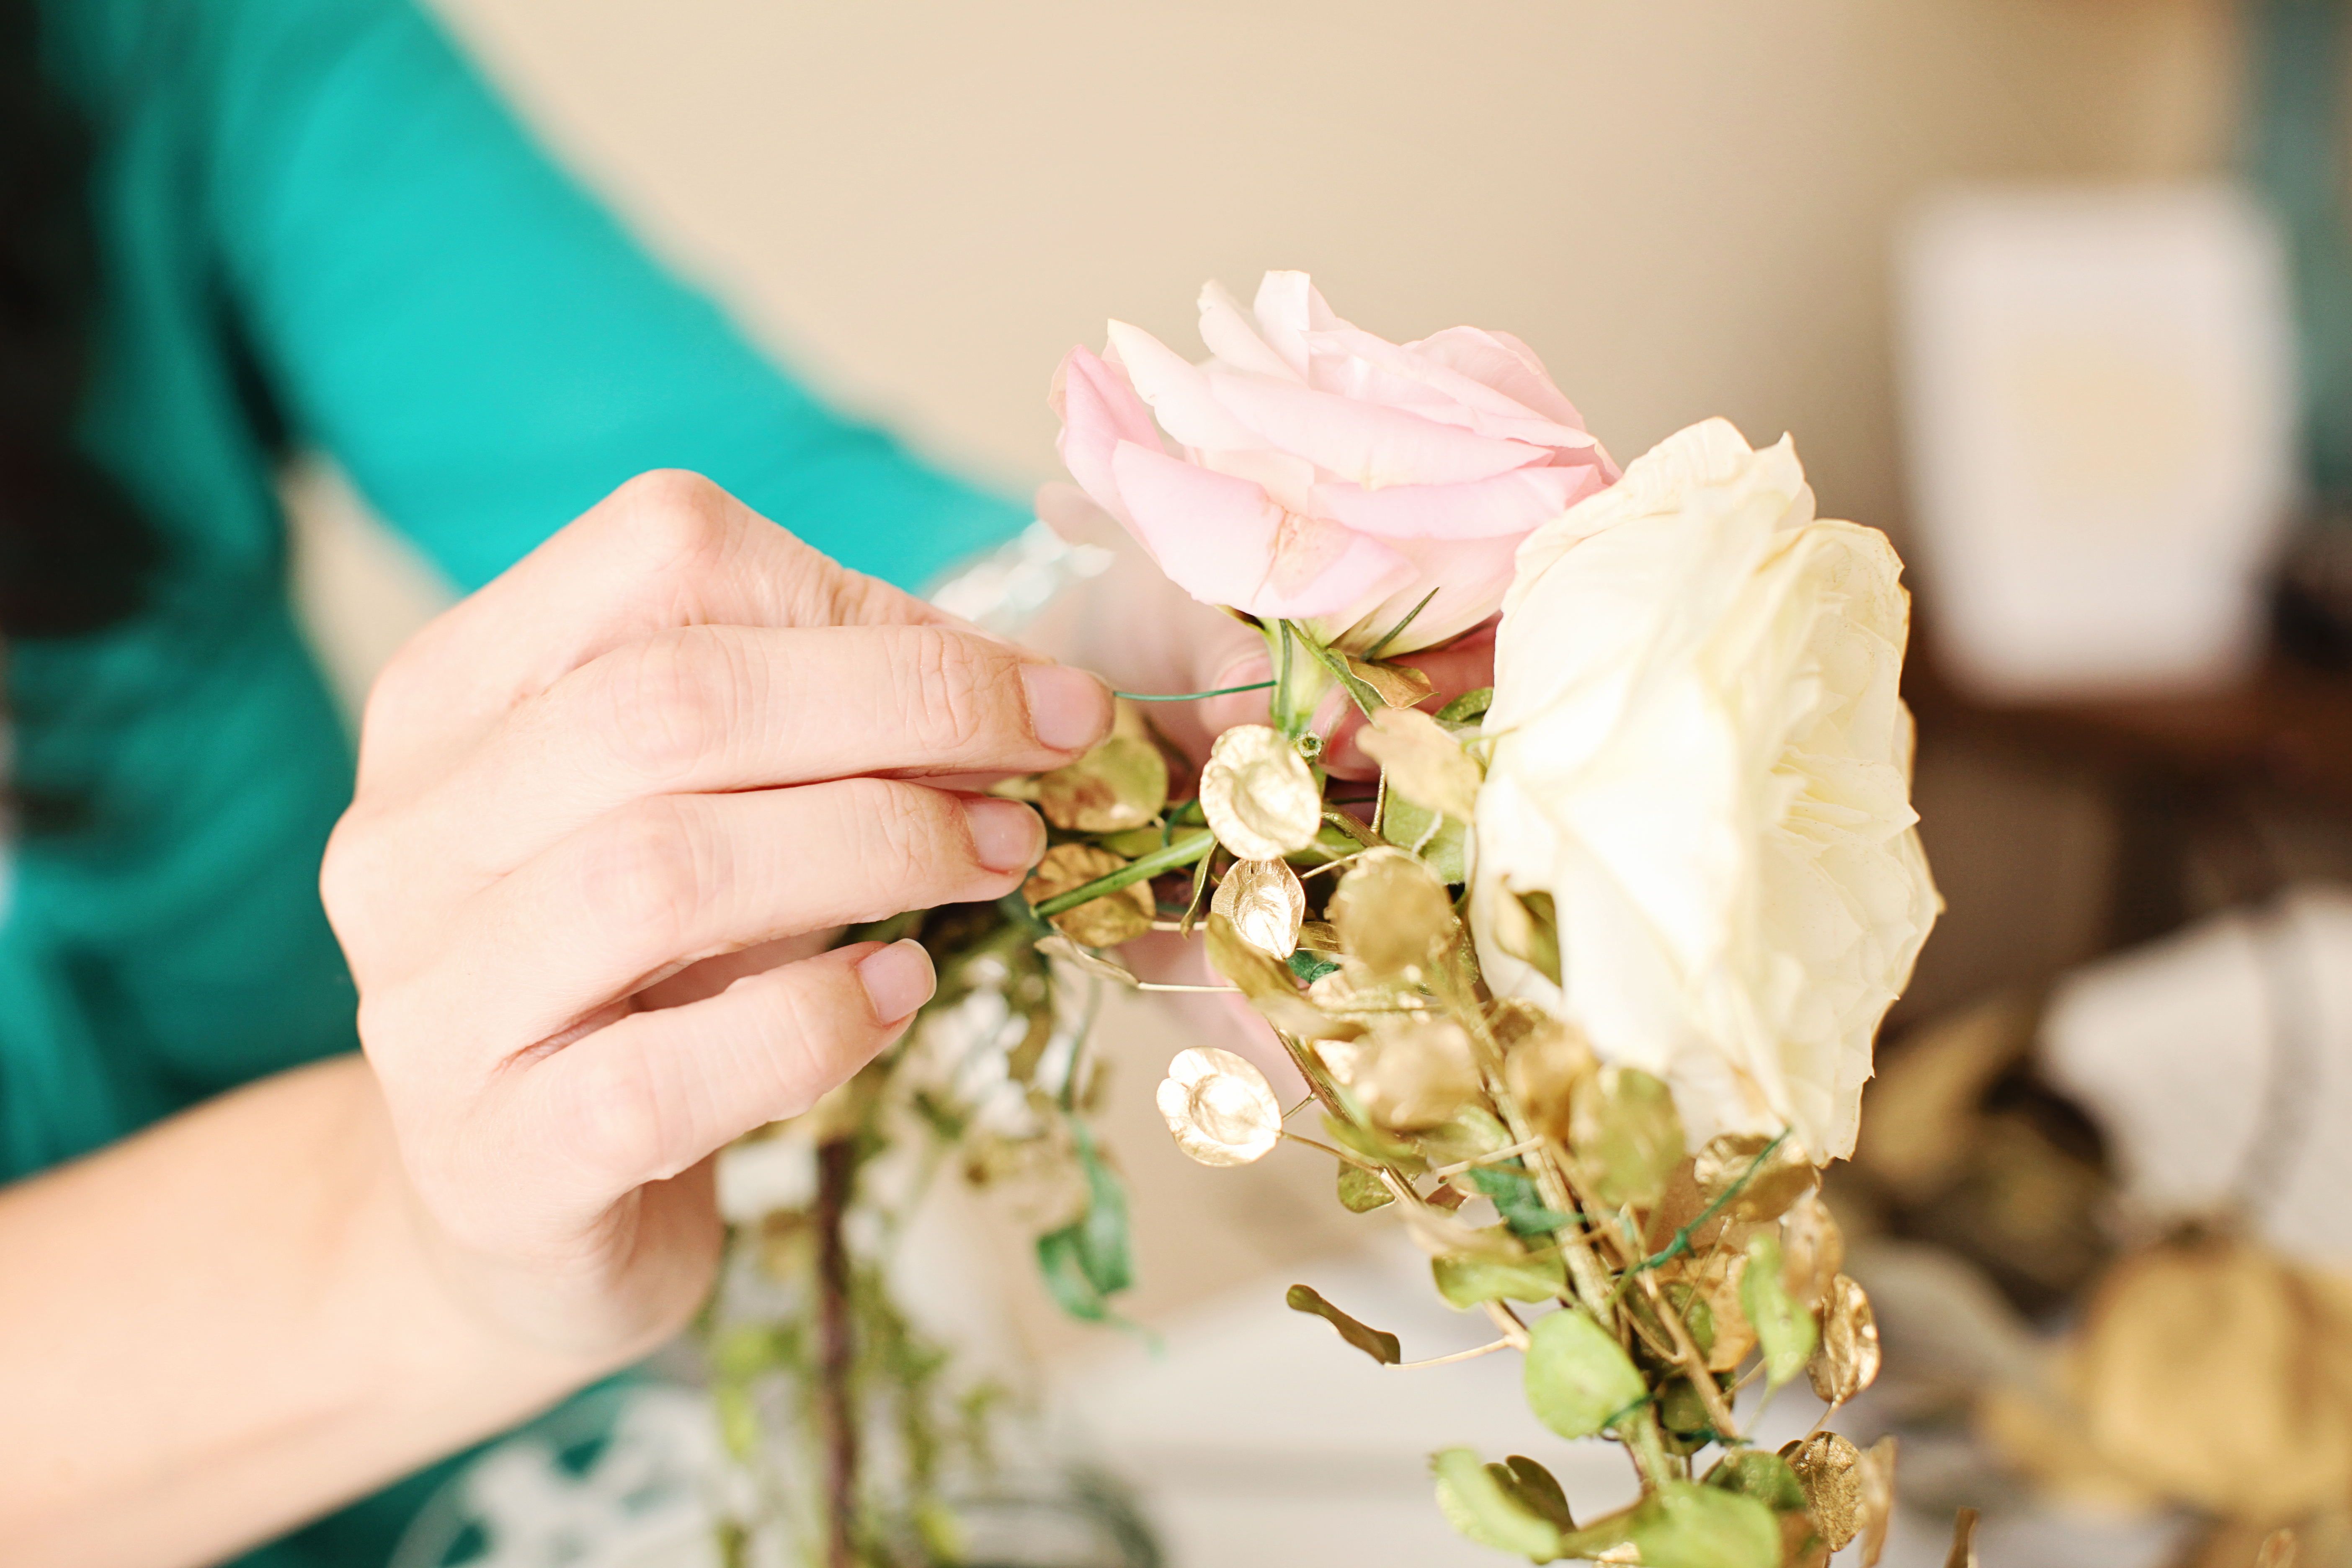
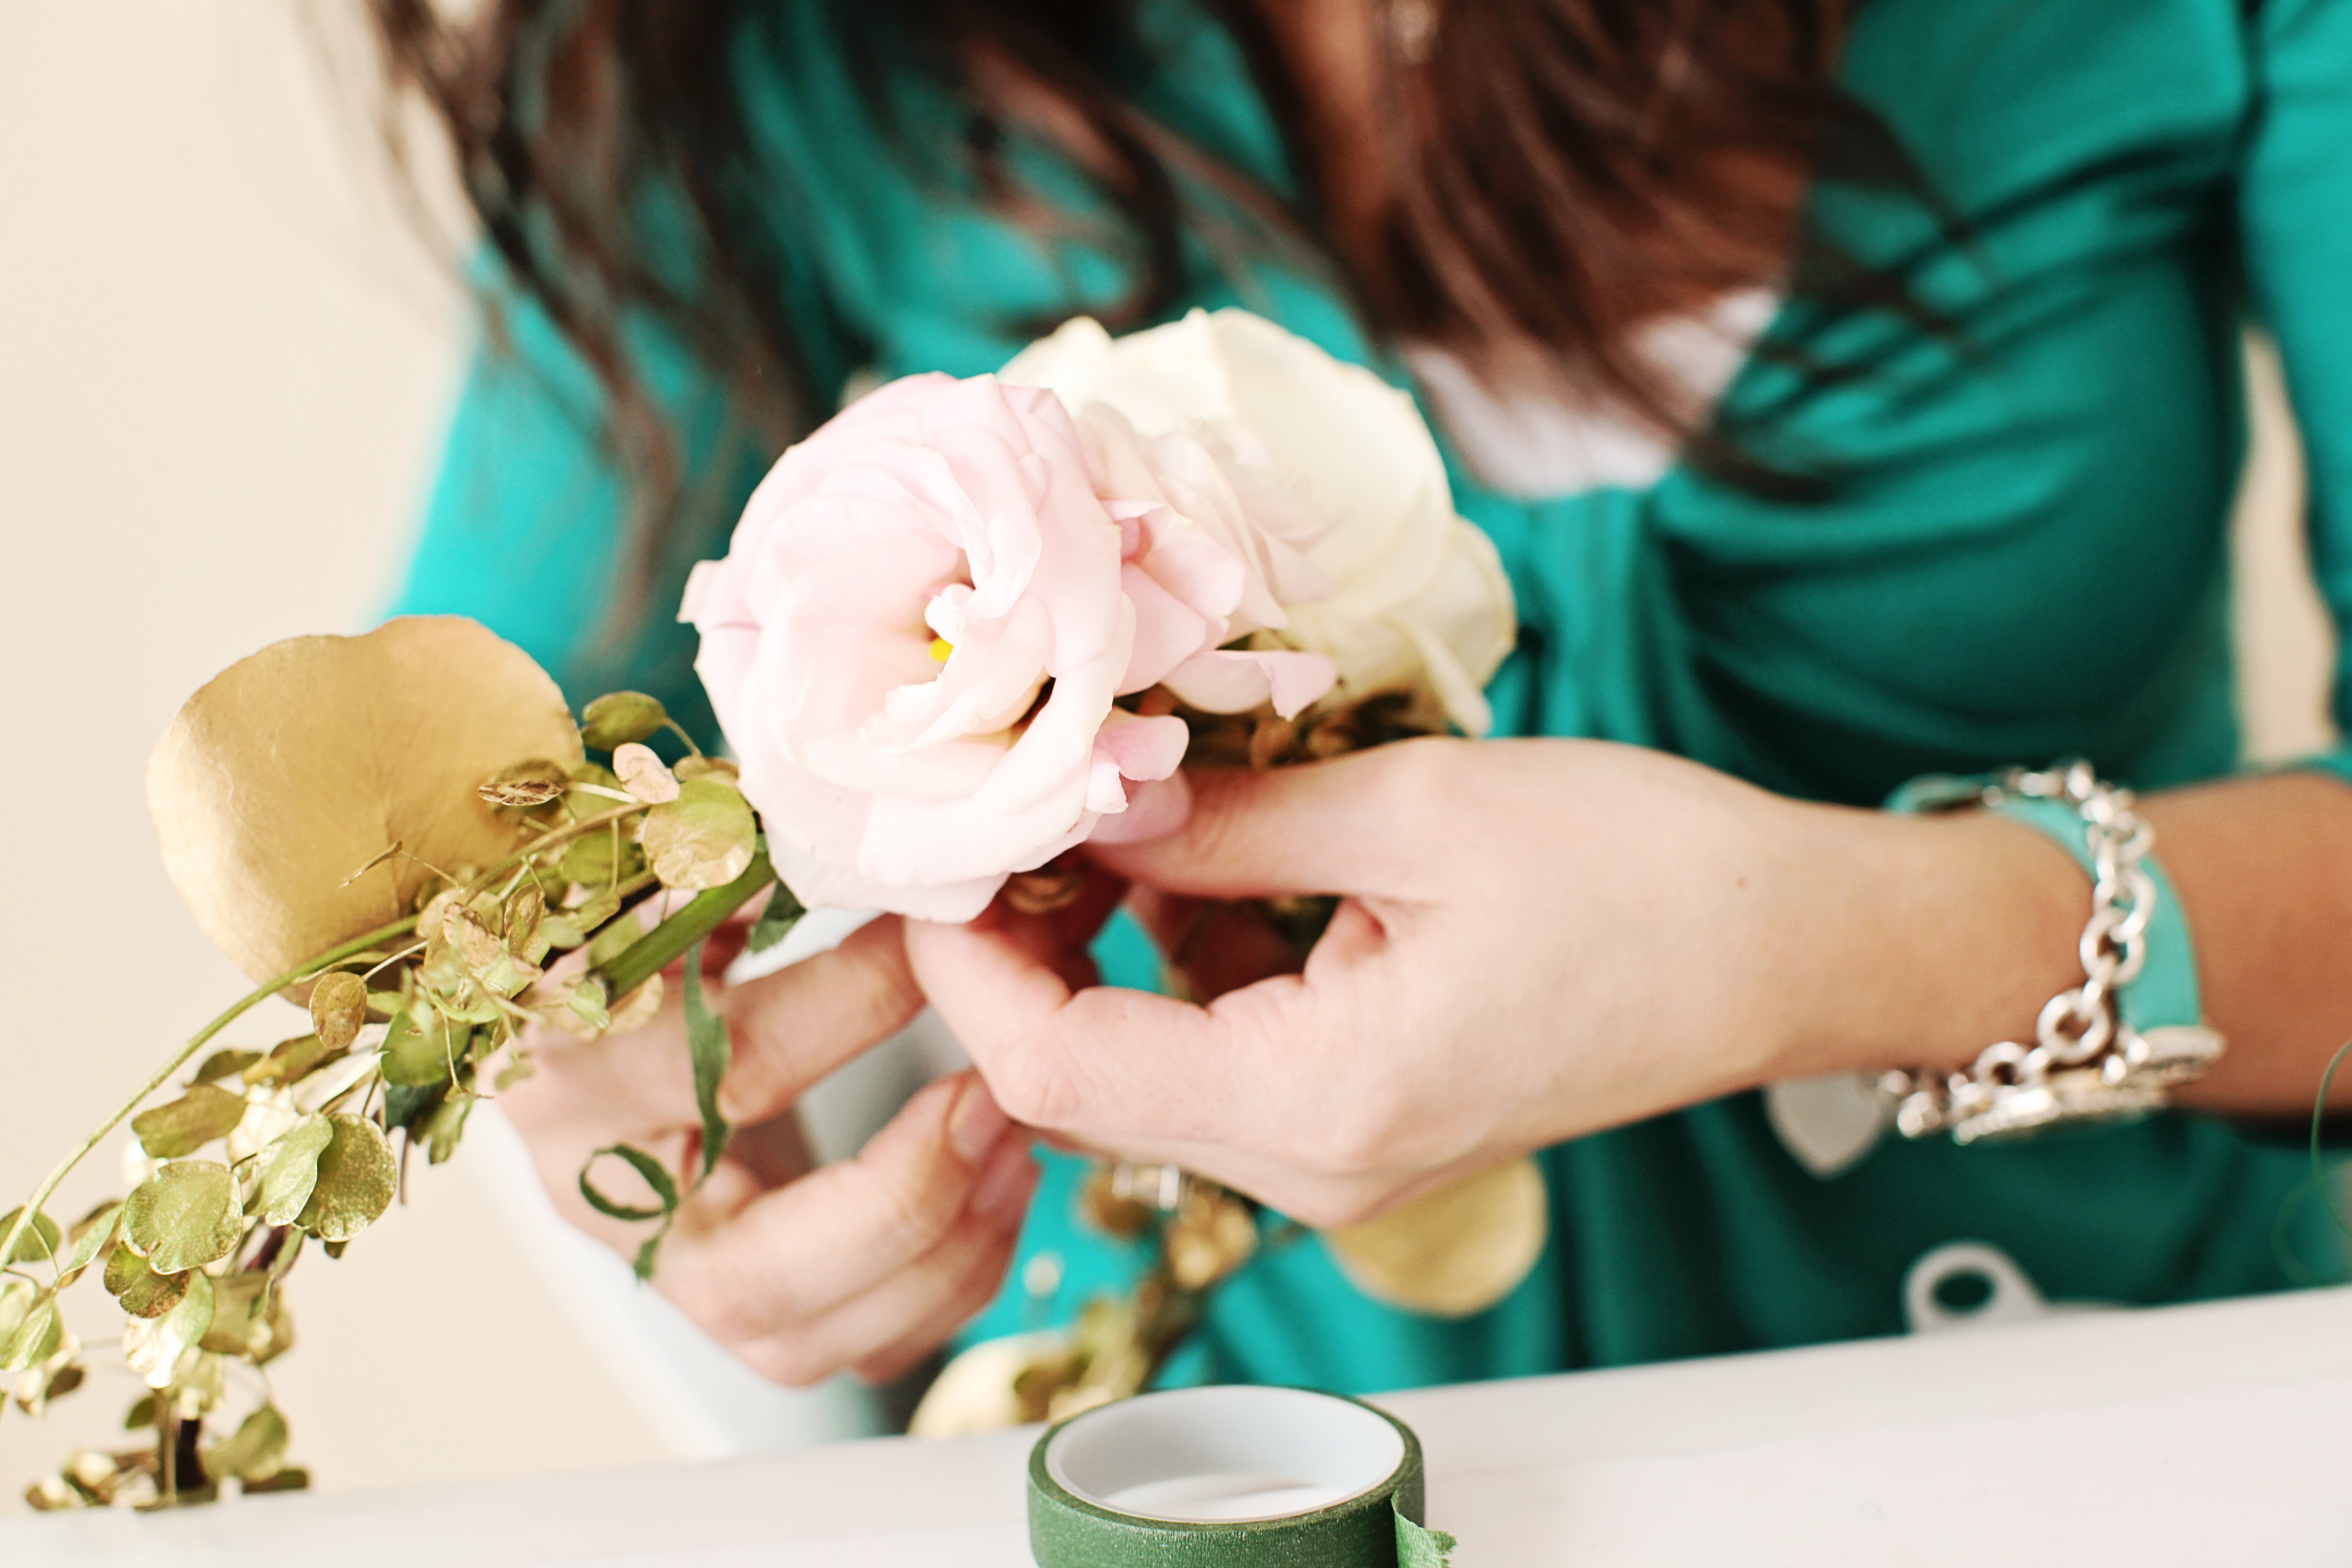
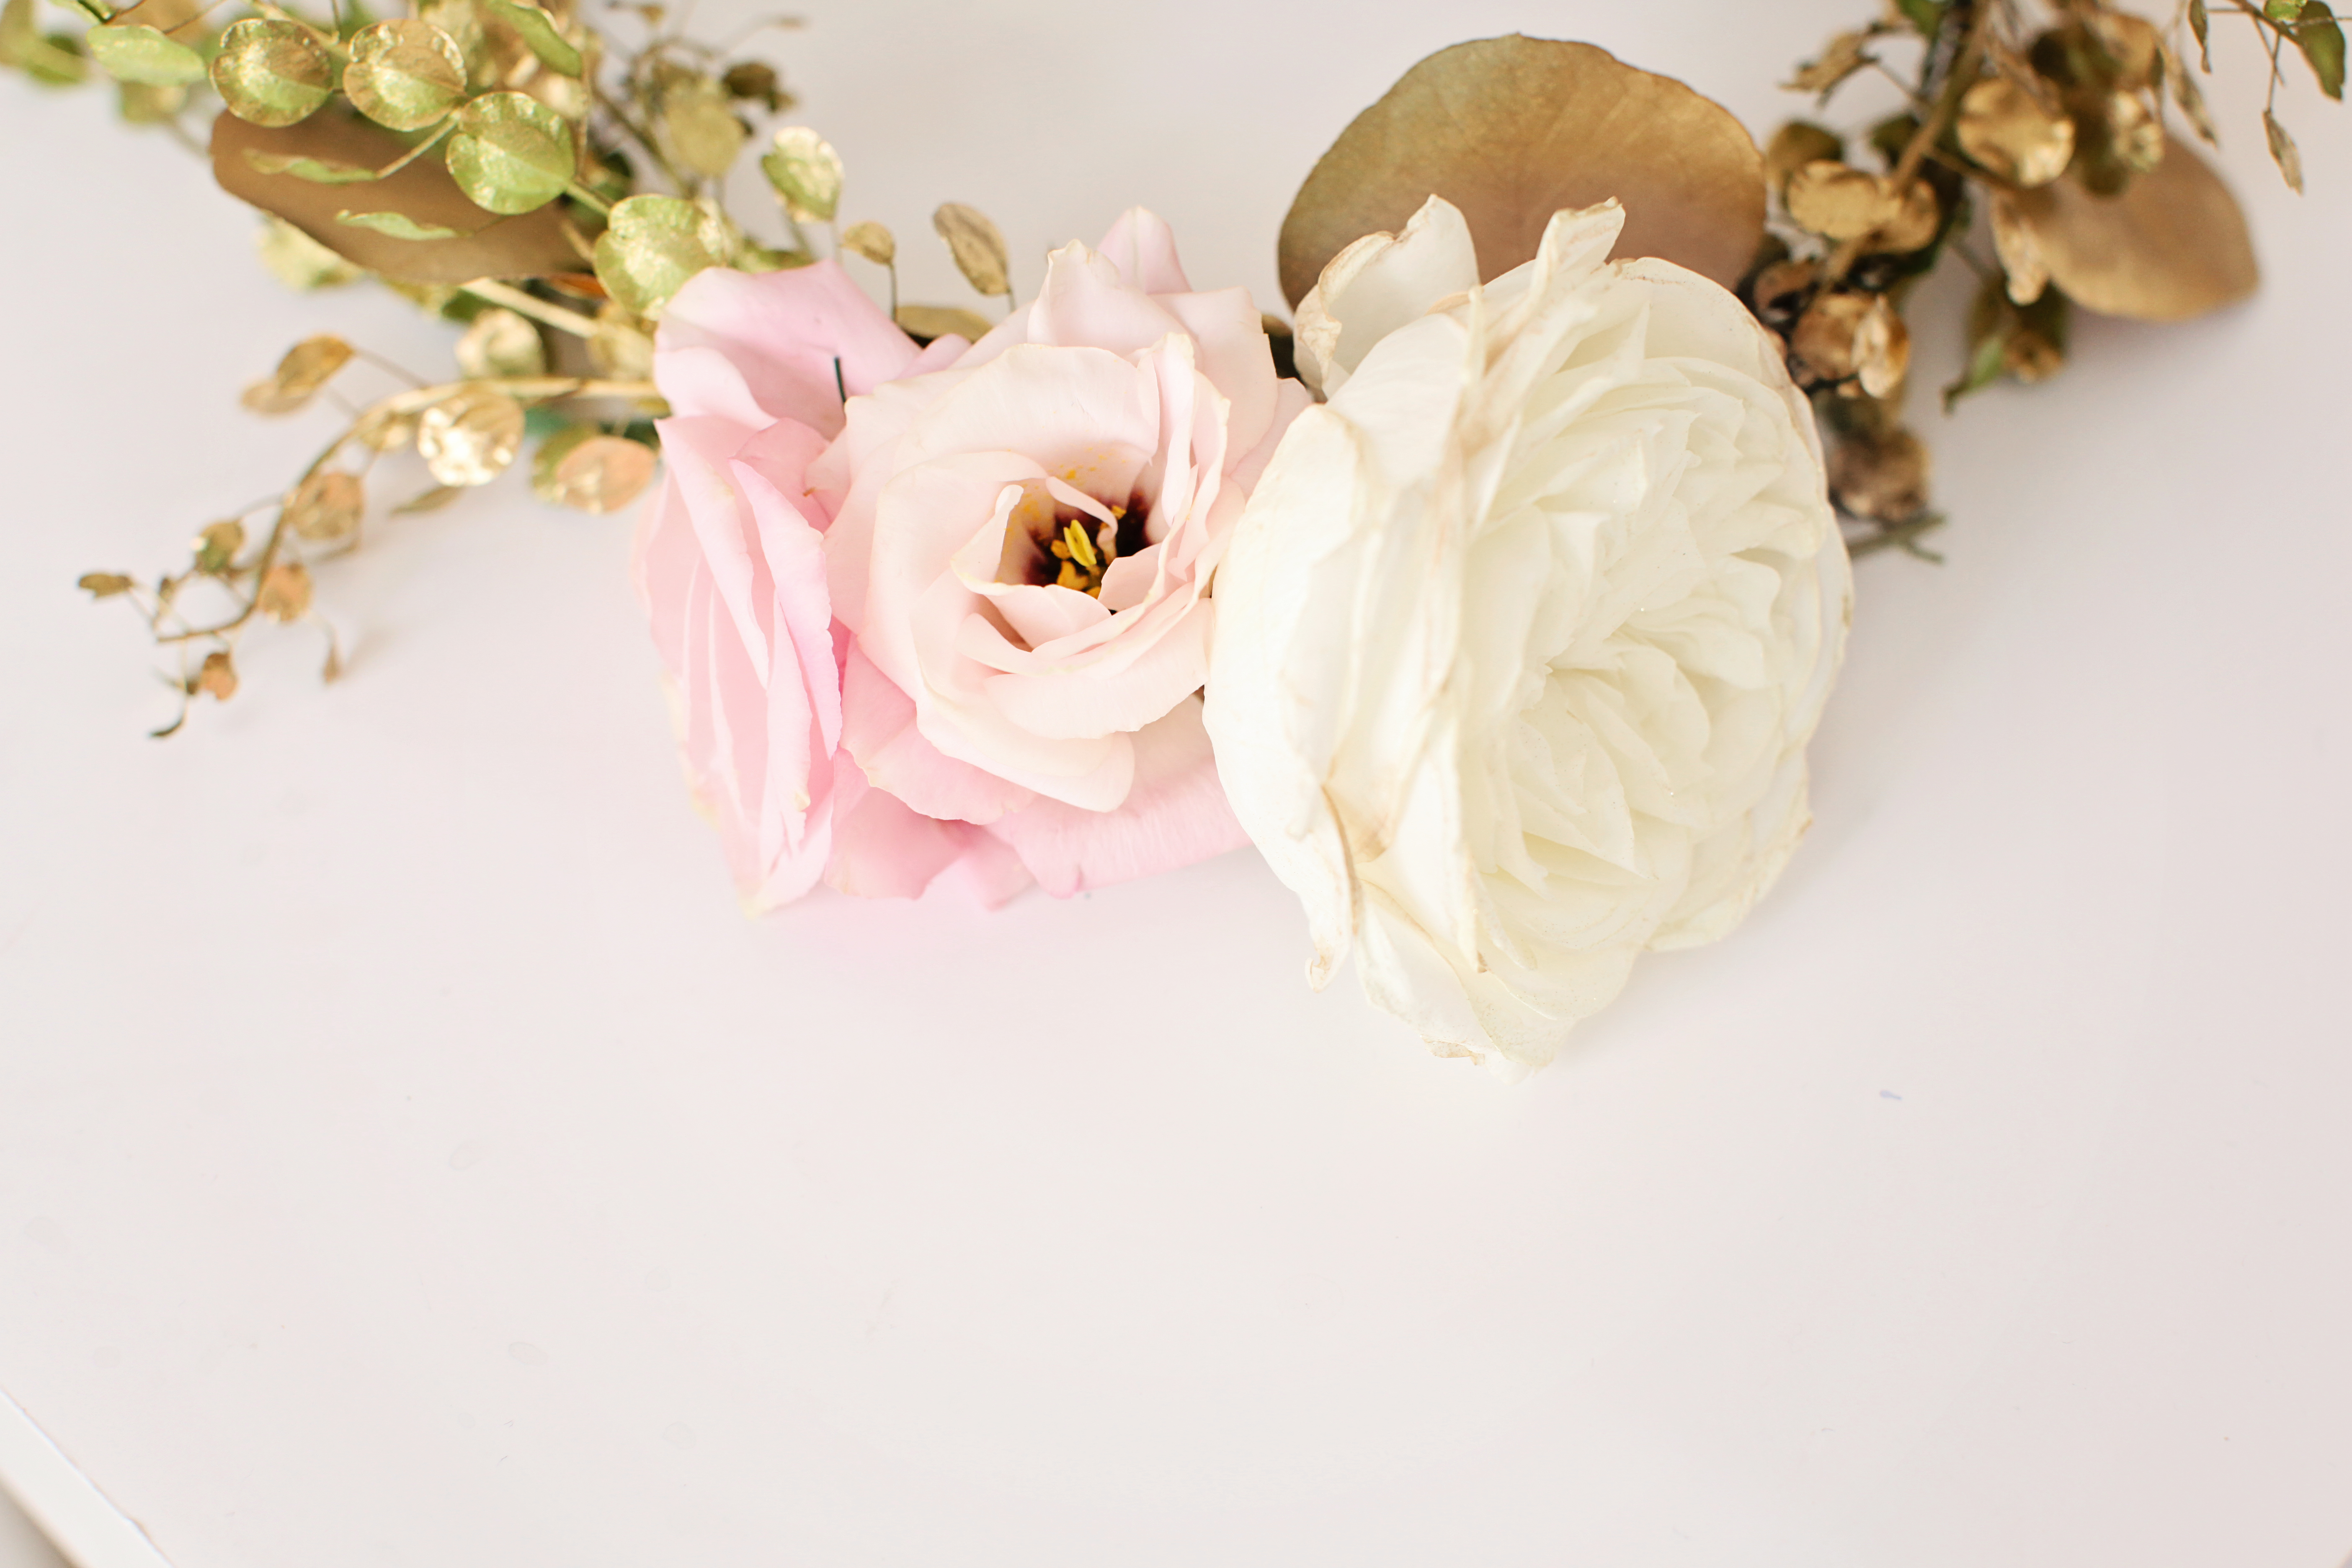
*I used one stem of pink lisianthus (which had two flowers) and a cream garden rose.  For greens I used mini coin as my base and filled in with silver dollar eucalyptus – but the options are limitless, use what inspires you!

Floral Crown Supplies | The Day's Design | Ashley Slater Photography

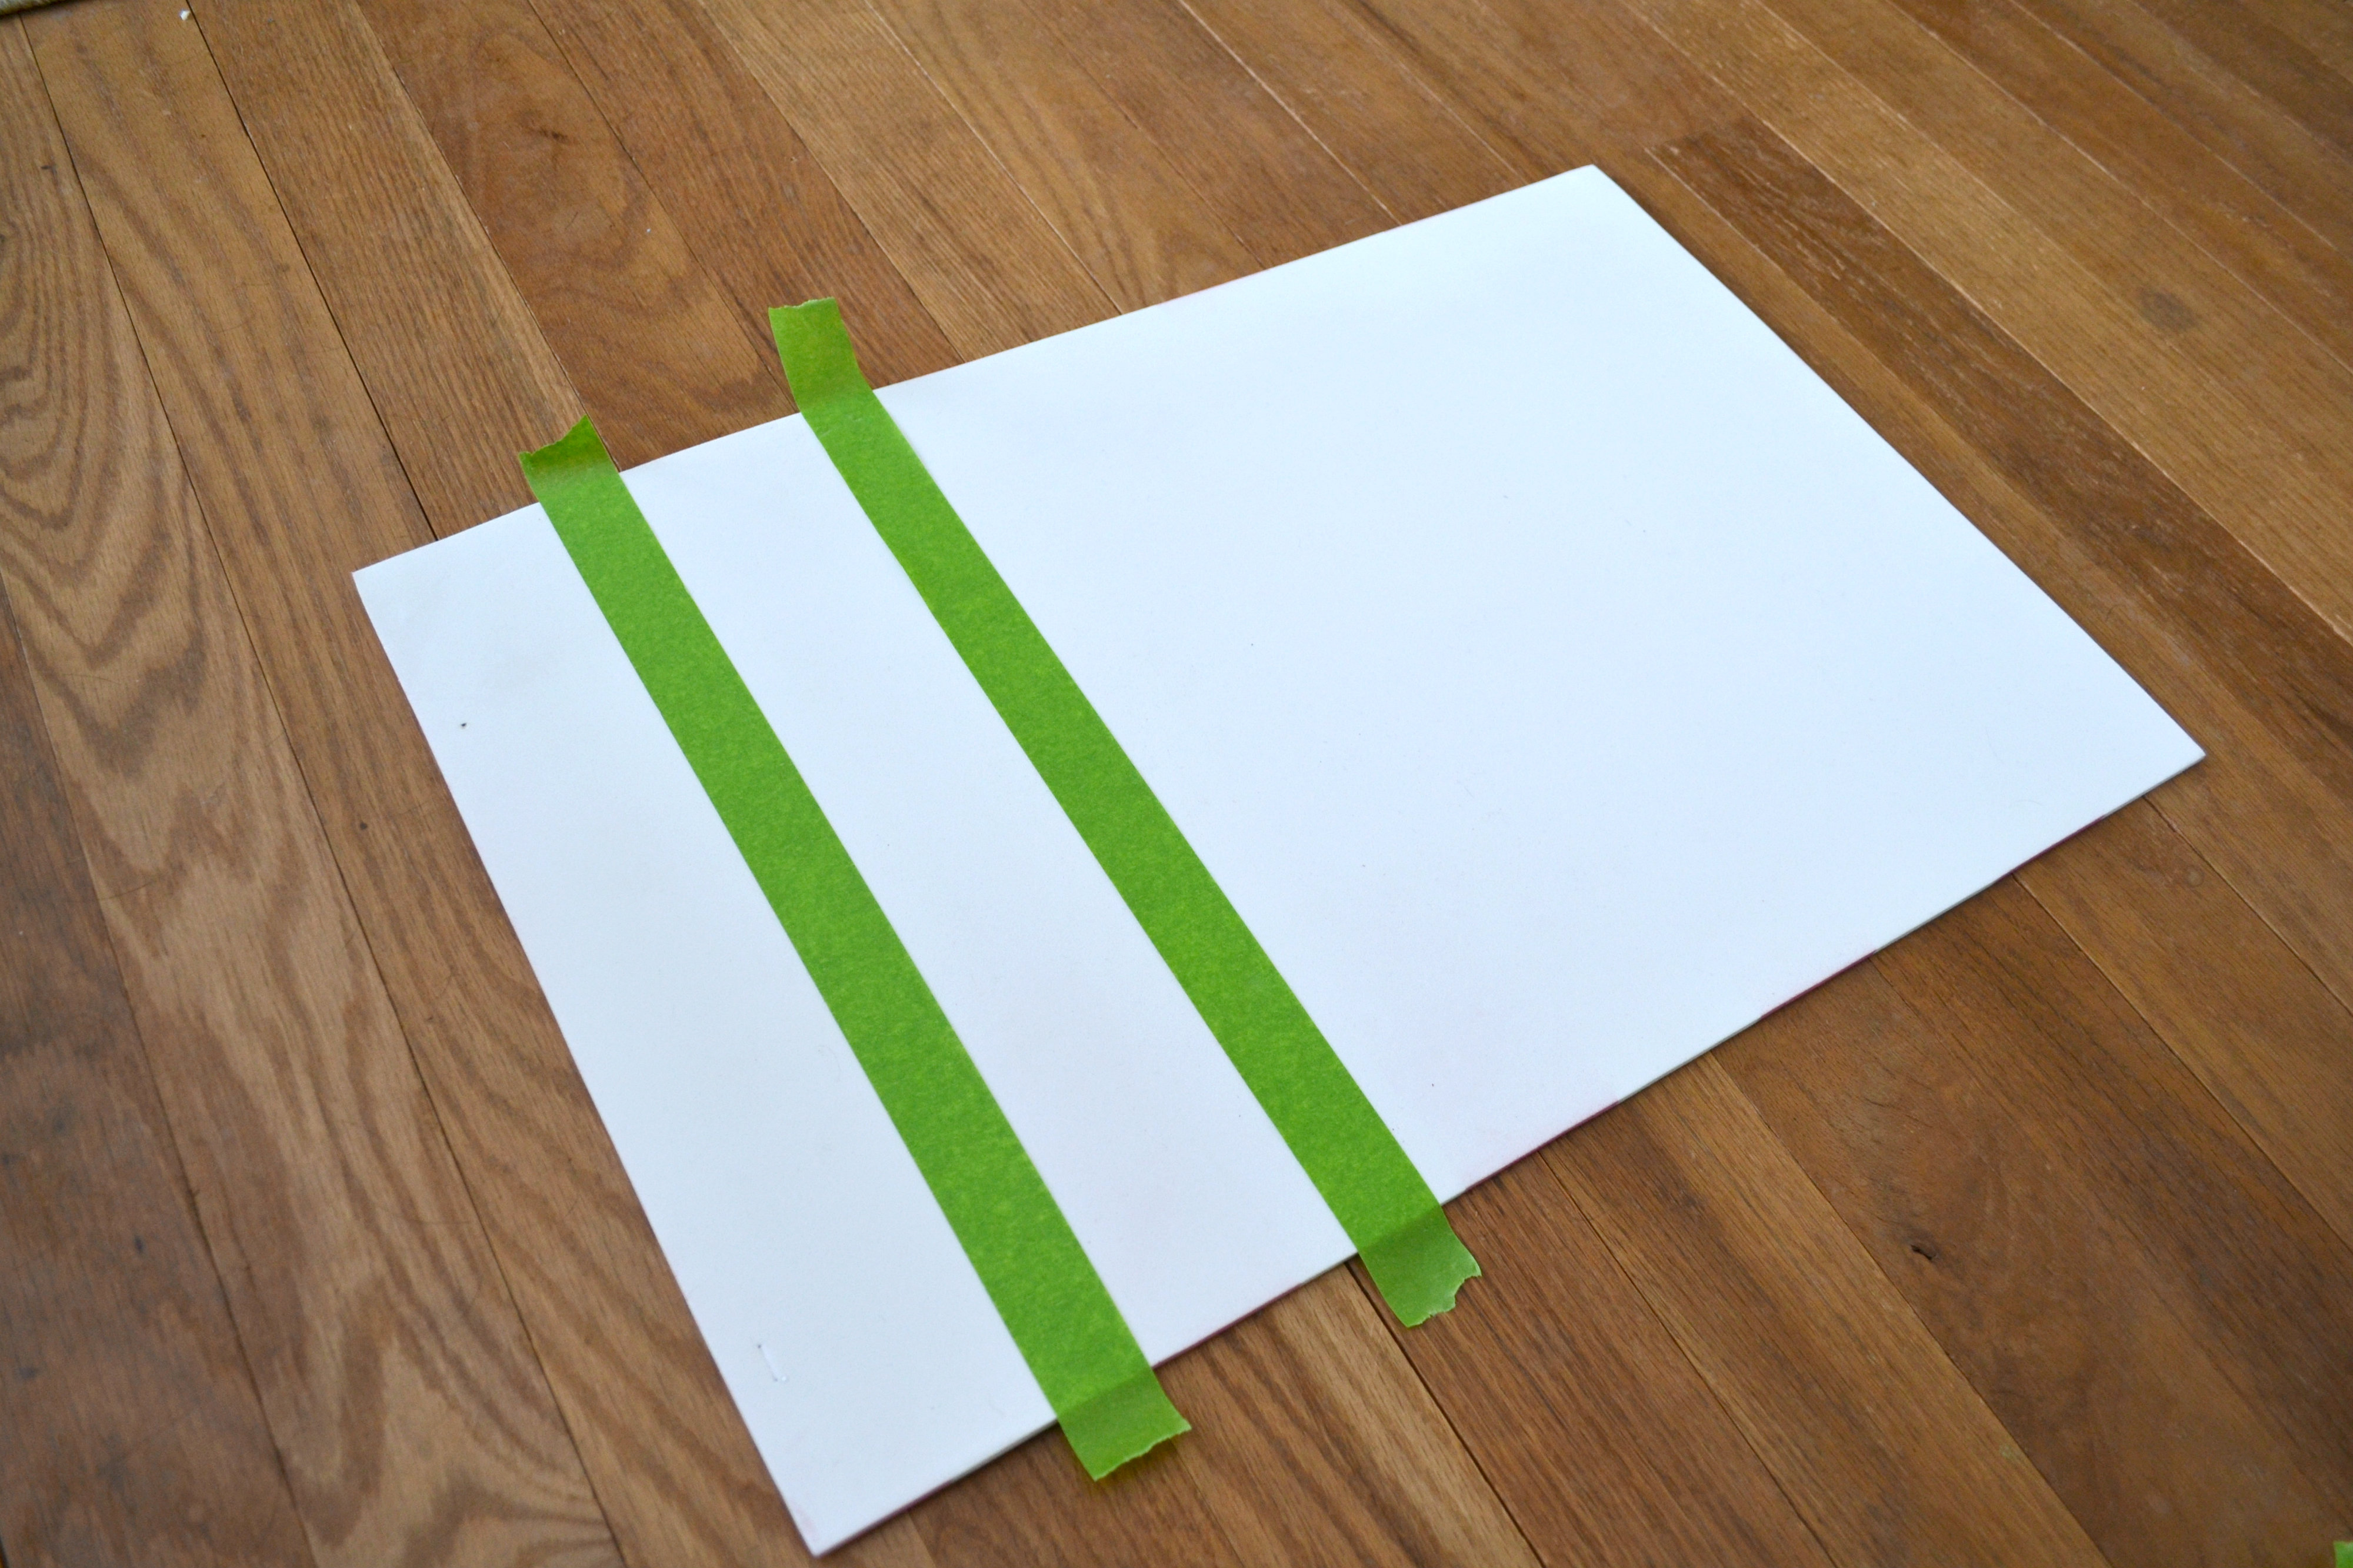
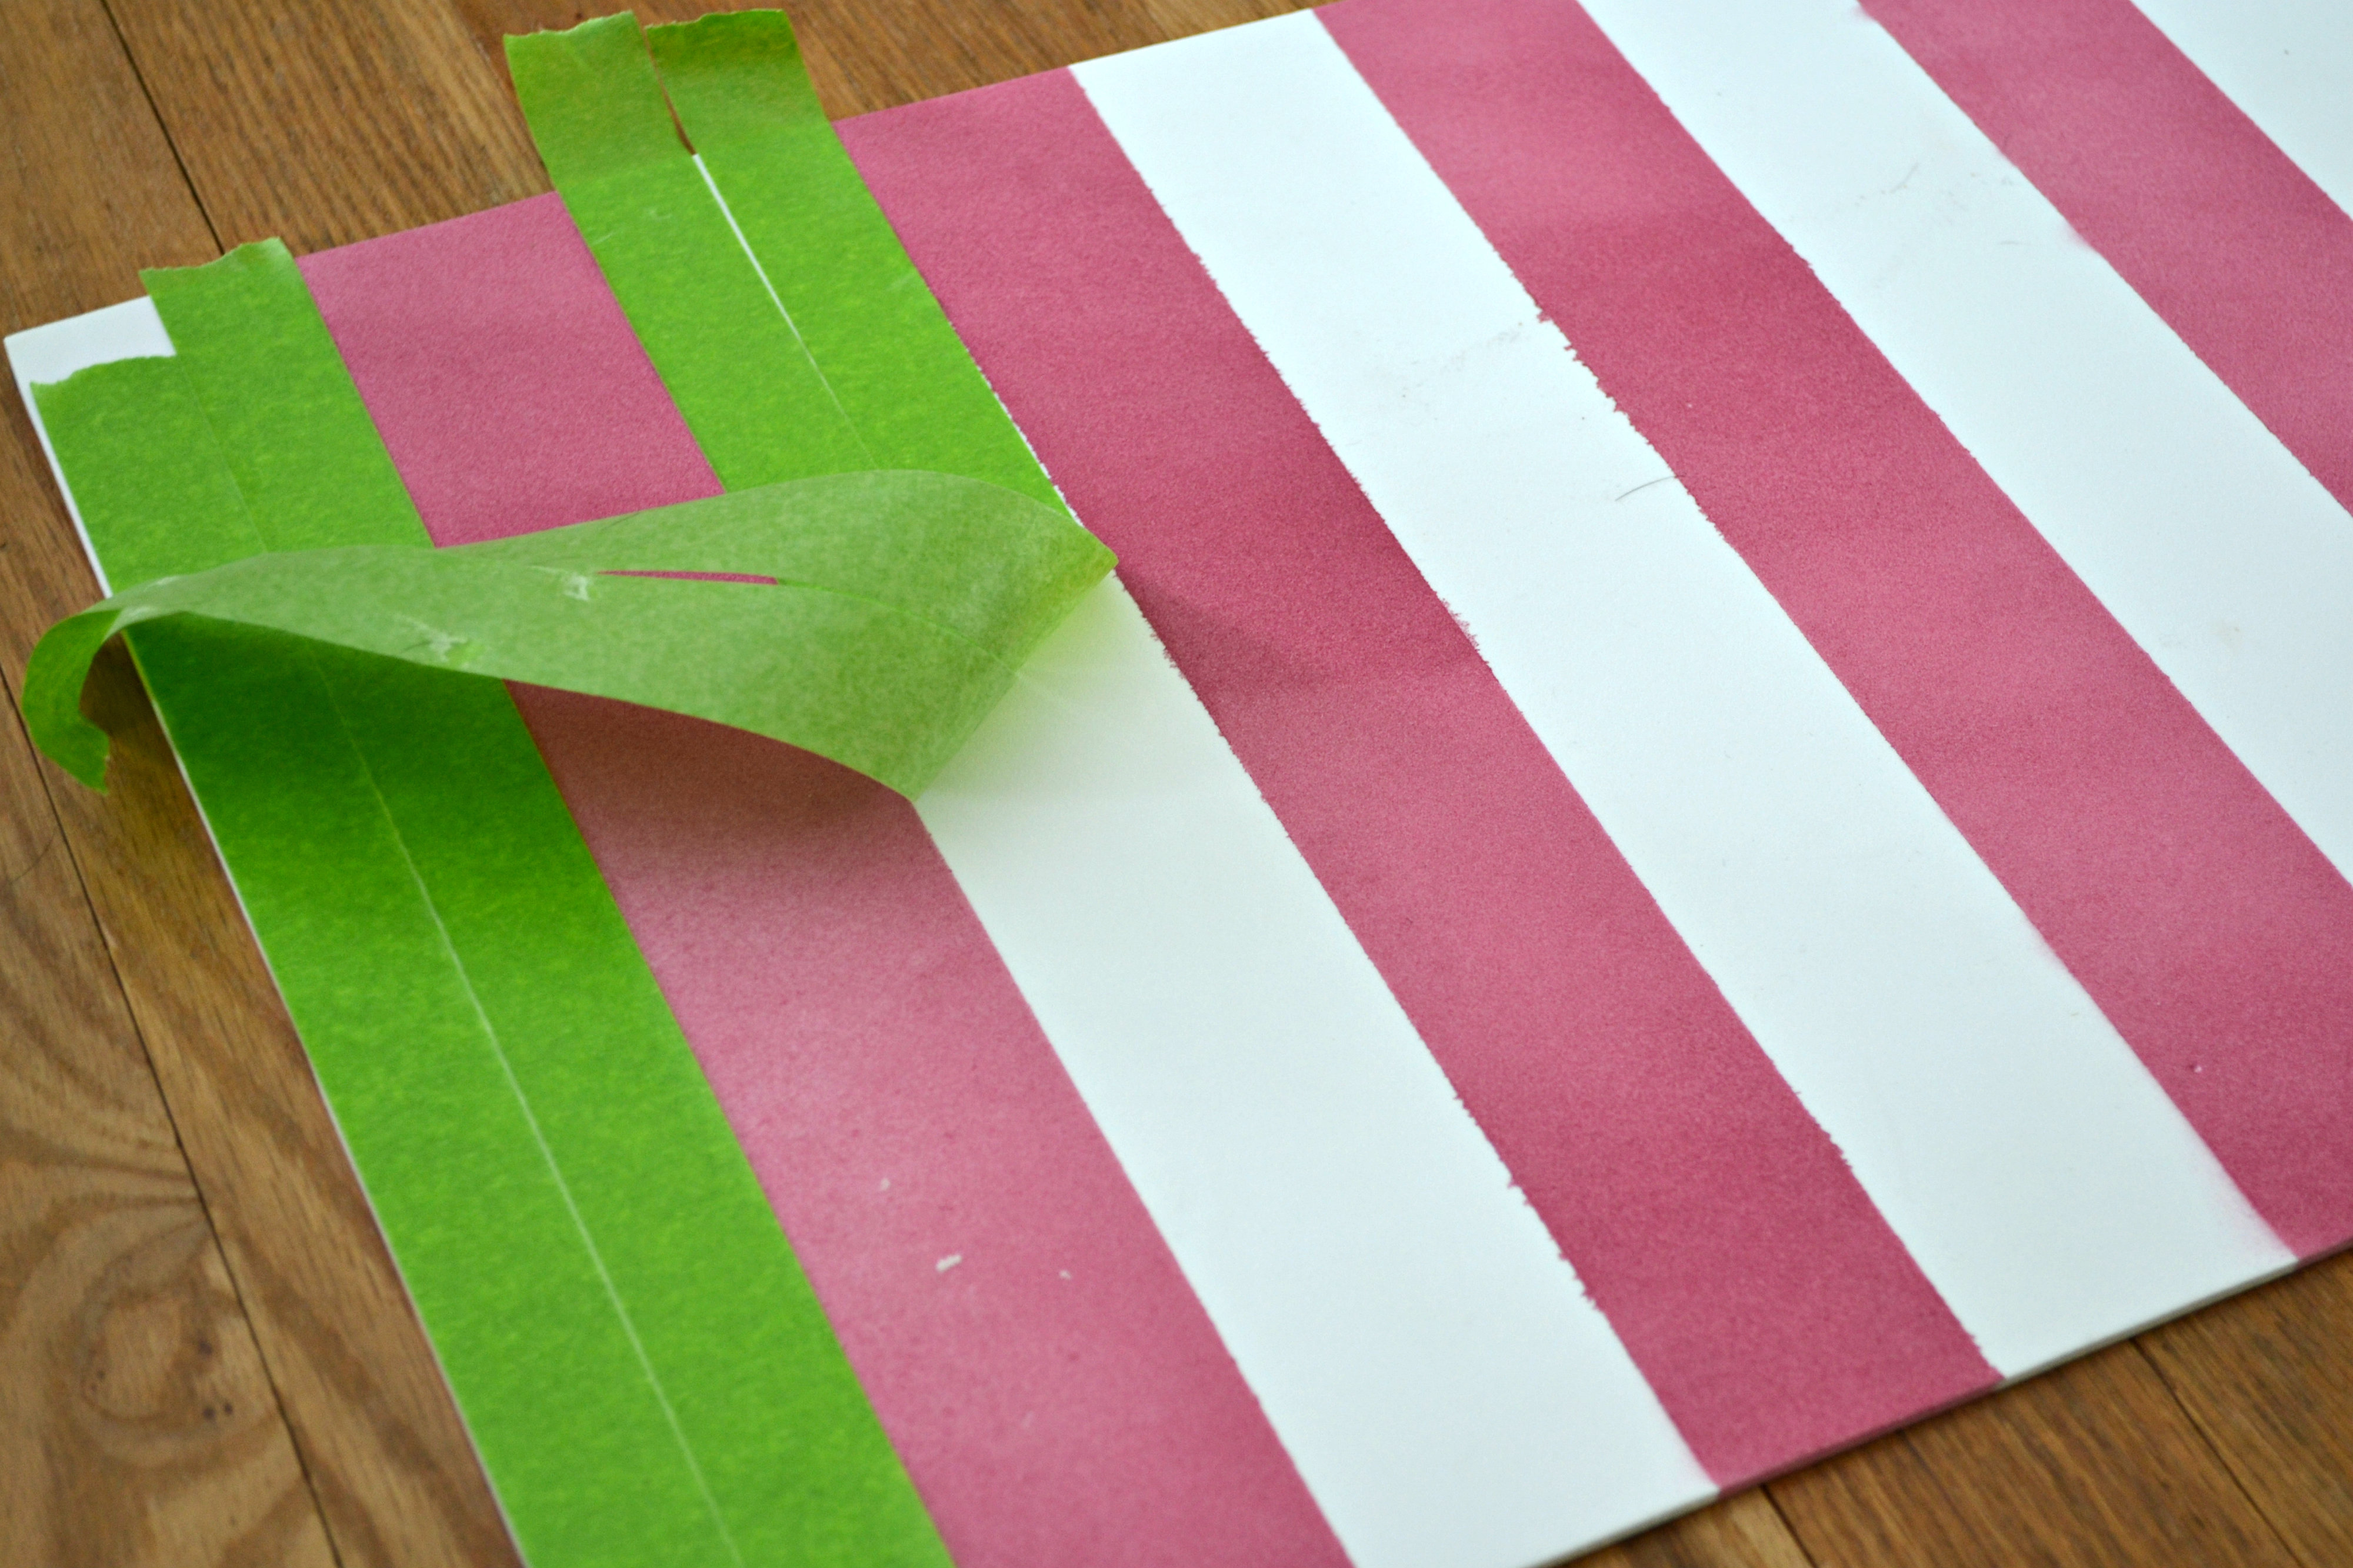
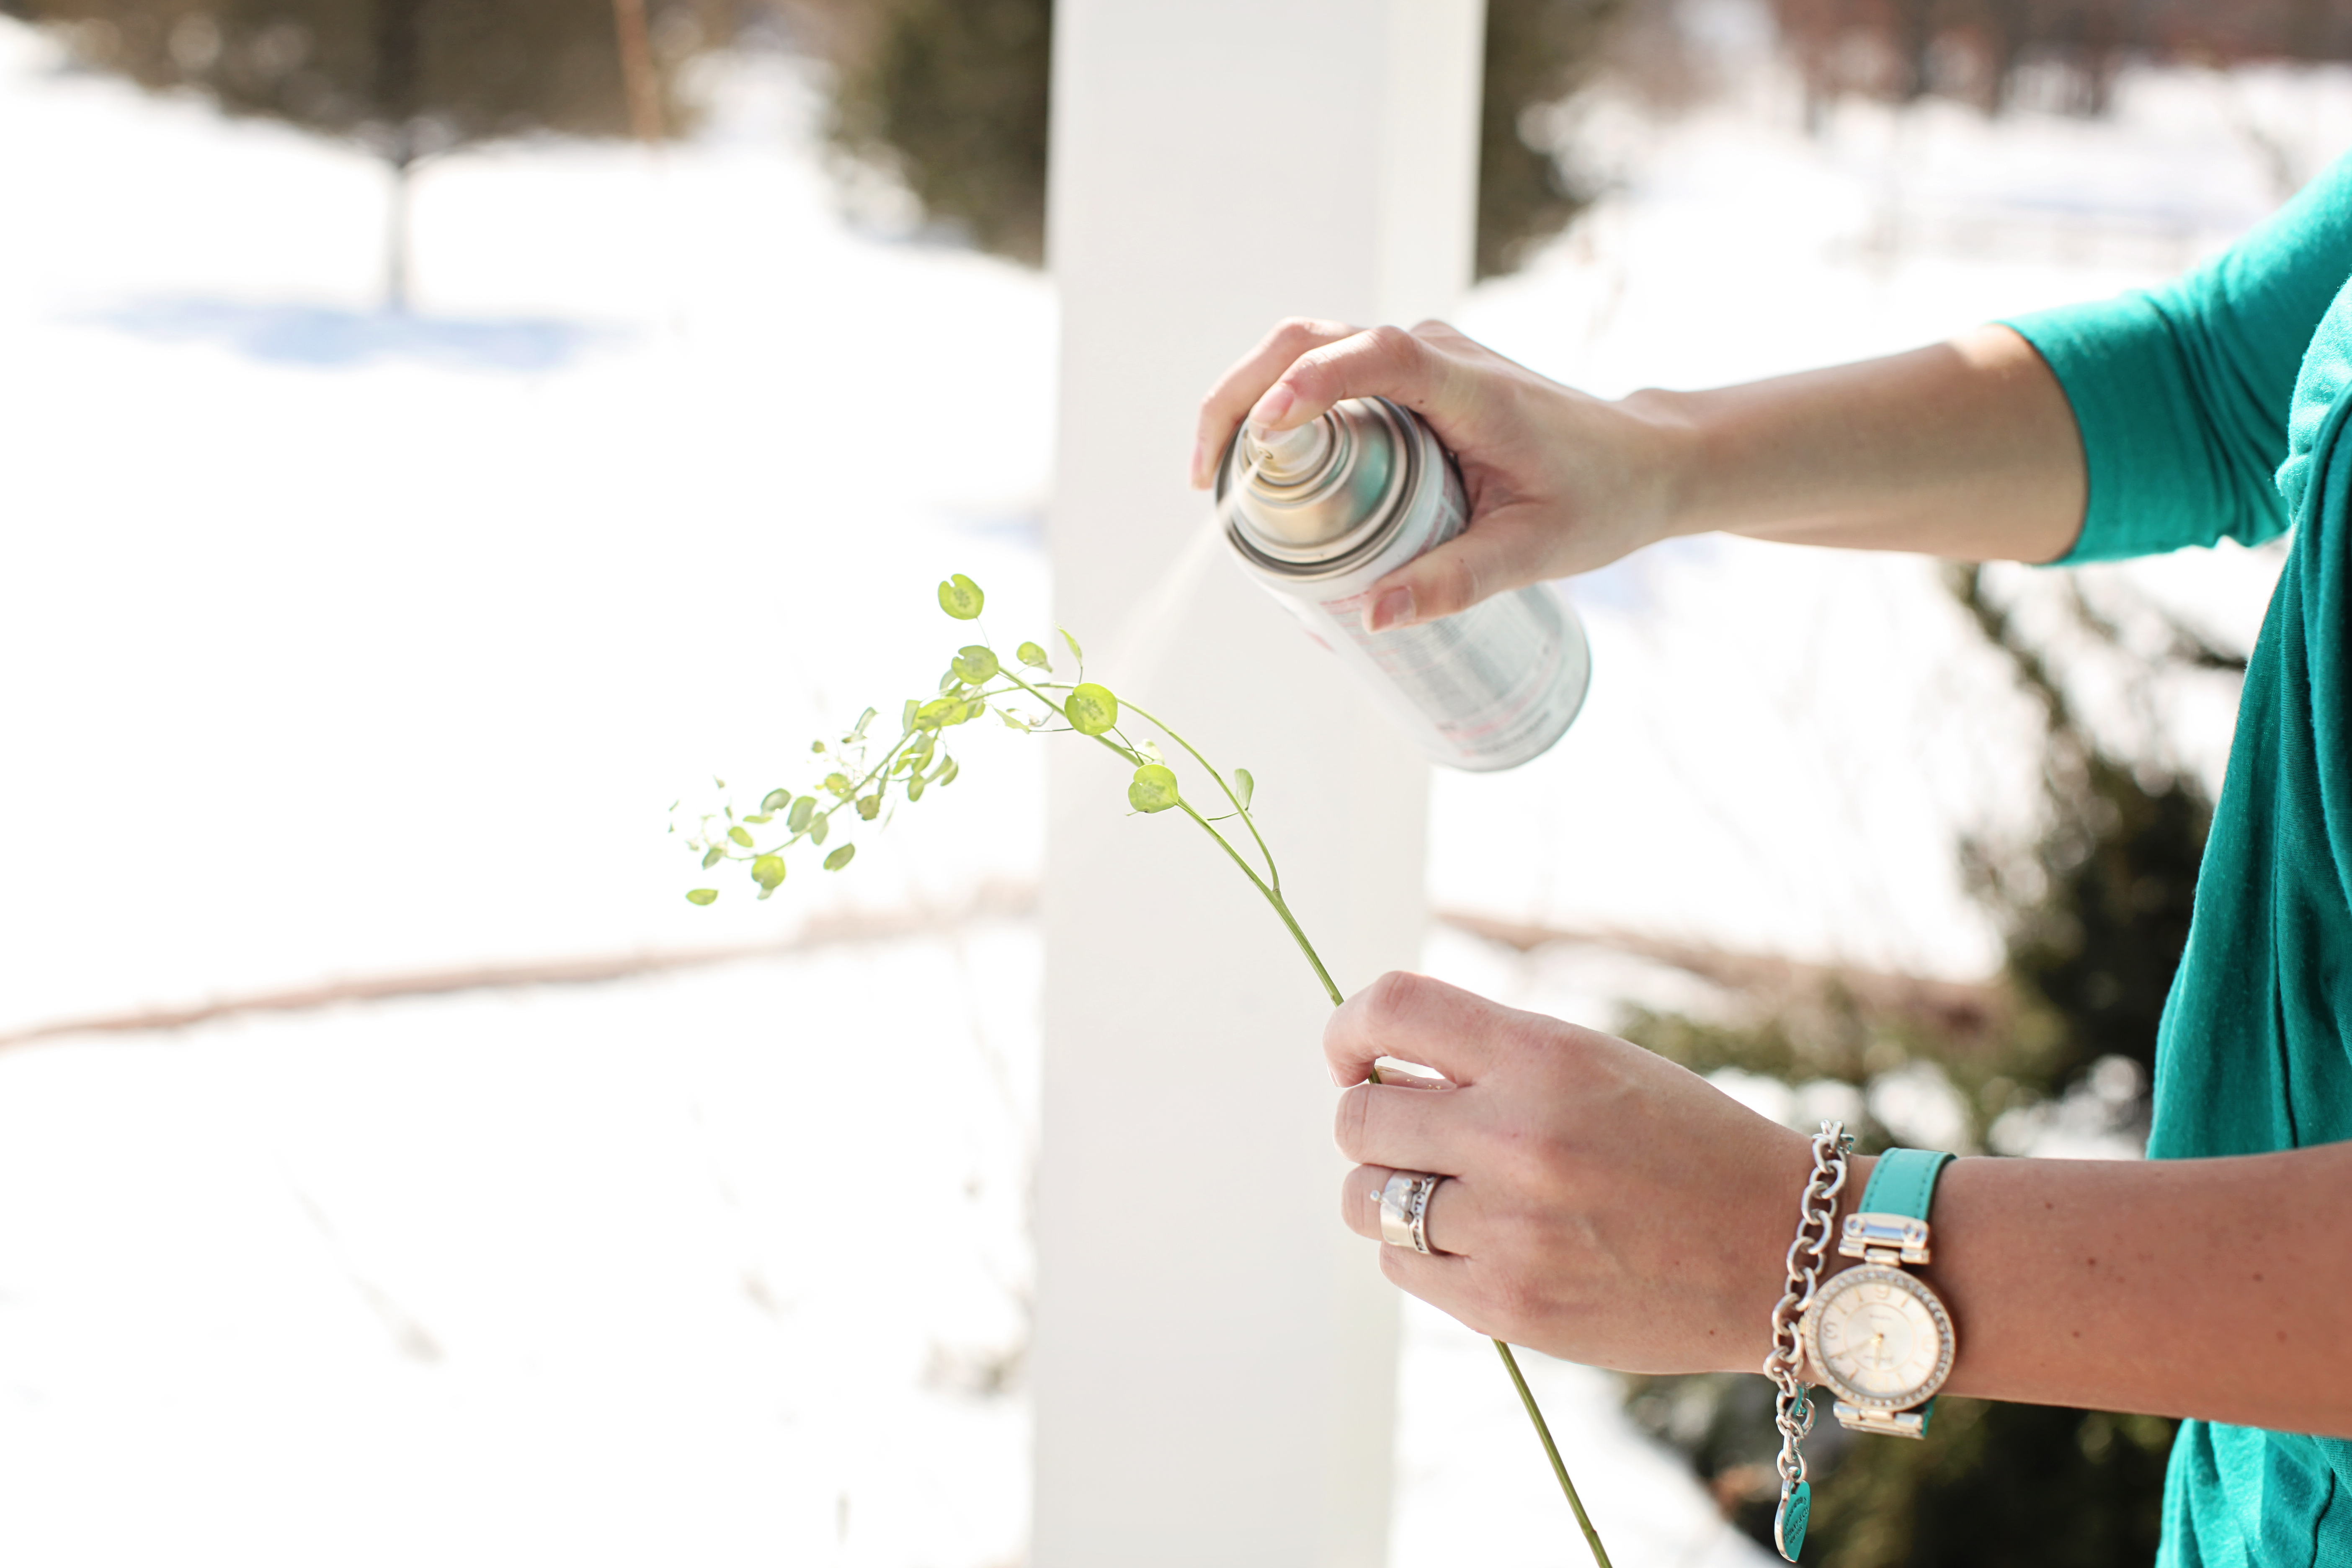
Step 1:  Spray paint your greens.  You can completely coat them or let a little green show.  I like to leave a little nature shining through.

Gold Gilded Floral Crown | The Day's Design | Ashley Slater Photography

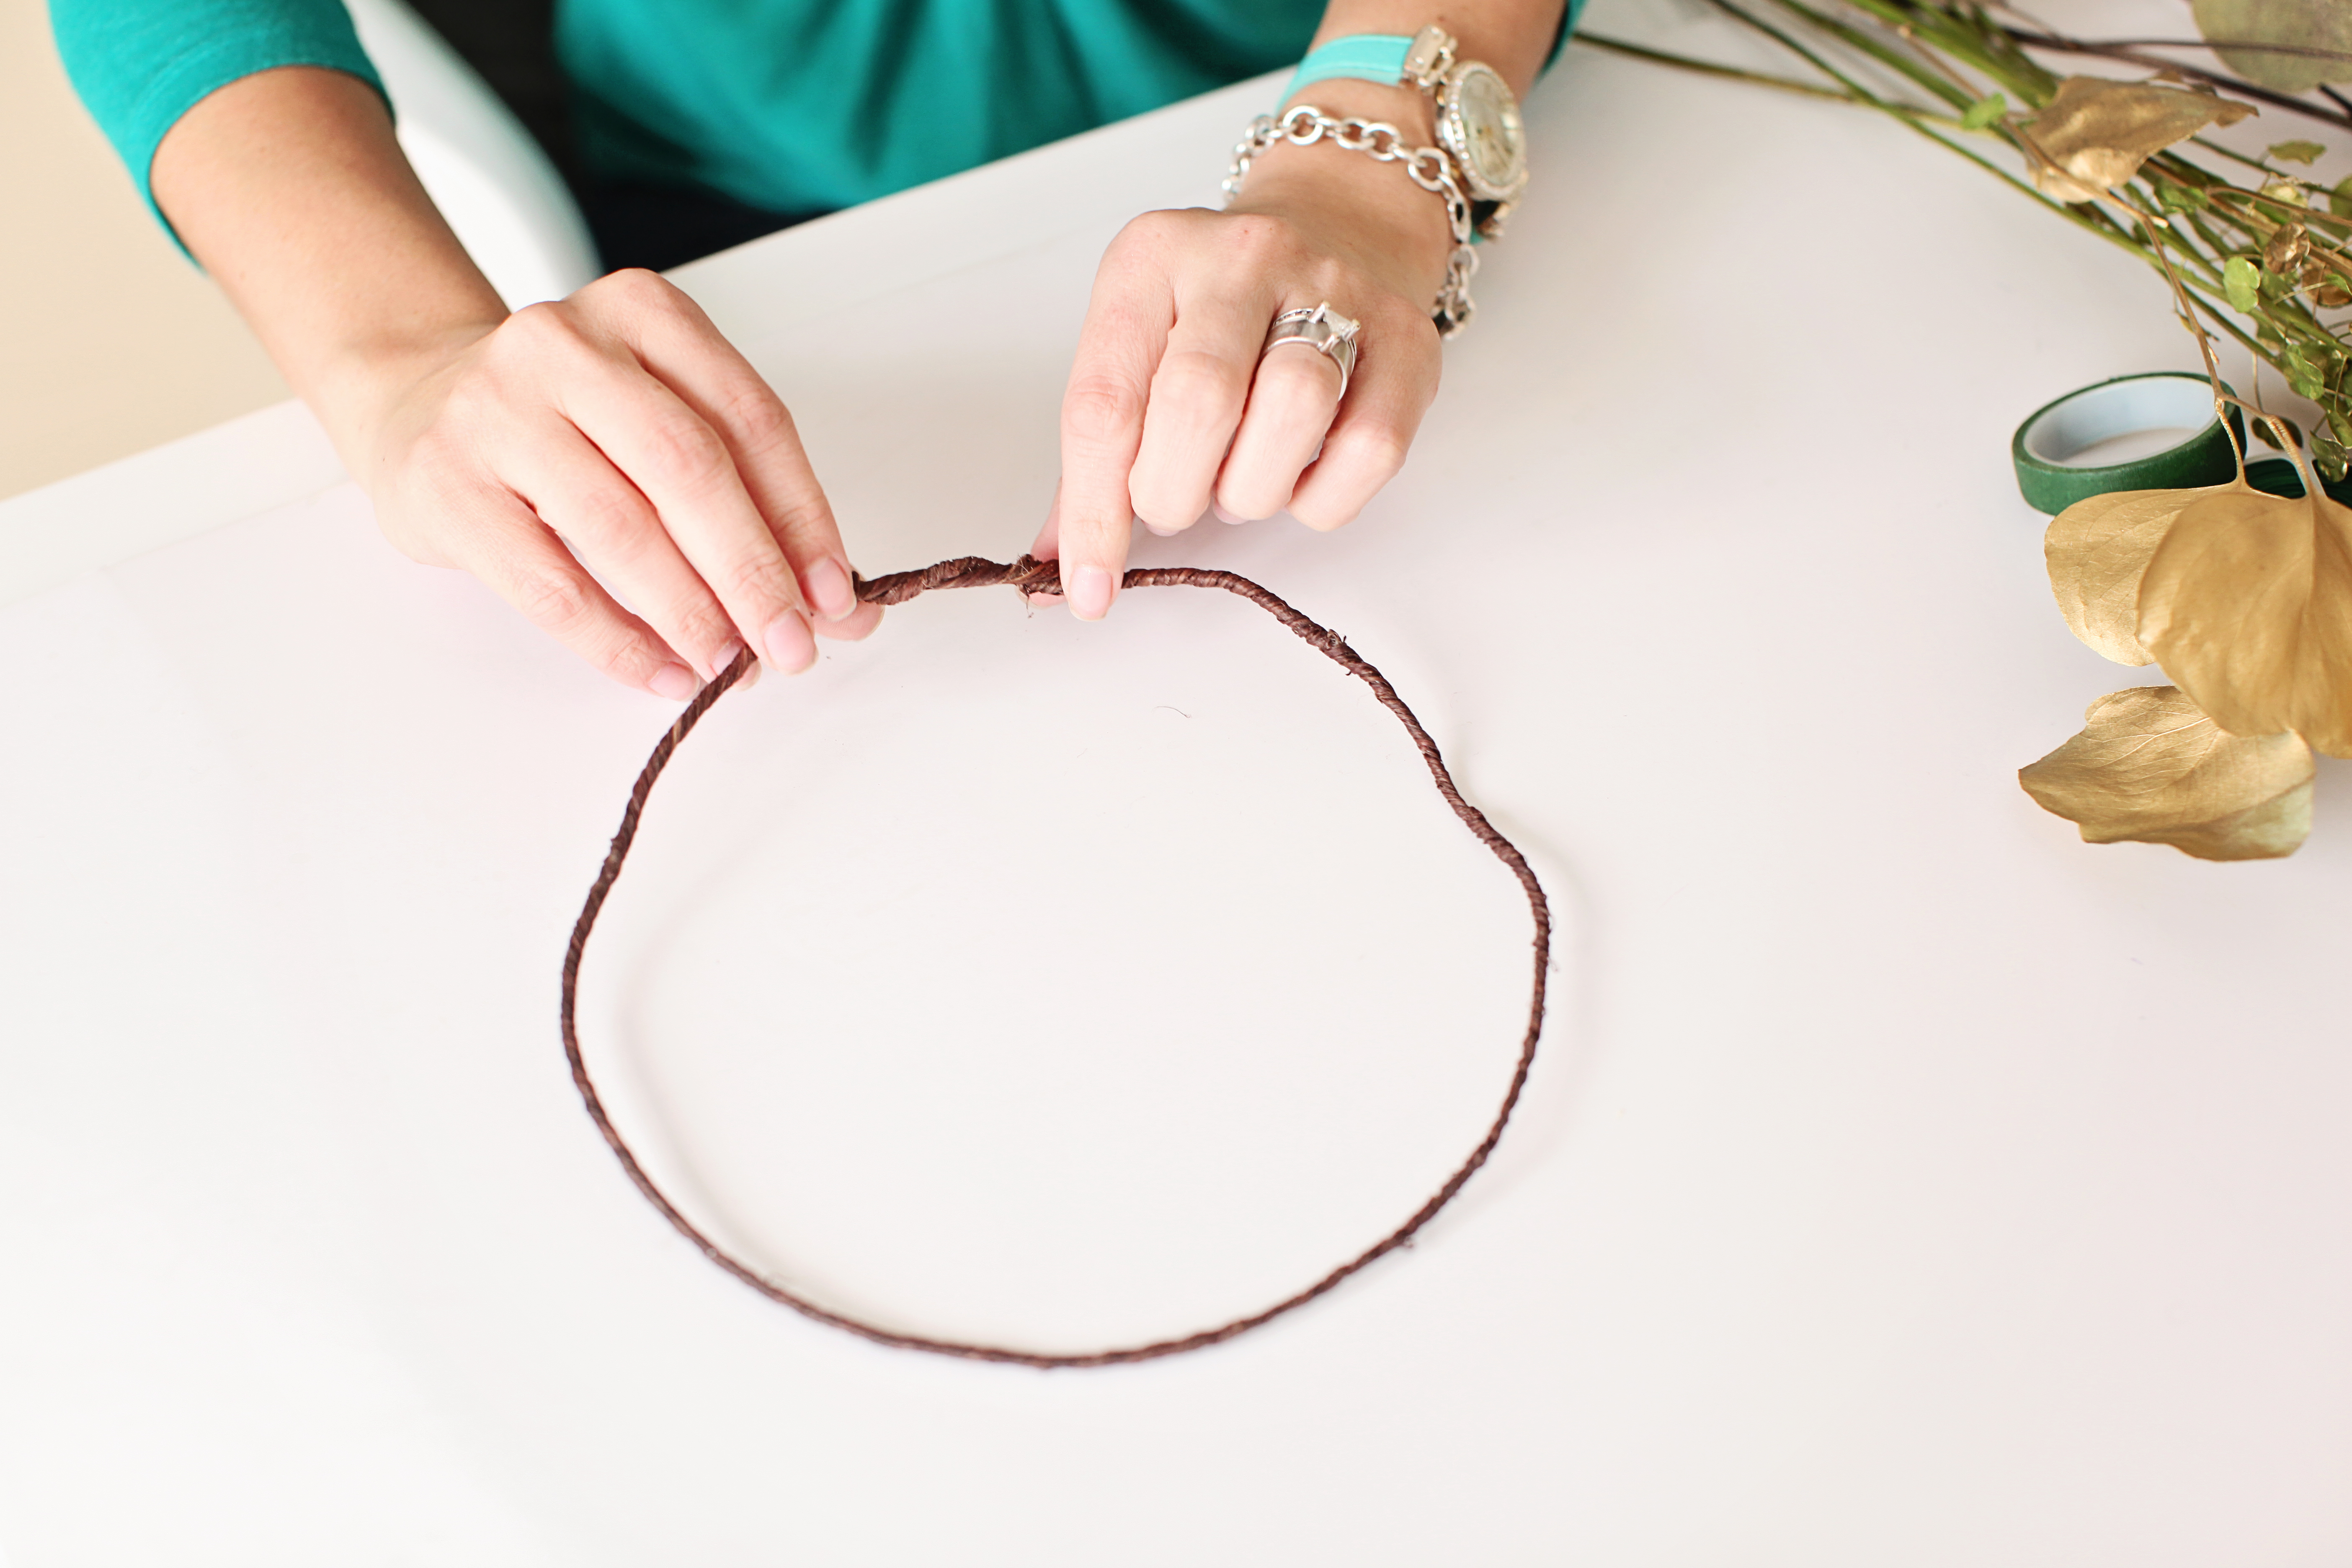
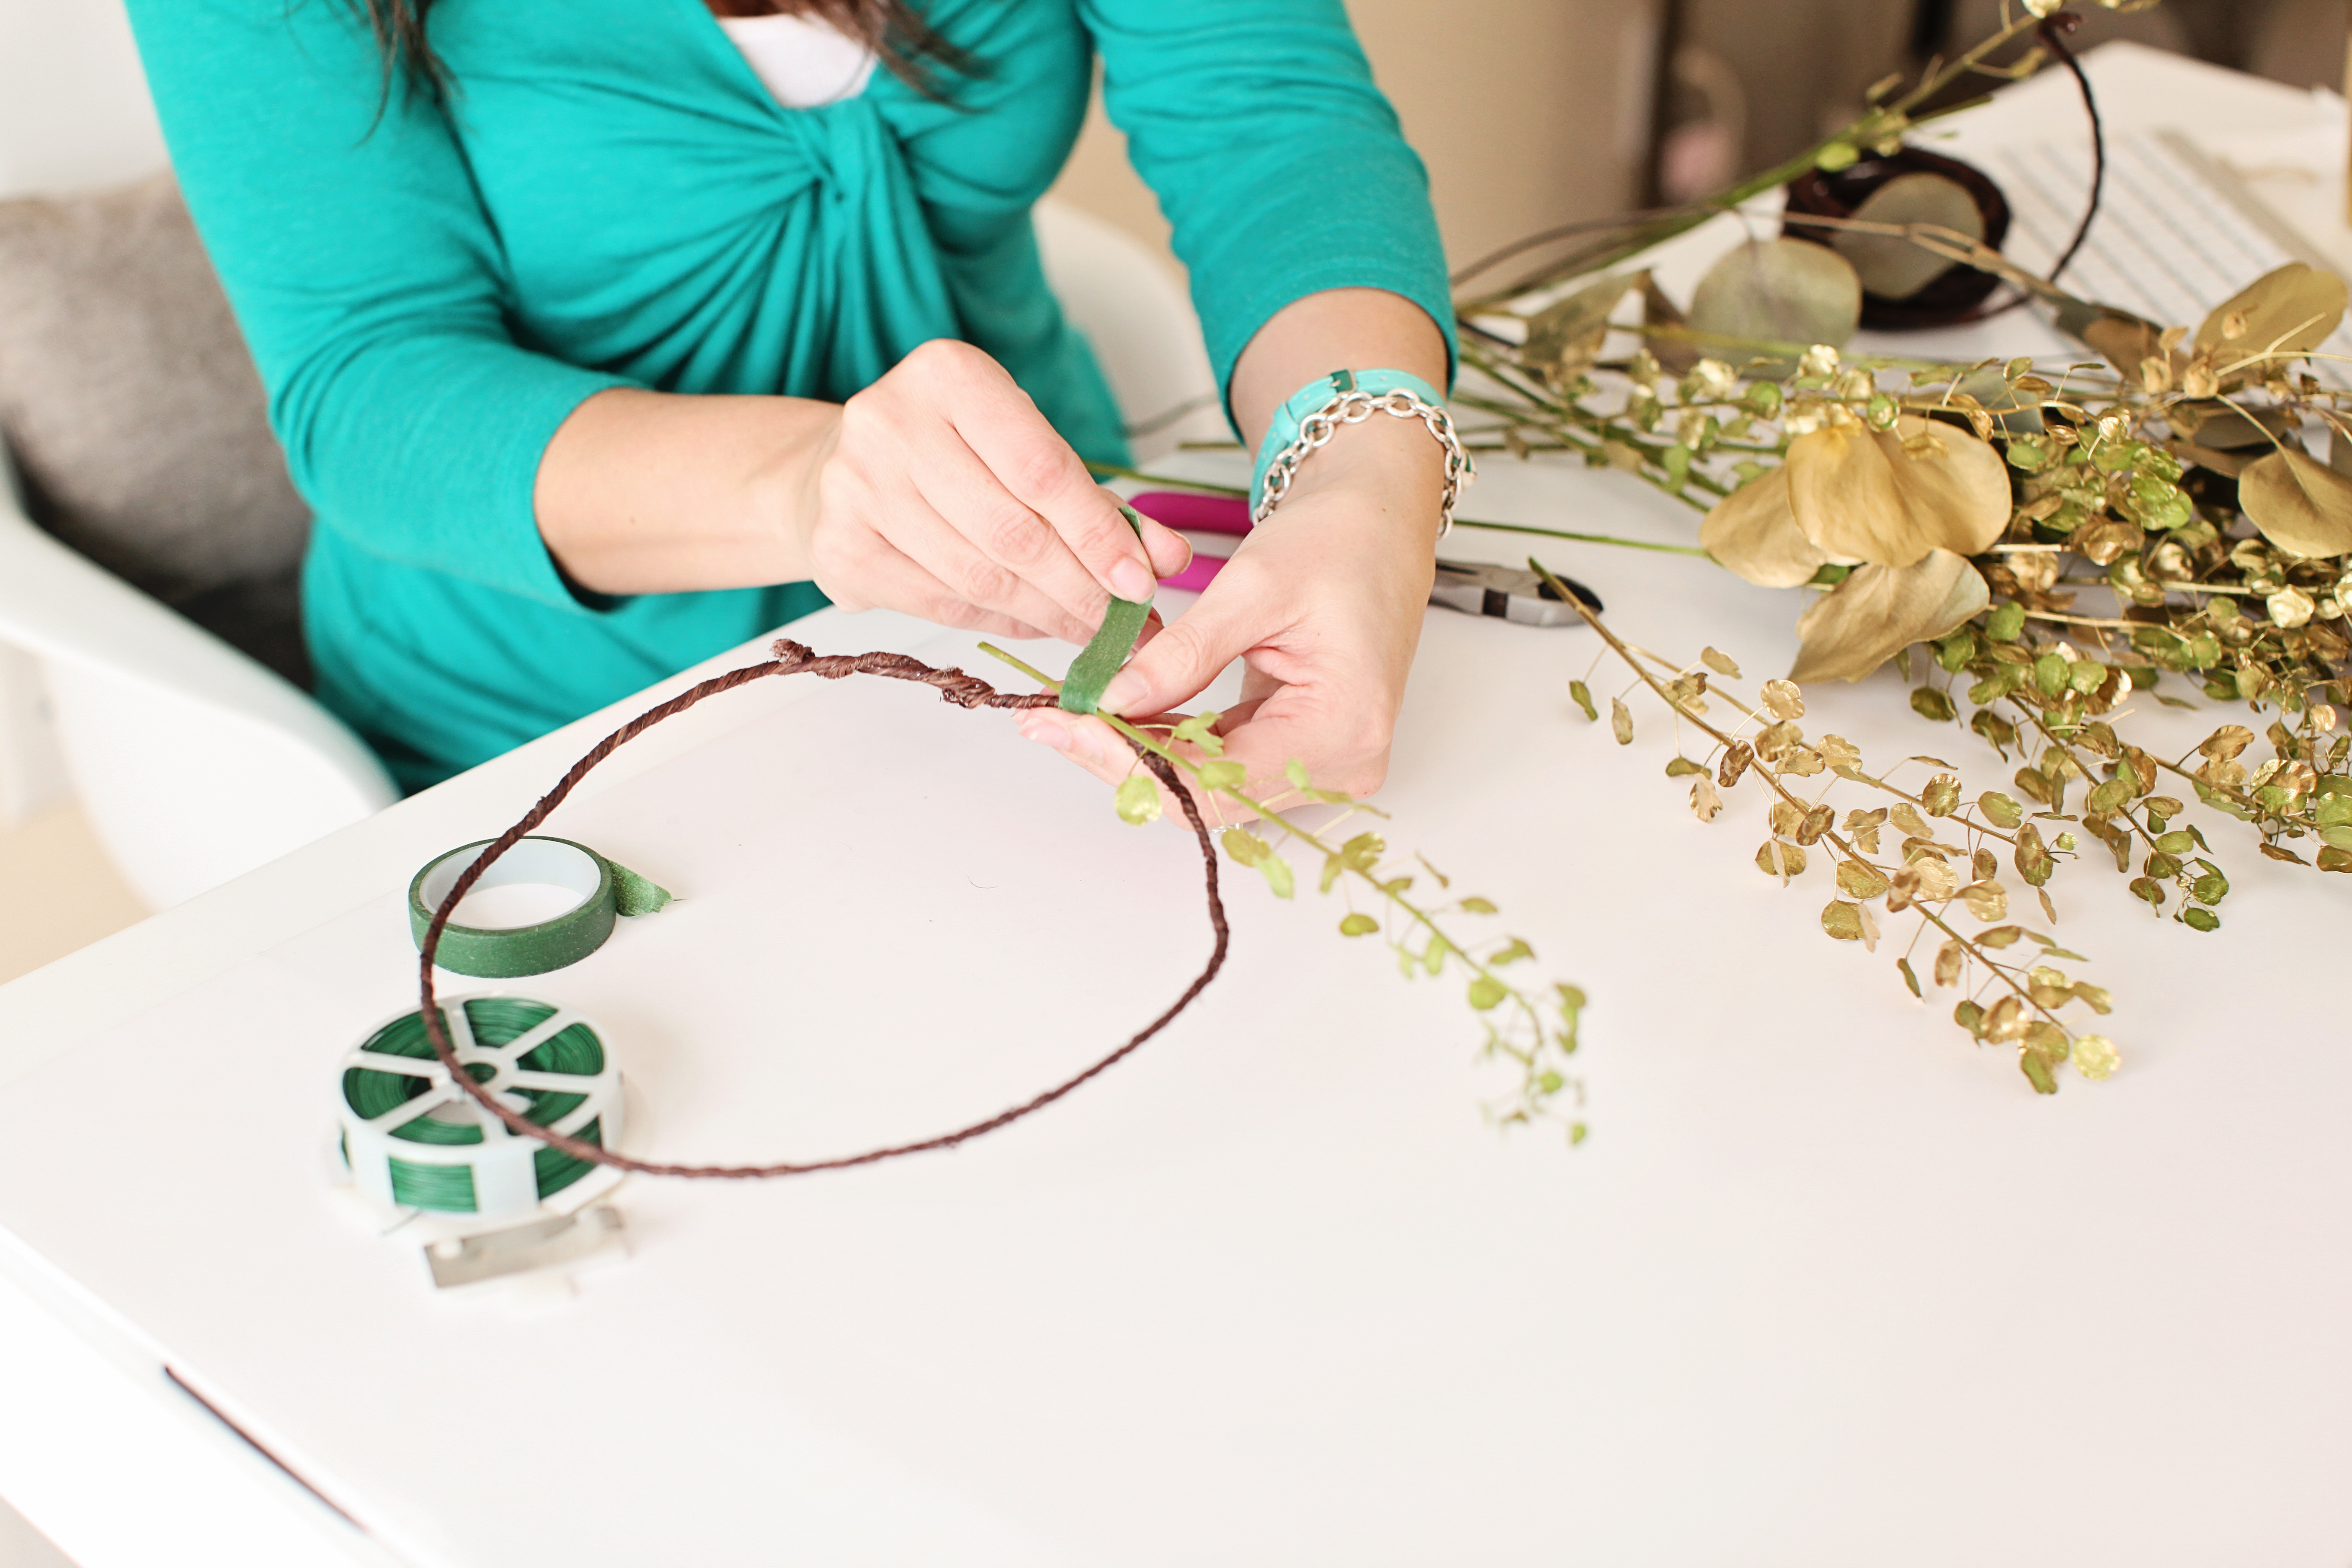
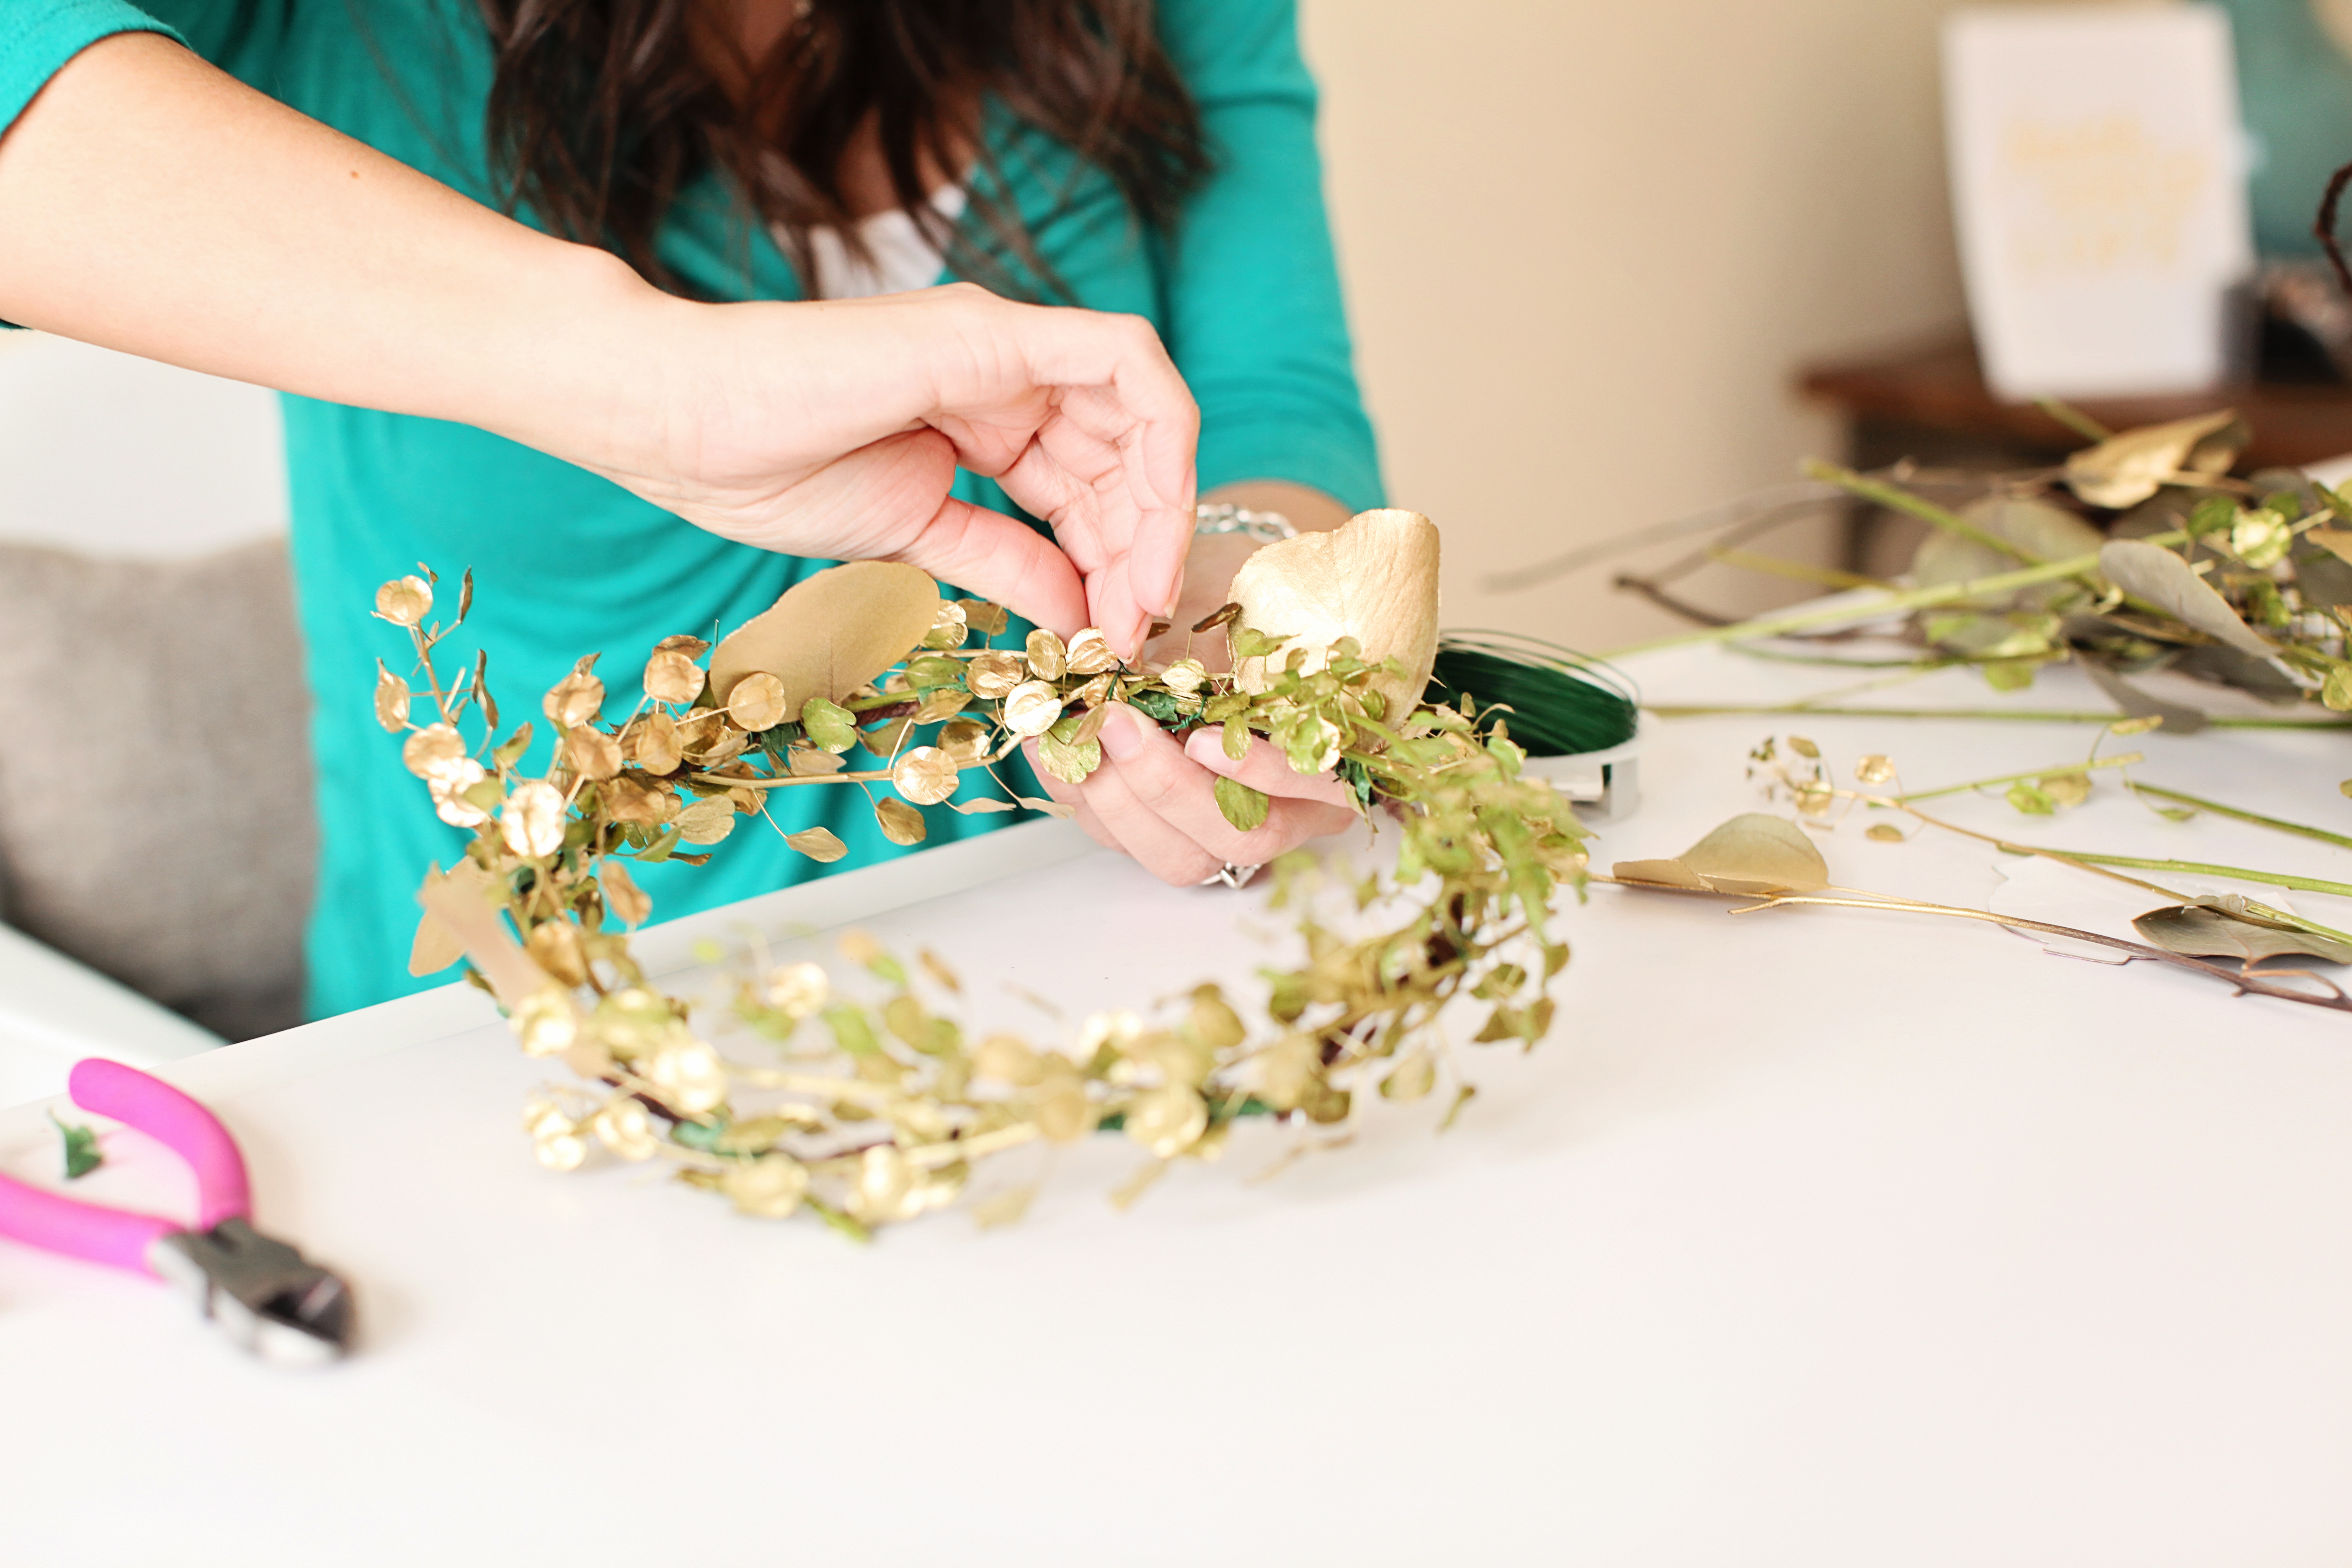
Step 2:   Form a circular base with the grapevine wire.  The form should be slightly larger than your head as once the greens are attached the fit will be more snug.

Floral Crown DIY | The Day's Design | Ashley Slater Photography

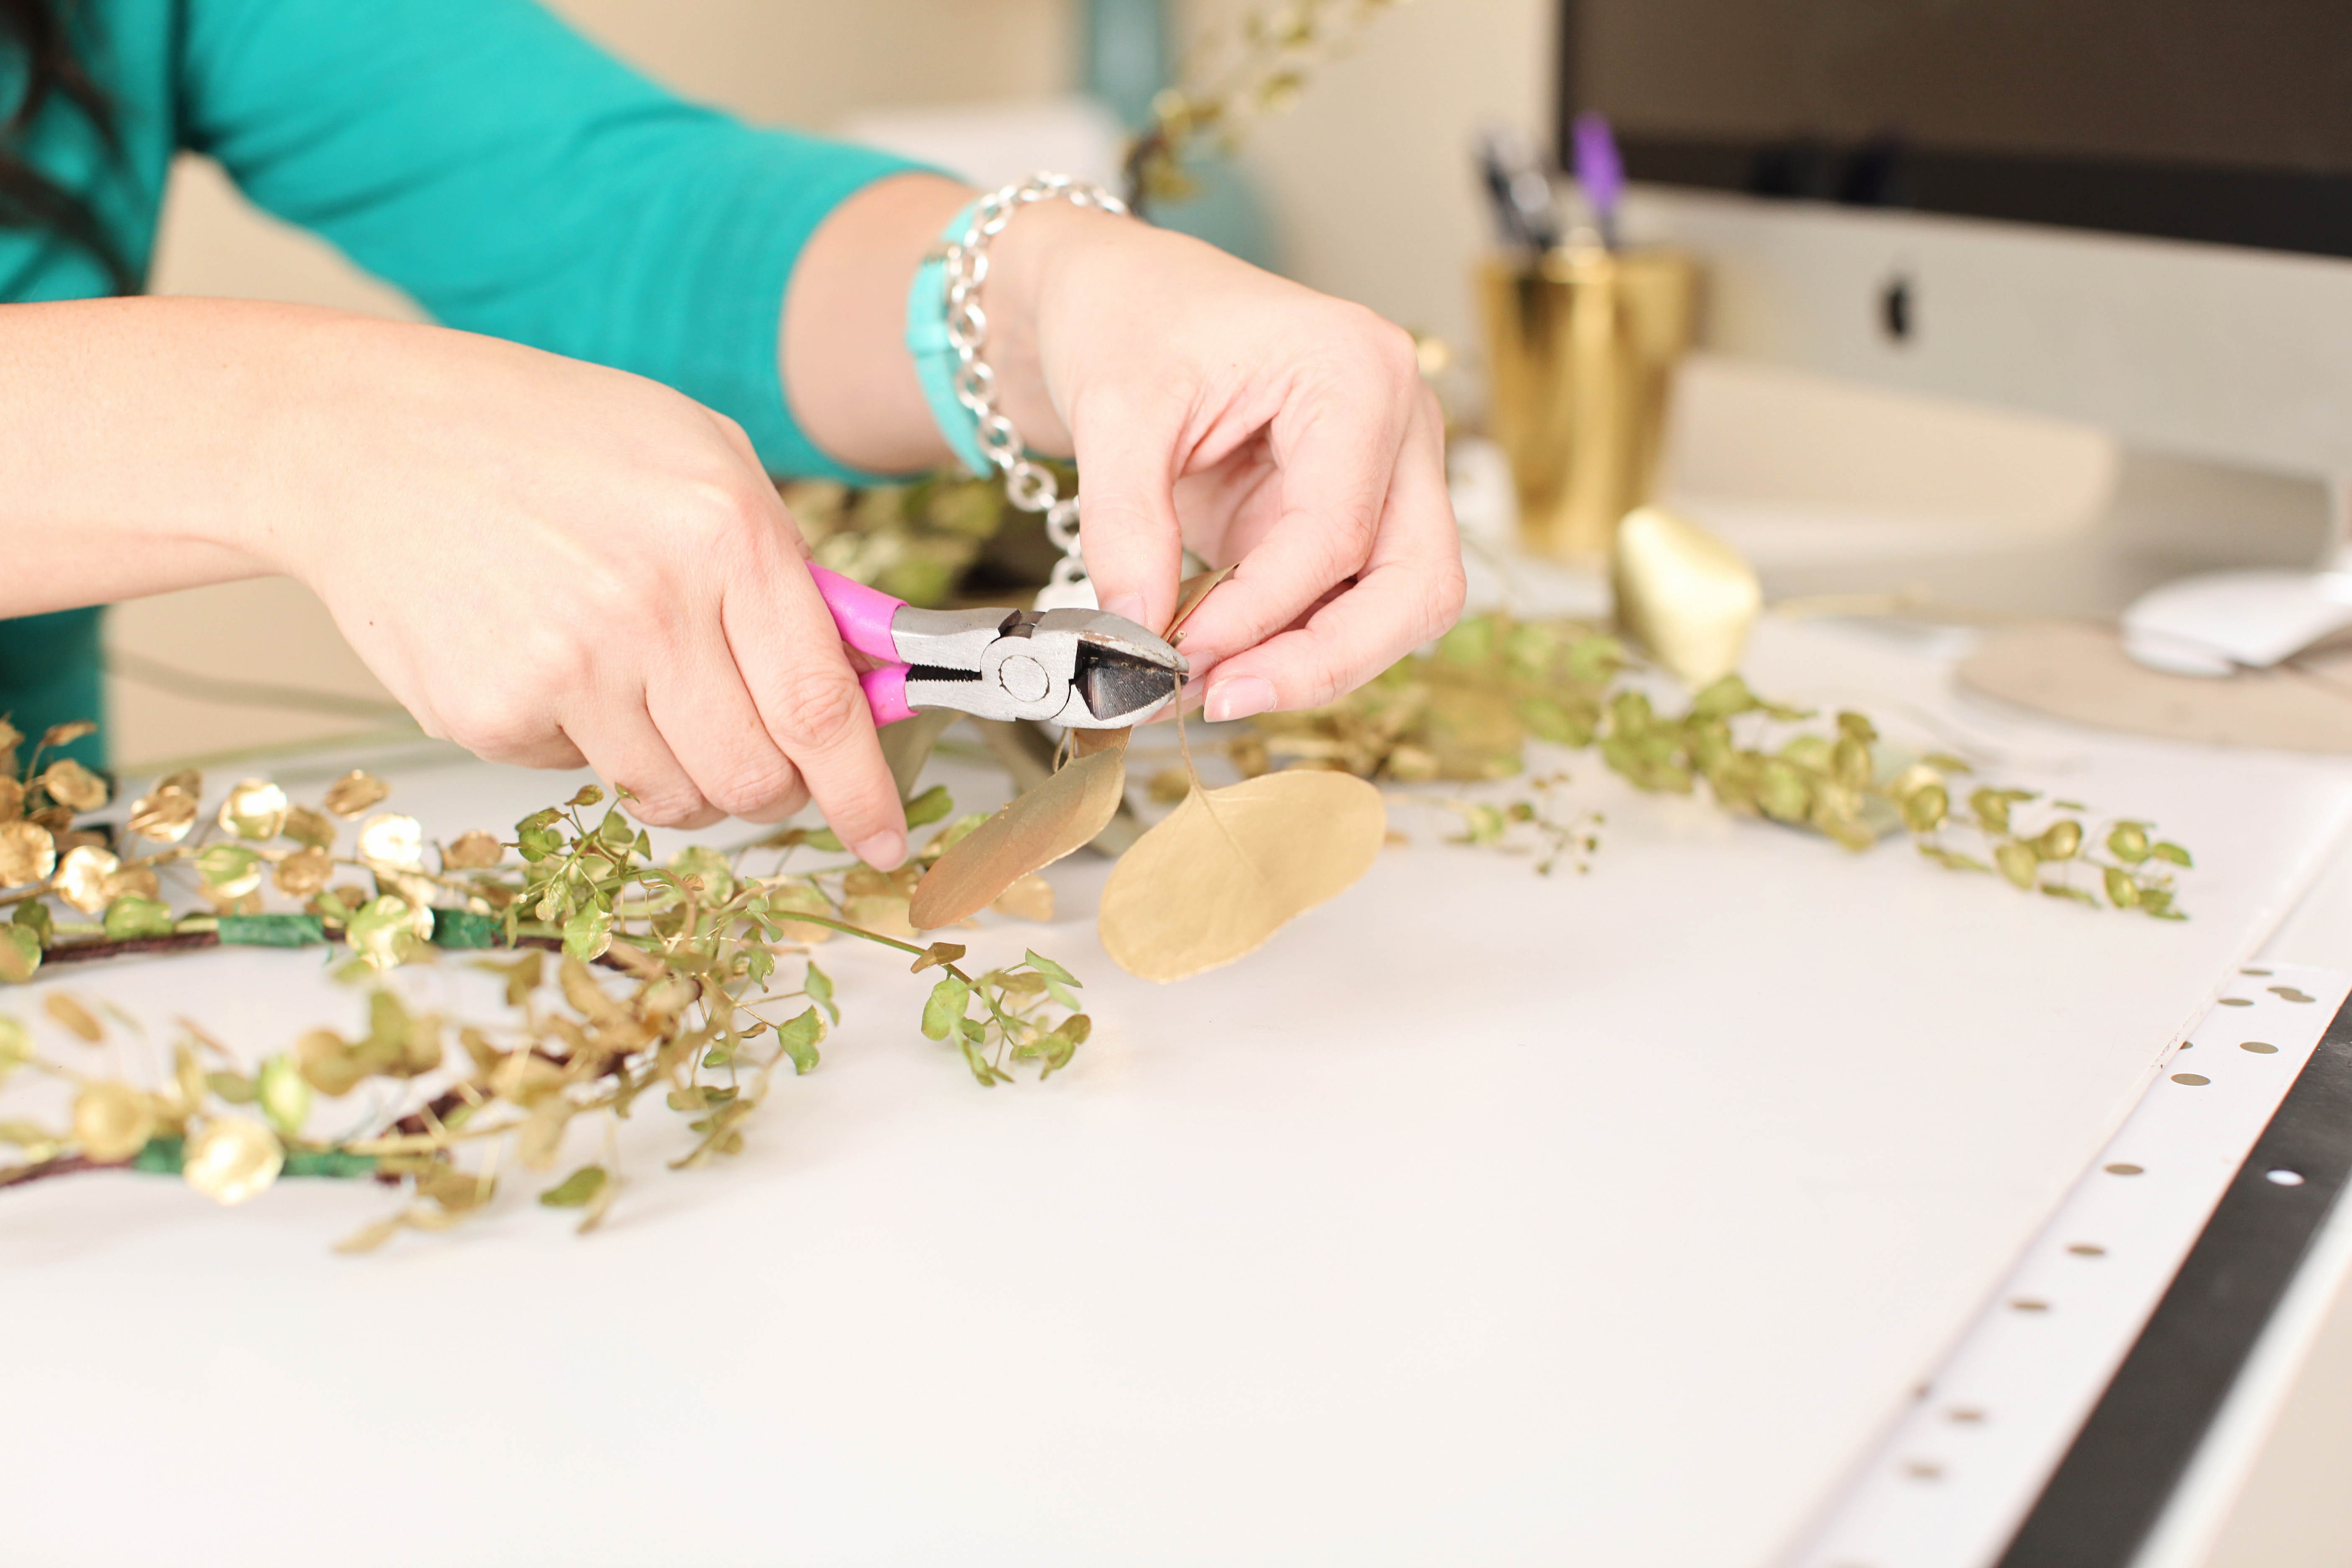
Step 3:  Once the paint has dried, clip the long stems so only an inch or so remain, along with the leafy, pretty part of the plant.

DIY Gilded Floral Crown | The Day's Design | Ashley Slater Photography

Step 4: Using floral tape, wrap the stem of the greens and attach it to the grapevine wire. Continue to attach stems to the grapevine wire, leaving the other end of the greens free until you have created a full circle of greens.

Gilded Floral Crown tutorial | The Day's Design | Ashley Slater Photography

DIY Gilded Floral Crown | The Day's Design | Ashley Slater Photography

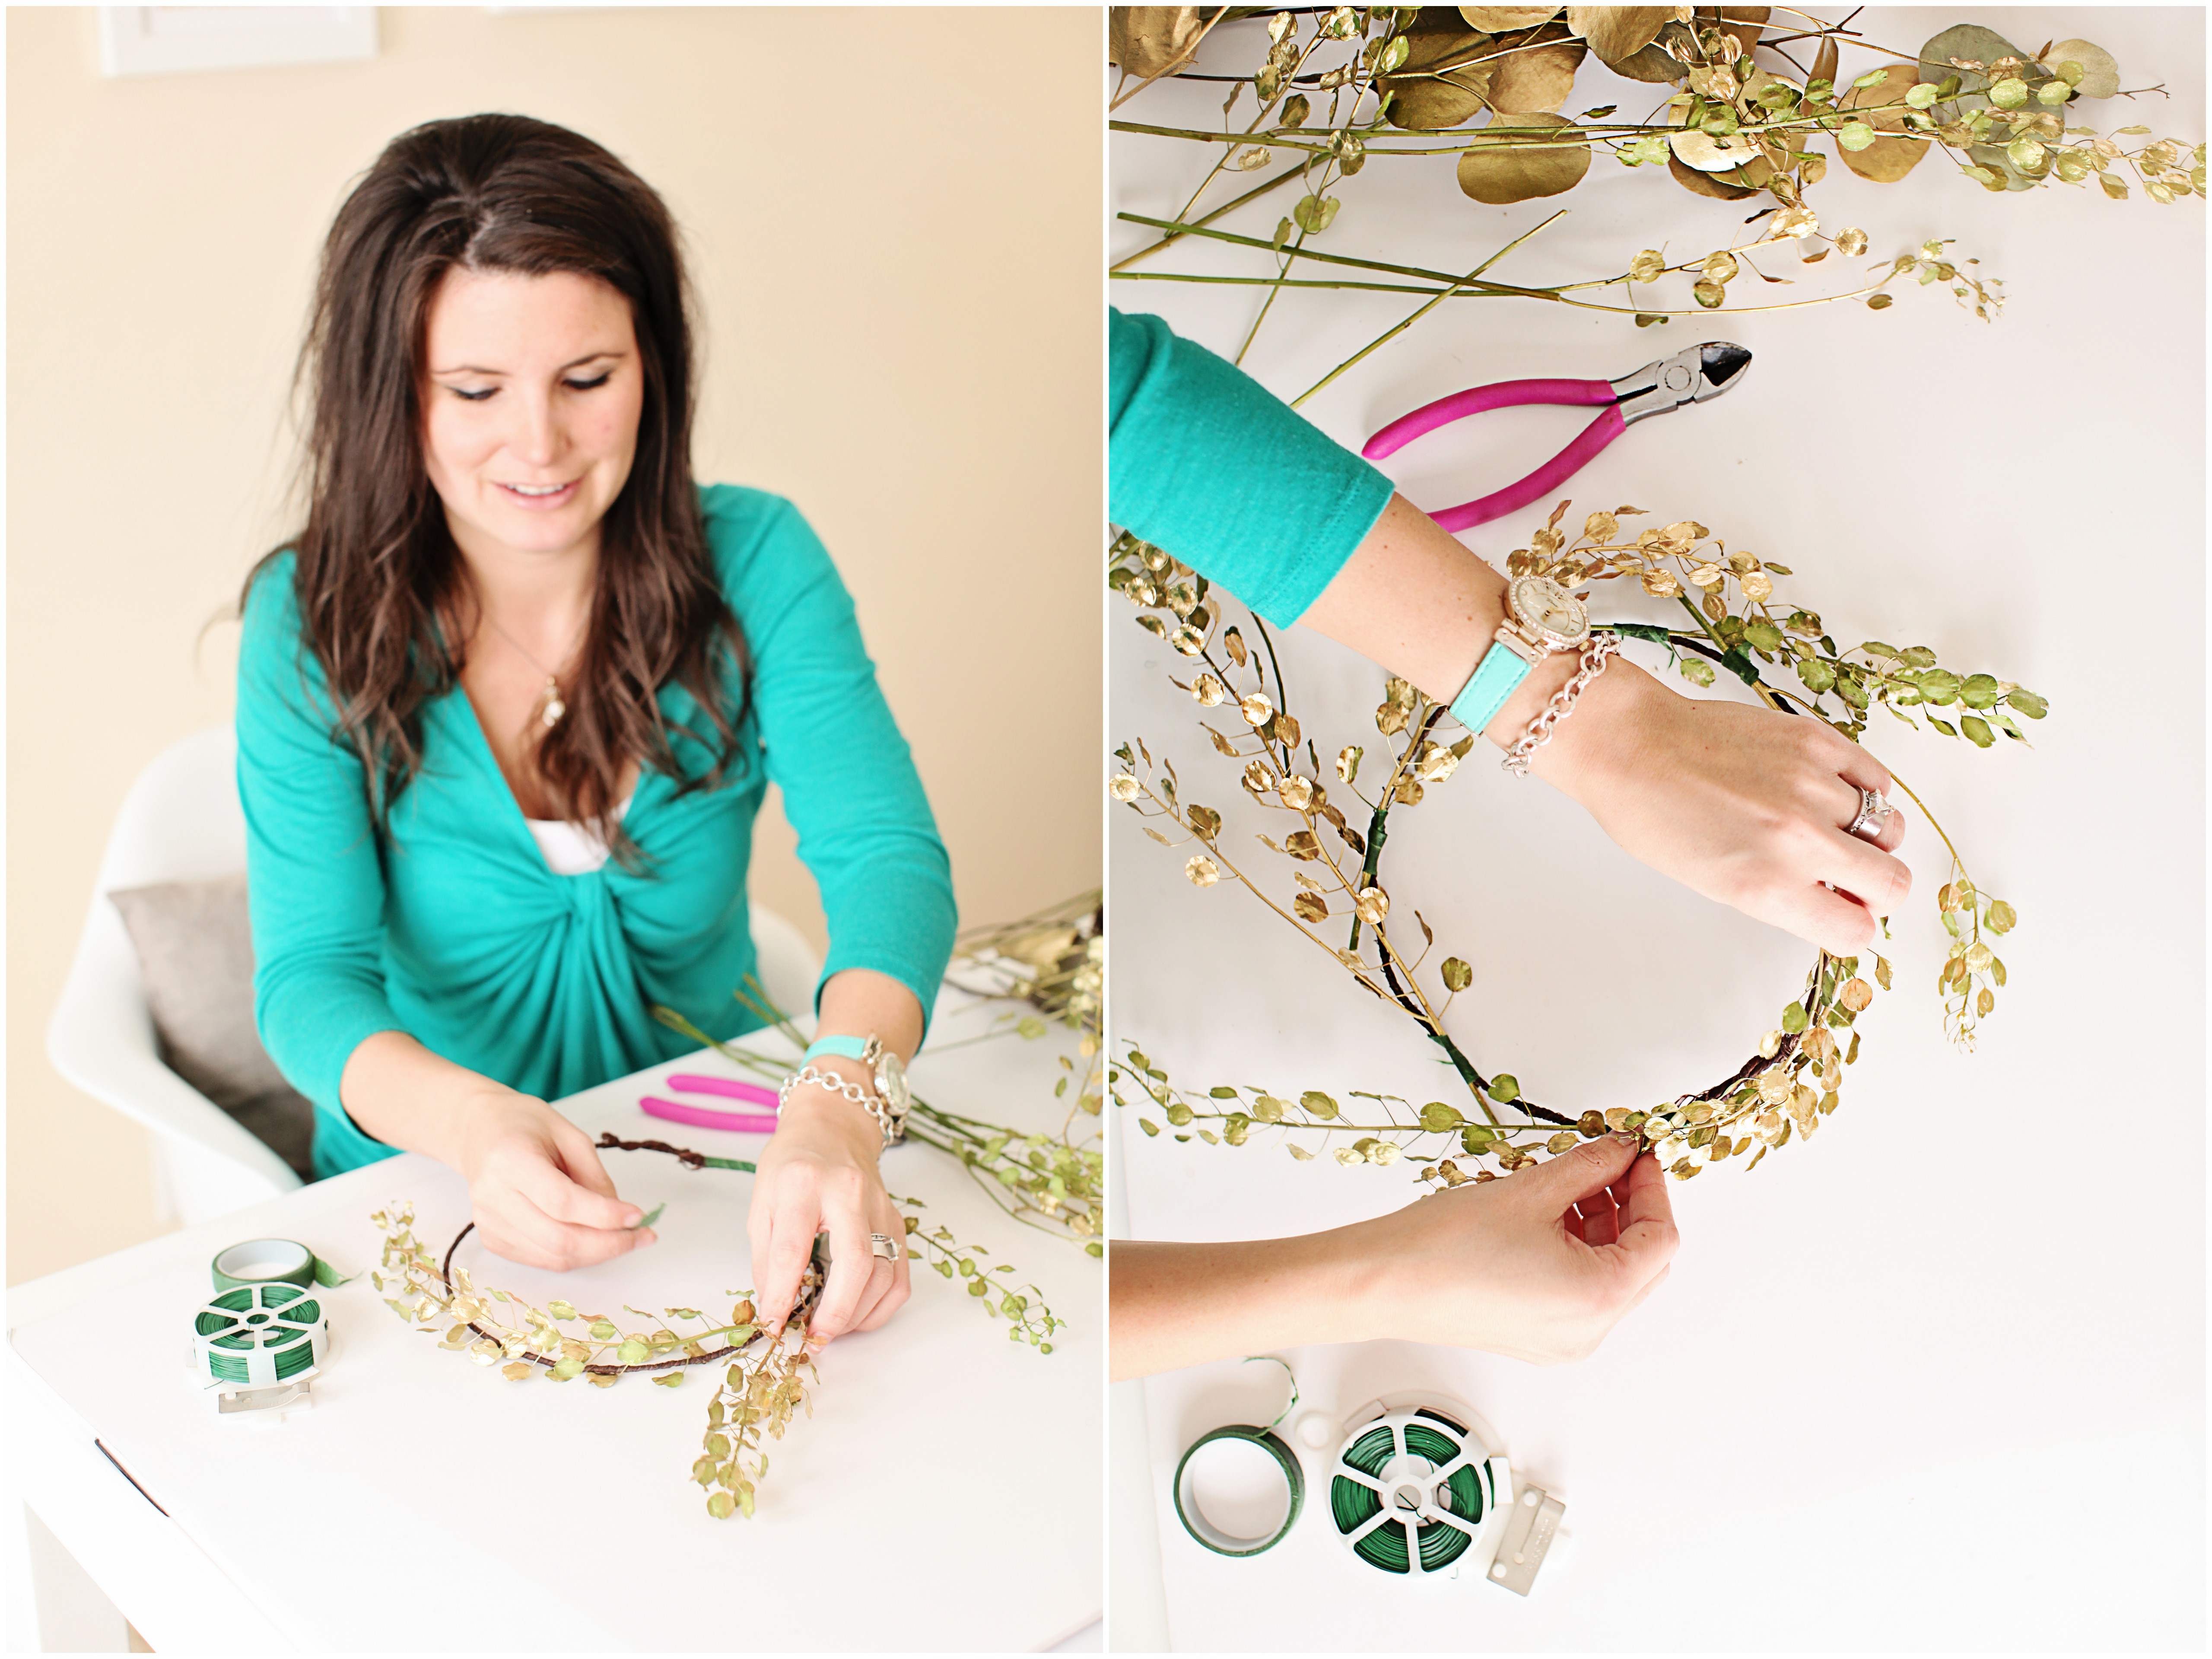
Step 5: Begin filling in the larger leaves, taping them to the grapevine wire.  The larger leaves (eucalyptus) are optional, but I like the extra texture they add.

Gilded Floral Crown Tutorial | The Day's Design | Ashley Slater Photography

Step 6: With the small pieces of floral wire, attach the loose ends of the leaves to the crown so it creates a full and lovely circle.  How tightly you attach the greens is up to you, a looser greens with create a more wild and relaxed look.

At this point you might choose to add an additional layer of gold paint which would help to camouflage any floral tape and wire.

Gilded Floral Crown tutorial | The Day's Design | Ashley Slater Photography

Step 7:  Trim the stems and add flowers.  I chose to place them off to the side, but the options are limitless.  To add them – pierce the base of the bloom with the floral wire and then twist and attach to the crown.

Gilded Floral Crown DIY | The Day's Design | Ashley Slater Photography

Floral Crown DIY | The Day's Deisgn | Ashley Slater Photography

Step 8: Wear your gold crown pretty lady!

Garden Rose Floral Crown | The Day's Design | Ashley Slater Photography

DIY Floral Crown | The Day's Design | Ashley Slater PhotographyDIY Gold Floral Crown | The Day's Design | Ashley Slater Photography

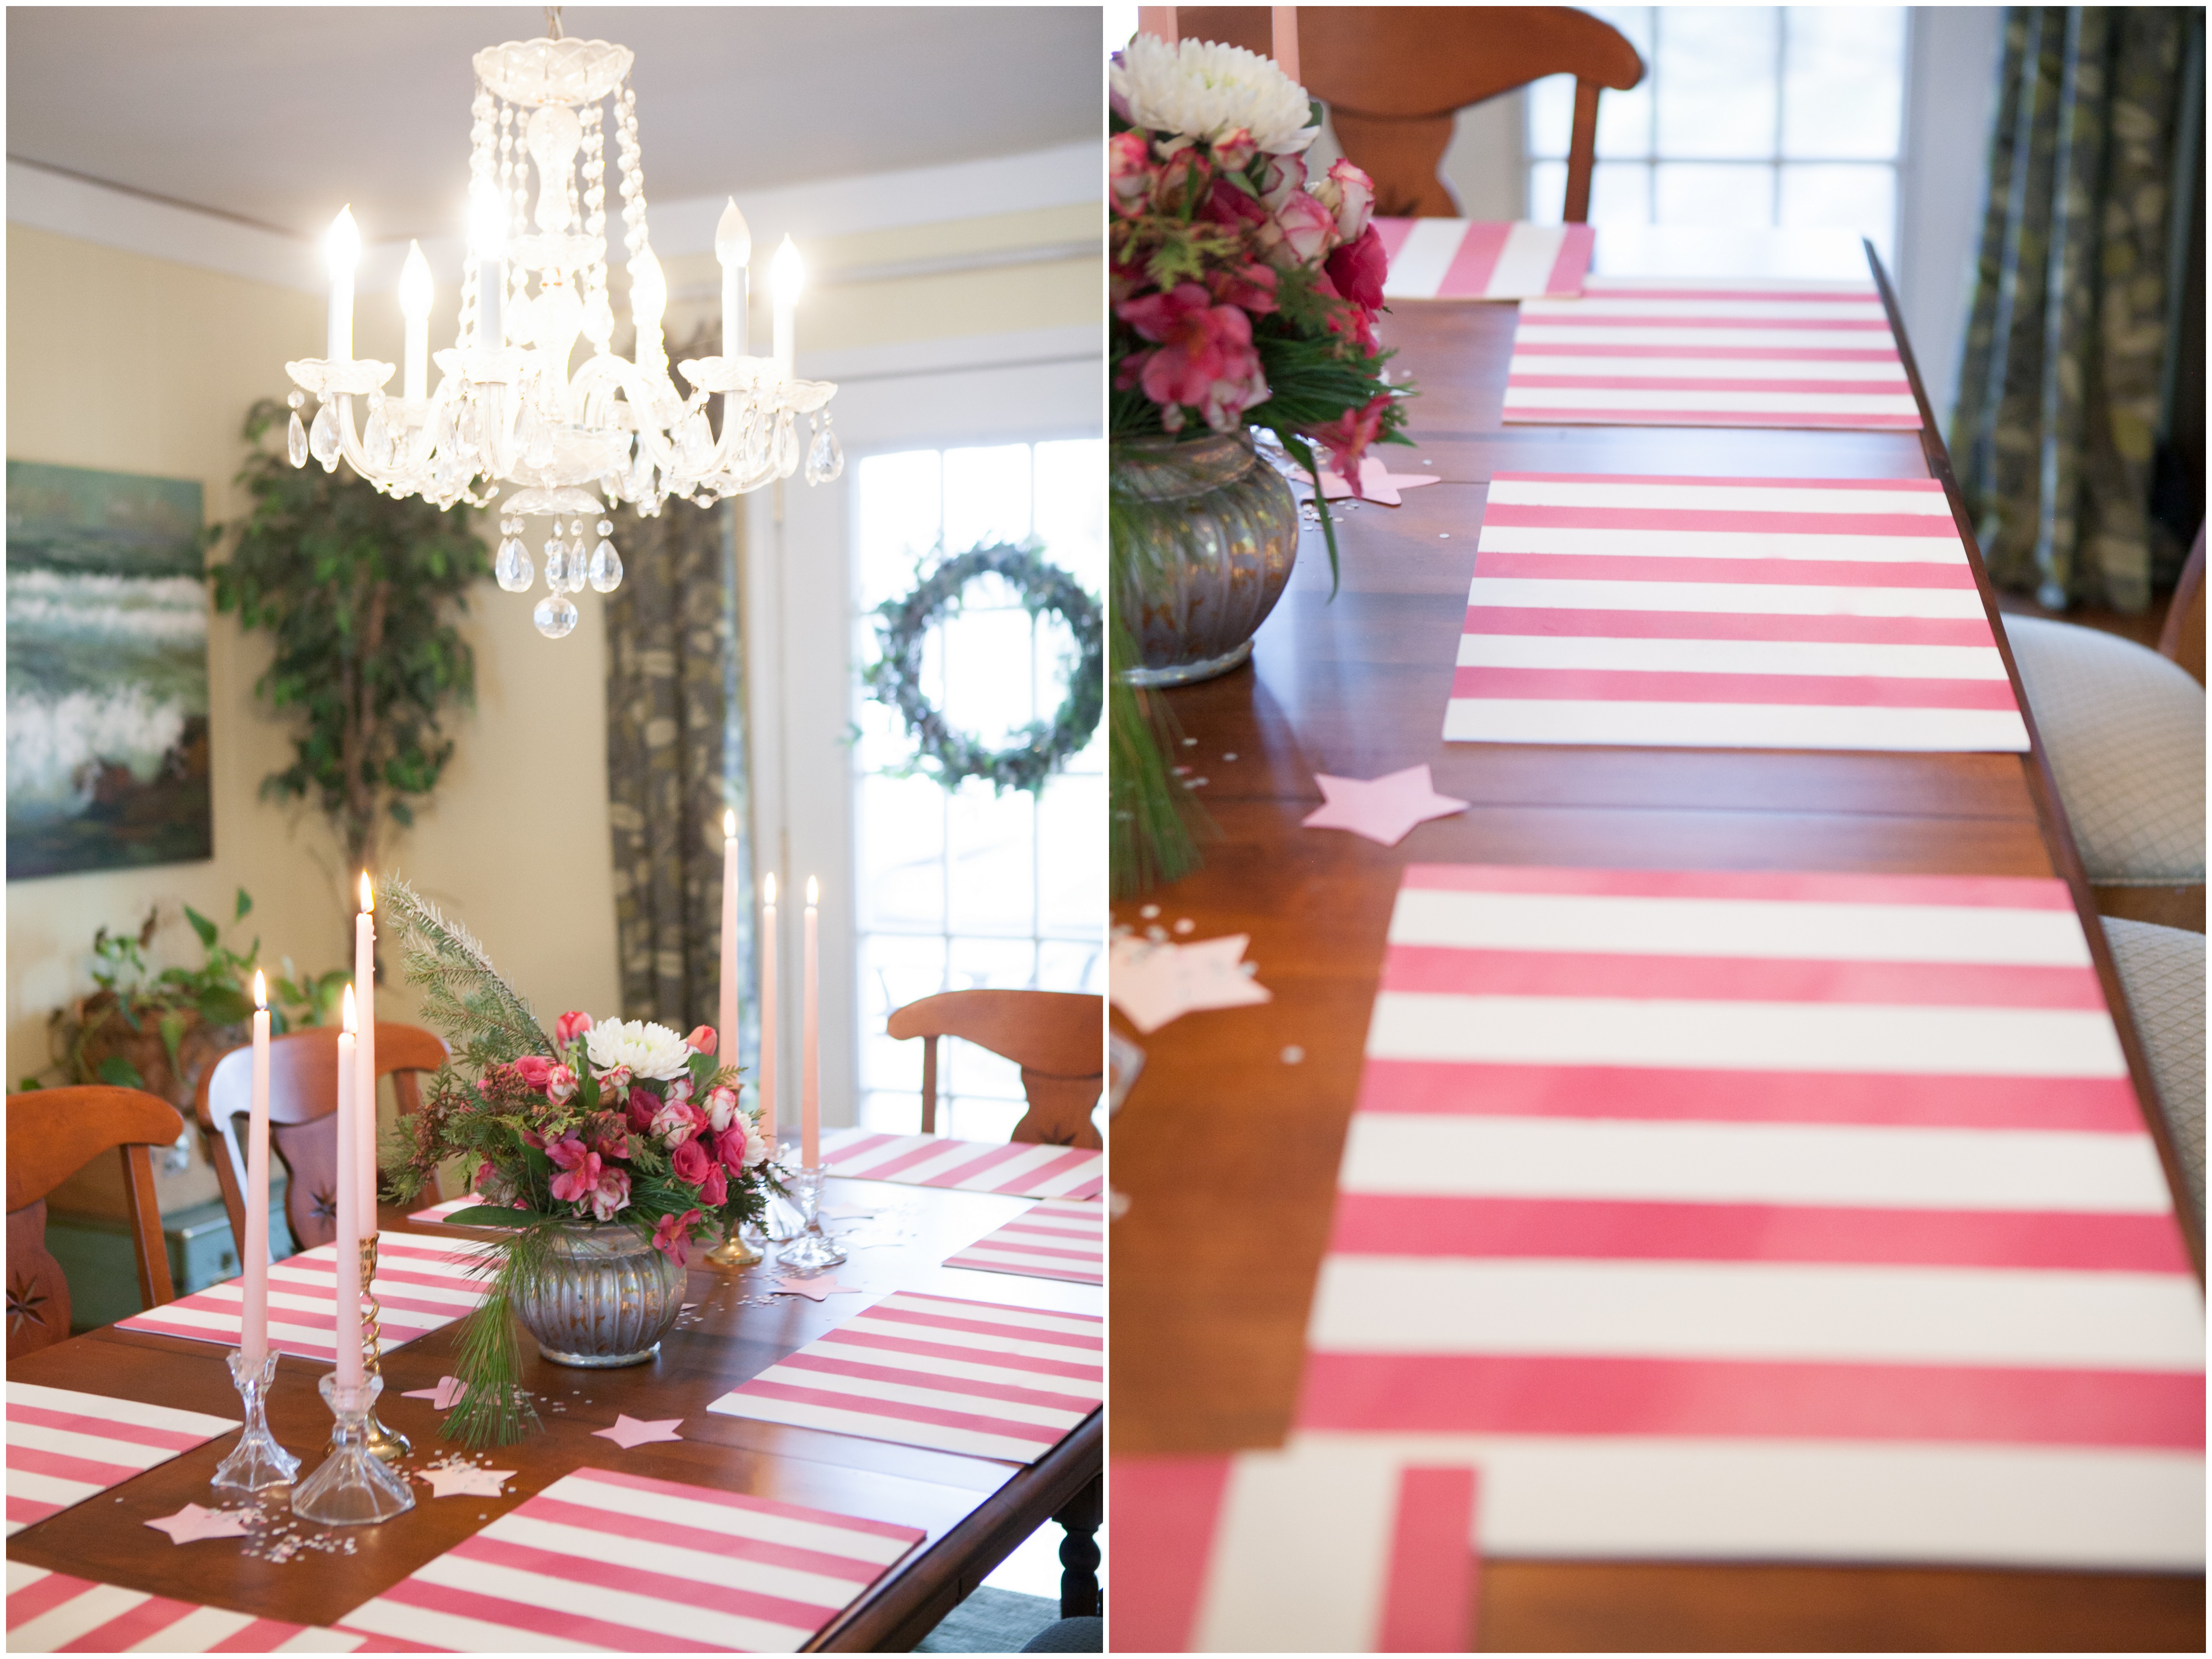
All photos by the fabulous Ashley Slater Photography, thanks love!

about_signature

Projects & Tutorials Ashley Slater Photography, DIY, floral crown, floral crown tutorial, flowers, Garden rose, gilded flower crown, gold crown, gold leaves, pink lisianthus, pretty projects, spray paint, the day's design

DIY Striped Placemats

0 · Jan 24, 2014 ·

It occurred to me this morning that I have not left my house all week.  The last time I stepped out my front door was on Sunday, heading to church.  This cold winter weather has me all cooped up and I start going a little stir crazy.  If you’re like me, it’s this time of year that you start looking for pretty projects to work on and ways to add some easy glam to your home.

Back in November I created quite a few DIY items for Gretta’s first birthday party (you can see the whole thing here), these fun striped place mats were just one little piece of the celebration.

DIY Striped Placemats

The gorgeous photos above are from Hetler Photography… the DIY portion of this post will be snaps shots capture by yours truly and they’re not pretty, but they get the point across!  So here we go:

You will need:

  • 12 x 18 inch foam sheets
  • Painter’s tape
  • Spray paint

DIY placemats

Step 1:

Add lines of painter’s tape in a vertical direction over the foam.  Remember, any area covered with painter’s tape will remain white.  For thicker stripes, add use thicker tape or multiple pieces until desired thickness is achieved.

DIY Striped Placemat

Continue adding tape until you have created your desired number of stripes.  Here’s a little tip to make sure spacing stays consistent and lines of tape are straight: find a piece of furniture or object with straight lines and use it as your guide.  I like to take advantage of my hardwood floors and use the lines as a guide keeping the stripes the same width as the slats on my floor and also making sure the tape stays alined with the floors on either side of the foam.

Step 2:

Spray paint.  Any color works, make it match your house or party decor!  No rules there 🙂

DIY Striped Placemats

Step 3:

Remove painter’s tape once paint is dry.  The paint dries pretty quickly on the foam, it took about a 1/2 hour for me, but could vary depending on the day and drying conditions.  The lines might not be perfectly crisp, but that gives them a little character.

And ta-da, instant glam to your table!

Oh My Stars 1st Birthday Party | The Day's Design | Hetler Photography

A couple of other notes about this project:

  • I used 3 mm thick foam, the thinner pieces seemed to flimsy to be place mats in my opinion.  I purchased mine at Hobby Lobby but JoAnn Fabrics carries it as well.  They were $1.00 each.
  • The spray paint color is used is Krylon’s Raspberry
  • And I also wish my pictures were are pretty as Kellie’s!  Let’s pretend, shall we?

Stay warm friends!

about_signature


Projects & Tutorials DIY, DIY placemats, Gretta's birthday, hetler photography, home decor, place mats, placemats, pretty projects, raspberry, spray paint, stripes

Primary Sidebar

Featured Posts

Yellow poppy centerepice for spring wedding flowers

Mauve & Yellow Flowers for the Month of March

5 Flowers for the Month of March

5 Flowers for the Month of February

The Day’s Design’s Valentine’s Flowers

round table with blush and blue decor

Blush & Blue Winter Tabletop

More

As Seen On

EveryLastDetail

BurnettsBoard

Footer

Instagram

Instagram has returned invalid data.

Follow along with our adventures

  • Projects & Tutorials

Copyright © 2026 · Cravings Pro